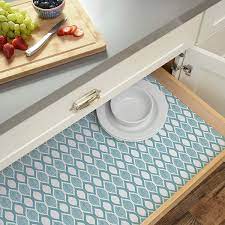
Unleash Your Inner Handyman: 5 Unique Home Maintenance Tips

Maintaining a clean and fresh home doesn’t always require expensive products or complicated techniques. Embrace creativity and resourcefulness with these five unique home maintenance tips that will make your life easier and your home more delightful.

  1. Dryer Sheet Dusting: Don’t toss those used dryer sheets just yet! Put them to work as dusting superheroes. The anti-static properties in dryer sheets attract dust and pet hair like a magnet, making them perfect for cleaning surfaces like baseboards, lamps, and blinds. Not only will you save money on traditional dusting cloths, but you’ll also enjoy a fresh laundry scent in your home.
  2. DIY Air Freshener: Breathe new life into your living space with a simple and natural air freshener. Create your own concoction by mixing water, baking soda, and your favorite essential oils in a spray bottle. The baking soda helps neutralize odors, while the essential oils provide a delightful fragrance. Spritz this magical potion around your home to enjoy a refreshing scent without resorting to harsh chemicals.
  3. Rubber Glove Hair Remover: Pet owners know the struggle of dealing with pesky pet hair on furniture and carpets. Bid farewell to lint rollers and opt for a damp rubber glove instead. Simply don the glove and glide it over the hairy surfaces. Watch as the pet hair clings to the glove, leaving your home fur-free and clean.
  4. Chalk Dehumidifier: Say goodbye to damp and musty closets or drawers with this ingenious hack. Place a few sticks of chalk inside these spaces to absorb excess moisture. Chalk’s natural moisture-wicking properties will prevent mildew and unpleasant odors, ensuring your belongings stay fresh and dry.
  5. Vinegar Magic for Faucets: Is your faucet suffering from mineral deposits and water stains? Fear not! Harness the power of vinegar to bring back the shine. Secure a bag of vinegar around your faucet overnight, and let it work its magic. The acidity in the vinegar will break down stubborn mineral deposits, leaving your faucet sparkling and water flowing freely.

These unique home maintenance tips showcase that creativity and resourcefulness can lead to a cleaner and more inviting living space. So, don your rubber glove, grab those used dryer sheets, and get ready to transform your home maintenance routine into an adventure of practicality and innovation. Happy cleaning!

The Five-Pile Rule: Simplify Your Organizing Process

Photo by Pixabay on Pexels.com

When it comes to organizing our spaces, the task can often feel overwhelming. However, the Five-Pile Rule offers a simple and effective approach to decluttering and organizing. We saw this article that talked about the concept of the Five-Pile Rule and how it can help you streamline your organizing process.

The Five-Pile Rule is a practical strategy that involves sorting items into five distinct piles based on different categories or purposes. These categories typically include “Keep,” “Donate/Sell,” “Trash,” “Rehome,” and “Undecided.” By allocating items into these piles, you gain clarity and make more informed decisions about what to do with each item.

The “Keep” pile consists of items you genuinely need or have a strong attachment to. The “Donate/Sell” pile is for things that are still in good condition but no longer serve you. The “Trash” pile is for items that are no longer usable or valuable. The “Rehome” pile is for items that belong elsewhere in your home. Finally, the “Undecided” pile allows you to temporarily set aside items you’re unsure about and revisit them later with a fresh perspective.

By following the Five-Pile Rule, you simplify the decision-making process, reduce clutter, and create a more organized living environment. It helps you let go of unnecessary items, find new homes for belongings that no longer serve you, and regain control over your space.

The Five-Pile Rule provides a practical and systematic approach to organizing. By categorizing items into distinct piles, you can simplify decision-making, declutter effectively, and create a more organized living space. Embrace this strategy and experience the transformative power of simplifying your organizing process.

https://www.housedigest.com/1320510/five-pile-rule-great-for-organizing/

Exploring the Endless World of Kitchen Gadgets

Photo by Ioana Motoc on Pexels.com

Step into any kitchen, and you’ll likely be greeted by an assortment of fascinating gadgets designed to simplify and enhance cooking experiences. From basic tools to advanced appliances, the world of kitchen gadgets is vast and ever-expanding. Let’s delve into the plethora of kitchen gadgets available and discover the remarkable range of options that can elevate your culinary adventures.

  1. Essential Basics: Every kitchen needs its foundation of essential gadgets, including measuring cups and spoons, cutting boards, knives, mixing bowls, and utensils. These staples form the backbone of culinary preparation.
  2. Clever Time-Savers: Kitchen gadgets like food processors, immersion blenders, and stand mixers make quick work of chopping, blending, and mixing, saving you time and effort in the kitchen.
  3. High-Tech Marvels: Technology has found its way into the kitchen, offering smart gadgets like programmable coffee makers, air fryers, and sous vide machines, taking cooking precision to new heights.
  4. Novelty Delights: Who can resist quirky and fun gadgets that bring a smile to your face? From pancake molds to egg separators shaped like animals, these gadgets add a touch of whimsy to your culinary adventures.
  5. Space-Saving Solutions: For those with limited kitchen space, there are gadgets designed to optimize organization and storage. Collapsible measuring cups, stackable containers, and compact multi-purpose tools are just a few examples.
  6. Innovative Accessories: Beyond gadgets, kitchen accessories like herb strippers, garlic presses, and spice grinders offer convenient solutions for adding flavor to your dishes effortlessly.

The world of kitchen gadgets is a treasure trove of tools, appliances, and accessories that cater to every culinary need and desire. From time-saving essentials to high-tech marvels and novelty delights, there’s a gadget for every cooking enthusiast. Embrace the endless possibilities, explore new horizons, and equip your kitchen with the gadgets that inspire you to create culinary masterpieces.

As an Amazon Associate, I earn on qualifying purchases.

Bye-Bye Bad Smells: 2 Ideas to Keep Your House Smell-Free!

Are funky smells turning your home into a stinky labyrinth? Fear not, we’ve got some tips to keep your house smelling fresh.

  1. Fresh Wave Gel is an odor eliminator designed for use in various areas of the home, such as the kitchen, bathroom, garages, pet areas, and cars. It effectively neutralizes odors caused by cooking, trash, paint, and other common household sources. This gel is particularly useful for eliminating strong odors, including pet smells, and is recommended for placement in the area where the odor is most concentrated. Each 15oz. container of the gel lasts approximately 30-60 days and can be refilled with Fresh Wave Gel Refills. It can be discreetly placed on bookshelves, cabinets, closets, or near trash cans. The Fresh Wave Gel has received the Safer Choice label from the EPA, indicating that it is non-toxic, non-GMO, and non-hazardous, making it safe for people, pets, and the environment. It does not contain harsh chemicals, synthetic perfumes, alcohol, or phthalates. The gel is made from natural ingredients, including lime, pine needle, clove, anise, and cedarwood, which give it a pleasant scent that fades as the gel evaporates, leaving the space smelling clean and fresh.
  2. An air purifier is a fantastic tool to combat unwanted smells in your home. Whether it’s lingering cooking odors, pet smells, or musty scents, an air purifier can help eliminate them. By utilizing advanced filtration systems, such as HEPA filters or activated carbon filters, air purifiers can effectively capture and neutralize odor-causing particles and pollutants in the air. Say goodbye to unpleasant smells and hello to fresh, clean air with the help of an air purifier. Breathe easy and enjoy a scent-free sanctuary in your home.

A fresh-smelling home is a happy home. So, don’t let those odors cramp your style—take charge and show them who’s boss! Your house will be a fragrant haven that delights the senses and puts a smile on your face. Happy scent-national adventures, my fresh-air enthusiast!

As an Amazon Associate, I earn on qualifying purchases.

Adding a Cork Board to the Side of Your Fridge for Kids’ Artwork

As a proud parent, you know how quickly children’s artwork can accumulate. From colorful drawings to imaginative crafts, their creations are filled with joy, creativity, and a sense of accomplishment. Instead of having them hidden away in drawers or scattered around the house, why not create a dedicated display space for your little one’s artwork? We had the idea of adding a corkboard to the side of your fridge, turning it into a gallery where you can proudly showcase your child’s masterpieces.

  1. Convenient and Versatile Location: The side of your fridge provides a convenient and highly visible location for displaying artwork. It’s a space that is easily accessible and always in view, allowing both your child and the rest of the family to appreciate their artistic endeavors on a daily basis.
  2. DIY Cork Board Installation: To create a designated art display area, consider attaching a corkboard to the side of your fridge. Measure the available space and purchase a corkboard of a suitable size. Use adhesive strips or strong magnets to secure the corkboard to the fridge’s side. Ensure that it is firmly attached to prevent any accidents or damage.
  3. Personalize and Decorate: Make the corkboard area visually appealing by adding a touch of personalization. Paint the corkboard frame in your child’s favorite color or use washi tape to create a fun border. You can also include your child’s name or a positive message using colorful letters or stickers. Encourage your little one to participate in the decoration process, making it a joint creative effort.
  4. Rotating Artwork: Since kids are constantly producing new artwork, consider rotating the displayed pieces regularly. This ensures that their latest creations are showcased and encourages them to keep exploring their artistic talents. Use push pins or colorful clips to attach the artwork securely to the corkboard, making it easy to switch out and rearrange pieces.
  5. Celebrate Milestones and Achievements: The cork board provides an ideal platform not only for displaying drawings and paintings but also for celebrating your child’s milestones and achievements. Showcase certificates, awards, and special projects alongside their artwork, creating a gallery that tells the story of their artistic journey.

By adding a corkboard to the side of your fridge, you create a dedicated space to proudly display your child’s artwork. This simple and accessible solution not only showcases their creativity but also boosts their confidence and creates a sense of pride in their accomplishments. With a personalized and versatile display area, you can rotate their masterpieces and celebrate their milestones, creating a living gallery that reflects the joy and imagination of your little Picasso.

Thick Cork Roll

As an Amazon Associate, I earn on qualifying purchases.

Blue painter’s tape, it’s not just for painting

Blue painter’s tape is a versatile tool that many people underestimate. Sure, it’s great for taping up walls before painting or protecting surfaces during a renovation project, but did you know it has many other uses? Here are some of the many ways you can put blue painter’s tape to work:

  1. Labeling: Need to label something but don’t want to make it permanent? Write on a piece of tape and stick it on the item in question.
  2. Cable management: Use blue painter’s tape to keep cords and cables organized behind your desk or entertainment center.
  3. Jar opener: Can’t get that pesky jar open? Wrap a piece of blue painter’s tape around the lid for extra grip.
  4. Temporary hemming: If you need to hem your pants or skirt temporarily, use blue painter’s tape instead of sewing.
  5. Clothing repair: Use blue painter’s tape to temporarily fix a torn hem or keep a bra strap in place.
  6. Removing pet hair: Wrap some blue painter’s tape around your hand, sticky side out, and use it to remove pet hair from furniture and clothing.
  7. Game night: Use blue painter’s tape to create a makeshift game board on any surface.
  8. Decorating: Create temporary wall art by using blue painter’s tape to outline shapes or designs.

ScotchBlue Original Multi-Surface Painter’s Blue Tape

As an Amazon Associate, I earn on qualifying purchases.

The Best Kitchen Island Size

Photo by Level 23 Media on Pexels.com

The kitchen is often considered the heart of a home, and a well-designed kitchen can enhance your lifestyle and add value to your property. When it comes to kitchen islands, finding the right size and proportion can make a big difference in the functionality and aesthetics of your space. In this post, I’ll guide you through some important considerations for determining the ideal size of a kitchen island in proportion to the room’s footprint.

Firstly, let’s discuss the minimum size for a built-in kitchen island. A kitchen island should be at least four feet by two feet, with an average of 36 to 42 inches of clearance all the way around. You can stretch the surrounding space to 48 inches or shrink it to 30 inches, but it’s crucial to check building codes on accessibility. If your kitchen is less than 13 feet wide, it is unlikely that a built-in island will be possible.

Secondly, it’s important to consider the height of the kitchen island. The standard height for a kitchen island is 36 inches, but if your island will also be used for dining, you should raise it to 42 inches. This height is ideal for bar stool seating and offers enough space for a breakfast bar, where you can enjoy simple meals and snacks. Make sure that bar stools have at least two feet of clearance for access and comfort.

Photo by Rosana Solis on Pexels.com

Lastly, it’s a good idea to refer to resources like The Thirty-One Kitchen Design Rules, based on standards set by the National Kitchen and Bath Association, to ensure that your kitchen meets building codes and functional design rules. This guide offers comprehensive advice on all aspects of kitchen design, including layout, storage, and safety.

Thinking of moving or investing and need a referral for a Real Estate Broker, we can help: email us at TEAM@McDanielCallahan.com, fill in the form below or call 925-838-4300. Terry McDaniel DRE license #00941526

← Back

Thank you for your response. ✨

Increasingly Popular…Open Shelving

Picture from Houzz, Covenant Kitchen & Baths, Inc.

Open shelving has become increasingly popular in recent years, and it’s easy to see why. It adds a stylish and modern touch to any kitchen, and it’s a great way to display your favorite dishes and cookware. In this blog post, we’ll explore the pros and cons of open shelving and provide tips on how to make the most of this trend in your own home.

First, let’s look at the pros of open shelving. One of the biggest advantages is that it can make your kitchen feel more spacious and open. With no cabinet doors to block your view, your kitchen can feel brighter and more inviting. Open shelving also allows you to display your favorite dishes and cookware, adding a personal touch to your kitchen decor. It can also be a great way to show off any unique or antique pieces you may have collected over the years.

However, there are also some potential cons to open shelving. One of the biggest concerns is the need for constant upkeep. With no doors to hide your dishes and cookware, you’ll need to keep them organized and tidy at all times. This can be a challenge if you have a lot of items or if you’re not naturally neat and organized. Another concern is that open shelving can be a dust magnet, which means you’ll need to clean it regularly to keep it looking its best.

So, how can you make the most of open shelving in your home? Here are some tips:

  1. Use it strategically. Instead of replacing all your cabinets with open shelving, consider using it in a specific area or as an accent. For example, you could install open shelves above your sink or around your range hood.
  2. Keep it organized. Use matching or coordinating dishes and cookware to create a cohesive look, and arrange them in an aesthetically pleasing way. Consider using baskets or containers to corral smaller items.
  3. Mix it up. Don’t be afraid to mix open shelving with closed cabinets for a more balanced look. You can also mix and match different types of shelving, such as wood and metal, for added visual interest.
  4. Embrace the imperfections. Open shelving is meant to be lived in, so don’t worry too much about minor scratches or scuffs. They can add character and charm to your kitchen.
  5. Have fun with it. Experiment with different ways to style your open shelves, and don’t be afraid to switch things up from time to time. It’s a great way to express your creativity and add a personal touch to your kitchen.

Open shelving can be a stylish and functional addition to any kitchen. By following these tips, you can make the most of this trend and create a kitchen that’s both practical and beautiful. So go ahead, give it a try, and see how open shelving can transform your space!

Shelves Wall Mounted

Wooden Beads

As an Amazon Associate, I earn on qualifying purchases.