GFCI stands for Ground Fault Circuit Interrupter. It’s a type of electrical outlet designed to protect you from getting shocked by detecting when electricity is flowing in an unsafe way—like through water, or even through you.
If it senses that current is escaping the normal electrical path, it shuts off the power in a fraction of a second.
Why Are GFCI Outlets Important?
Because water and electricity don’t mix. GFCI outlets are life-saving devices commonly installed in areas where moisture is present, such as:
Bathrooms
Kitchens
Laundry rooms
Garages
Outdoor outlets
Basements
These outlets reduce the risk of electric shock, electrical fires, and even fatal electrocution.
Do You Need GFCI Outlets?
Yes, and in many cases, it’s required by building code. If your home doesn’t have GFCI outlets in the right places—especially near water—it’s a smart upgrade. They’re not expensive, and any licensed electrician can install them quickly.
Even older homes can be updated with GFCI outlets to meet modern safety standards.
How to Know If Yours Are Working
Every GFCI outlet has a “test” and “reset” button. You should:
Press the “test” button — the power should cut off.
Press the “reset” button — the power should come back on.
If it doesn’t respond, it might be time to replace it.
GFCI outlets may not be the most exciting part of home maintenance, but they’re one of the most important when it comes to keeping your family safe. A small upgrade can prevent a major tragedy.
When it comes to electricity, a little prevention goes a long way.
GFCI Adapter Outlet
Features: Adds GFCI protection to standard outlets, easy installation.
Ideal For: Temporary setups or areas without built-in GFCI.
When the summer heat rolls in, keeping your home cool and comfortable becomes a top priority. While air conditioning is great, it can be expensive to run all day long—and sometimes you just want a simple, efficient way to stay cool without cranking up your energy bill. That’s where tower fans come in.
What Makes Tower Fans Perfect for Summer?
1. Space-Saving Design Tower fans are slim and sleek, making them perfect for rooms where floor space is limited. Unlike bulky box fans or pedestal fans, tower fans fit neatly into corners or tight spots without getting in the way.
2. Powerful Airflow with Quiet Operation Don’t be fooled by their size—tower fans deliver strong, consistent airflow that helps circulate cool air throughout the room. Plus, most models run quietly, so you can sleep, work, or relax without the distracting hum of a traditional fan.
3. Multiple Speed and Mode Settings From gentle breezes to high-powered cooling, tower fans usually come with adjustable speed settings and modes like “natural wind” or “sleep mode.” This customization lets you tailor your cooling experience to your exact needs.
4. Energy Efficient Compared to running central air conditioning, tower fans use a fraction of the electricity. They’re an eco-friendly way to cool a room without breaking the bank on energy bills.
5. Convenient Features Many tower fans come with remote controls, timers, and oscillation features, giving you easy control from anywhere in the room. You can set it to turn off after you fall asleep or direct the airflow exactly where you need it.
How I Use Tower Fans in My Home
I keep a tower fan in the living room, bedroom, and even the kitchen. They help keep the air moving, reduce stuffiness, and make those hot summer evenings much more comfortable. Sometimes I use them alongside the AC to lower the thermostat setting, saving energy without sacrificing comfort.
Dreo’s all-in-one airflow system combines with a supercharged electric motor, delivering high-speed, refreshing winds. This 36-inch compact tower fan enlivens every inch of air in your living space fast at up to 25ft/s.
If you’re tired of soap scum, water spots, and endless scrubbing, there’s a simple solution: a squeegee. This small tool can make a big difference in keeping your shower doors clean and sparkling—without the need for harsh chemicals or exhausting elbow grease.
The Benefits of Using a Squeegee
1. Prevents Buildup: Hard water stains and soap residue accumulate quickly on glass shower doors. A quick swipe with a squeegee after every shower stops that buildup before it starts, saving you time and energy in the long run.
2. Keeps Your Bathroom Looking Clean: Clear, streak-free glass makes the entire bathroom feel fresher and more inviting. Using a squeegee regularly means you won’t be caught off guard when guests stop by.
3. Extends the Life of Your Shower Doors: Water and mineral deposits can gradually damage the glass and metal framing. A simple daily squeegee routine helps preserve the integrity and appearance of your shower over time.
4. Saves Money on Cleaning Products: Regular maintenance with a squeegee can reduce how often you need to use expensive specialty cleaners or schedule deep cleans.
How to Use a Shower Squeegee
It’s easy—just start at the top corner and pull the squeegee down in straight vertical strokes, wiping the blade with a towel after each pass. It takes less than a minute but makes a big difference.
Pro Tip: Keep It Handy
Install a hook or suction holder in the shower to make your squeegee easily accessible. If it’s within reach, you’re more likely to use it every day.
It’s easy to overlook, but the key to a truly clean home isn’t just how you clean—it’s what you clean with. If your tools are dirty, you’re not doing yourself any favors. In fact, you might be spreading grime around instead of picking it up.
A Dirty Mop Isn’t Helping
Mops that are soaked with old dirt and grime don’t absorb well. Instead of lifting dirt from your floors, they leave behind a streaky residue—and possibly even odor. Always rinse your mop thoroughly after each use, and let it dry completely to prevent mildew.
Your Vacuum Needs Some TLC Too
When your vacuum is full of dust or the filter is clogged, suction power drops significantly. That means dirt gets left behind—especially in carpets and tight corners. Empty the bin or bag regularly, and clean or replace filters as recommended by the manufacturer.
Dusters Shouldn’t Scratch
Dusters and microfiber cloths are great at trapping dust, but if they’re already loaded with debris, they can actually scratch surfaces—especially delicate ones like glass or wood. Wash them after use so they’re ready and safe for the next cleaning round.
Make It a Habit
The best way to make sure your tools stay in top shape? Clean them as soon as you finish using them. It only takes a few minutes and saves you time and frustration later.
Clean tools help you work smarter—not harder. So next time you grab your mop or vacuum, give it a quick check. A clean tool is a powerful one!
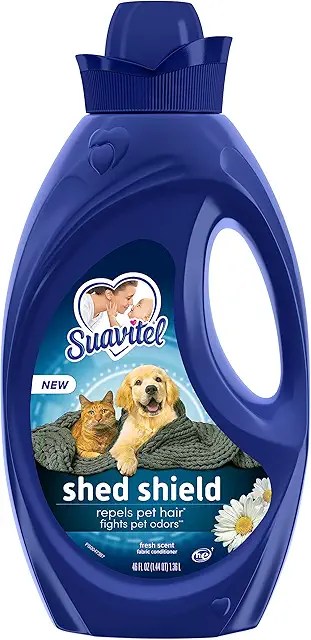
There’s dog hair on the couch. On your clothes. In your coffee mug. On the ceiling fan. How? You don’t know. But if you’ve got a dog that sheds, you know exactly what I’m talking about.
Trying to keep up with a shedding dog can feel like a full-time job. You sweep, you vacuum, you lint roll your entire outfit just to walk out the door… only to discover a rogue hair clinging to your lip halfway through a conversation.
It’s a Daily Battle—and a Lesson in Grace
At some point, you realize: you’ll never totally win the war against the fur. And strangely, that realization is freeing.
It becomes less about controlling every hair and more about managing your expectations, finding a rhythm, and letting go of the need for perfection.
Life Is Messy. So Is Love.
Dogs don’t worry about fur on the floor. They care about belly rubs, walks, and wagging their tails when you come home. The mess is a small price to pay for unconditional love, loyal companionship, and a face that lights up every time you say, “Wanna go for a ride?”
3 Quick Tips to Cope with the Fur Flood:
Brush often – Daily brushing can dramatically reduce shedding (and doubles as quality time).
Invest in a good vacuum – One that can handle fur like a champ. It’s worth it.
Keep a lint roller in every room and car – You’ll thank yourself later.
Trying to keep up with a shedding dog is a little like life—it’s messy, a bit chaotic, and full of surprises. But when you embrace it instead of fight it, it becomes part of the joy.
And honestly? A little fur never hurt anybody. It just means you’re loved by a four-legged friend.
A clean washing machine means cleaner clothes! Over time, detergent residue, hard water stains, and mold can build up on the inside glass of your washer, leaving it cloudy and less effective. Keeping the glass door clean not only improves your washer’s performance but also prevents unpleasant odors and bacteria buildup. Here’s a simple method to keep your washing machine’s glass crystal clear:
Step 1: Run a Hot Cycle with Vinegar or a Cleaner
Start by running an empty hot water cycle with either distilled white vinegar or a dedicated washing machine cleaner. Vinegar helps dissolve mineral buildup and kills mold, while commercial cleaners target grime and detergent residues.
Vinegar Method: Pour two cups of white vinegar directly into the detergent dispenser and run a hot cycle.
Washing Machine Cleaner: Follow the manufacturer’s instructions for the best results.
Step 2: Wipe Down the Glass Door
Once the cycle is complete, use a damp microfiber cloth or sponge to wipe down the glass door. Pay extra attention to any stubborn spots or streaks, using a bit of vinegar or mild dish soap if needed.
Step 3: Clean the Rubber Seal
The rubber seal around the door is notorious for trapping moisture, mold, and detergent buildup. Wipe it thoroughly with a cloth dampened in vinegar or an antibacterial cleaner. If there’s visible mold, scrub gently with an old toothbrush.
Step 4: Keep It Dry
After cleaning, leave the door slightly open to allow air circulation and prevent mold growth. Wiping the glass and rubber seal after each use also helps maintain cleanliness.
By following these simple steps regularly, you’ll keep your washing machine’s glass spotless and ensure your laundry stays fresh and clean!
As pet owners, we all want to make life easier for both ourselves and our furry companions. From feeding to grooming, we are constantly thinking of ways to improve their lives. One solution that’s become increasingly popular in recent years is installing a doggy door. While it might seem like a simple addition, a doggy door offers a host of benefits for both pets and their owners.
Here’s why having a doggy door might just be one of the best decisions you make for your household.
1. Freedom for Your Furry Friend
Perhaps the most obvious benefit of a doggy door is the freedom it provides to your dog. No longer will your pet have to wait for you to open the door so they can relieve themselves or get some fresh air. For active dogs, this can be a game-changer, allowing them to explore the backyard or enjoy outdoor playtime without you having to constantly supervise or open the door.
This added independence can be especially beneficial for working professionals or those with a busy schedule. With a doggy door, your pet can go in and out as they please, reducing the chances of accidents in the house and giving them more space to burn off energy.
2. A More Convenient Life for You
If you’ve ever had to get up in the middle of the night to let your dog out, you’ll know that the convenience of a doggy door cannot be overstated. No more midnight trips to the door! Whether it’s a quick bathroom break or simply a desire to get some fresh air, your dog can do it all on their own. This can save you time, energy, and the hassle of getting dressed or braving the cold to let your dog out.
Additionally, if you have a puppy or a senior dog, a doggy door can be a great way to ease their transition to potty training or make life more comfortable for them as they age.
3. Reduced Stress for Pets
For dogs who experience separation anxiety or stress when left alone, a doggy door can offer some relief. Having the ability to move freely between the inside and outside of the house allows them to escape from stressful situations, such as being confined to a room or left in a crate for too long.
Plus, the ability to get outside for fresh air or to lounge in a sunny spot can help keep their stress levels lower when they’re home alone. They’ll appreciate the autonomy and comfort that comes with having access to their environment.
4. Improved Health and Well-being
Dogs are naturally active animals, and regular exercise is key to keeping them happy and healthy. Having a doggy door makes it easier for them to get the exercise they need, whether it’s by running around the yard or just exploring the outside world. This can help prevent obesity and improve overall health, especially for dogs who have high energy levels.
Additionally, for dogs that are sensitive to being indoors for long periods (especially during colder months), a doggy door allows them to go outside for bathroom breaks, which can help with digestive health and prevent urinary issues.
5. Peace of Mind for Pet Owners
A doggy door offers peace of mind because it provides your dog with the freedom to go outside as needed without you having to keep a close eye on them every second. You’ll feel less anxious about your dog being cooped up inside for hours, especially if you’re gone for long periods of time.
And for dog owners who live in areas with extreme weather, many modern doggy doors come with weatherproof features to prevent drafts or the elements from entering your home, ensuring that your space remains comfortable year-round.
6. Easy Installation and Customization
Doggy doors have come a long way from the basic flap models of the past. Today, there are a variety of options to suit your home and your pet’s needs. From manual flaps to automatic doors with microchip sensors, there’s a doggy door for every type of household and lifestyle.
Installation is relatively easy, especially with some of the more modern options that are designed to fit into existing doors or walls. Many pet stores and home improvement centers offer options for different types of doors, and professional installation can often be arranged for a more seamless experience.
7. Enhancing Your Relationship with Your Pet
Having a doggy door also enhances the bond you share with your pet. With the added convenience, both you and your dog will feel less stressed, making the relationship more enjoyable and fulfilling. Your dog will appreciate the added freedom, and you’ll appreciate not having to constantly cater to their needs.
Is a Doggy Door Right for You?
If you’re considering adding a doggy door to your home, take into account your pet’s personality, your home’s layout, and your lifestyle. Some pets love the freedom and convenience that a doggy door offers, while others may take a little time to get used to it.
But once your pet adjusts, you’ll likely find that it’s one of the best additions you can make for your home. Not only does it give your pet more autonomy, but it also makes life much more convenient for you as a pet owner.
Managing a household can be overwhelming with a never-ending list of tasks and responsibilities. Between work, family, and personal life, it can feel like there’s no time left to keep things running smoothly at home. But what if you could simplify things? Here are three effective ways to make managing your house easier, less stressful, and more efficient.
1. Create a Routine for Daily Tasks
One of the best ways to prevent your house from becoming overwhelming is by establishing a daily routine. Small tasks, when done consistently, make a big difference. Instead of waiting for the mess to pile up, tackle it every day.
Daily habits to consider:
Make the bed: Starting your day by making your bed sets a positive tone for the rest of your tasks.
Do the dishes: Cleaning up after meals, even if it’s just a few dishes, helps keep your kitchen from getting cluttered.
Tidy up: Spend 10-15 minutes each day picking up any items that don’t belong in a room. A quick tidy-up is much less daunting than trying to clean up an entire room at the end of the week.
These small tasks, done daily, prevent them from snowballing into a bigger job. Plus, keeping up with them makes it easier to maintain a clean home, reducing the stress that comes with clutter and disorganization.
2. Declutter Regularly
Clutter can make a home feel chaotic and difficult to manage. When you have too much stuff, it takes more time and effort to keep everything organized. By decluttering regularly, you’re able to keep things simpler and more manageable.
How to declutter effectively:
Start small: Begin with one area, like your closet or the kitchen counters, and go through your belongings. Sort items into categories: keep, donate, or discard.
One-in, one-out rule: For every new item you bring into your home, commit to getting rid of something old. This helps you maintain a manageable amount of possessions without feeling like you’re constantly overwhelmed by things.
Tackle it periodically: Set aside time every couple of months to go through different areas of your home. This could be as simple as a few minutes each weekend or a bigger project every season.
Regularly clearing out what you no longer need or use will create a more organized space. Plus, you’ll find that you can easily locate the things you truly need, saving time in the long run.
3. Automate Where Possible
In today’s world, technology can be your best friend when it comes to simplifying home management. Automating tasks or setting up systems that require less hands-on work will save you time and energy. It’s like having a personal assistant for your home!
Ways to automate home management:
Automate bill payments: Set up automatic payments for utility bills, subscriptions, and even mortgage or rent payments to reduce mental load and the risk of late fees.
Use smart home devices: Smart thermostats, lights, and locks can be controlled from your phone, helping you manage your home’s comfort and security with ease.
Schedule regular cleaning: Whether it’s scheduling a cleaning service to handle deeper cleaning tasks or using a robotic vacuum to take care of the floors, automation can save hours of your time each week.
By using technology to handle repetitive tasks, you free up time to focus on other aspects of life. Plus, you’ll feel a sense of relief knowing that these things are taken care of without you having to constantly think about them.
Managing a home doesn’t have to feel overwhelming. By establishing a simple routine, decluttering regularly, and automating tasks wherever possible, you’ll find that maintaining a home becomes easier and more efficient. Instead of feeling buried under a mountain of responsibilities, you can enjoy the space you’ve created, knowing that your home is organized and under control.
Small changes can make a big impact. Start today and see how simplifying your home management leads to a more peaceful, enjoyable life.
As winter fades and the days grow longer, your lawn begins to awaken from its dormant state. It’s the perfect time to start thinking about how to rejuvenate your yard and prepare it for the vibrant growth of spring. One of the best ways to do this is by fertilizing your lawn at the right time, giving it the nutrients it needs to thrive in the warmer months.
Why Fertilizing Matters
Fertilizing your lawn is essential for ensuring healthy, green grass. After months of cold weather and limited growth, your lawn can be depleted of nutrients, and the soil may be lacking in the essential elements it needs for strong, lush grass. Fertilizer helps replenish these nutrients, promoting healthy root development, strong growth, and vibrant color.
When to Fertilize Your Lawn
Timing is crucial when it comes to fertilizing. Fertilizing too early can encourage growth before the ground has warmed up, which can lead to weak, leggy grass. Fertilizing too late may miss the window for optimal growth. Here’s how to determine the best time to fertilize:
Early Spring (March to April)
As the weather warms up and the snow begins to melt, your lawn is likely emerging from its winter dormancy. This is the ideal time for your first round of fertilization. Aim to apply a balanced fertilizer in early spring, just as the grass begins to show signs of growth. This will jumpstart the growing season and help your lawn recover from the cold months.
Late Spring (May)
In late spring, your lawn is actively growing, and it’s time for a second round of fertilization. This round should provide more nitrogen to encourage lush, green growth. By fertilizing at this time, you’ll promote thick, healthy grass that can better withstand the heat of summer.
How to Fertilize Your Lawn
When applying fertilizer, be sure to follow these tips for the best results:
Choose the Right Fertilizer: Select a fertilizer that matches your lawn’s needs. A slow-release, balanced fertilizer is often a good choice for lawns in early spring.
Apply Evenly: Use a spreader to apply the fertilizer evenly across your lawn. Avoid over-applying, as this can cause burning and damage to the grass.
Water After Fertilizing: After applying fertilizer, water your lawn thoroughly to help the nutrients absorb into the soil and reach the roots.
Consider Soil Testing: If you’re unsure about the nutrient levels in your soil, consider getting a soil test. This can help you choose the right type of fertilizer and avoid over-fertilizing.
Other Spring Lawn Care Tips
In addition to fertilizing, there are a few other lawn care tasks to consider as you prepare your yard for the warmer months:
Aerate Your Lawn: Aerating your lawn helps improve soil compaction and allows air, water, and nutrients to reach the roots more effectively.
Rake Up Debris: Remove leaves, sticks, and other debris that have accumulated over the winter. This allows your grass to breathe and reduces the risk of mold and fungus.
Water Wisely: As your lawn begins to grow, make sure to water it properly. Early morning watering is the best time, as it prevents the lawn from staying too wet overnight.
Spring is a time of renewal and growth, and fertilizing your lawn at the right time is essential for a healthy, beautiful yard. By fertilizing early in the season and providing the right nutrients, you’re setting your lawn up for success as it emerges from winter and heads into the vibrant months of spring. Take the time to care for your lawn now, and enjoy a lush, green space all season long! 🌱
Your washing machine works hard, day in and day out, to keep your clothes fresh and clean. But like any appliance, it needs some TLC to keep performing at its best. Over time, detergent residue, dirt, and even mold can build up inside, affecting both the machine’s efficiency and your laundry. So, how often should you clean your washing machine to ensure it’s working properly?
Why You Should Clean Your Washing Machine
Your washing machine isn’t just responsible for cleaning your clothes—it also needs to be cleaned itself. Here’s why:
Prevent Build-Up: Over time, detergent, fabric softener, and dirt can build up in the drum, pipes, and seals. This can lead to unpleasant odors and potential mold growth.
Maintain Efficiency: A clean machine operates more efficiently, using less energy and water. This can save you money in the long run.
Extend Lifespan: Regular cleaning can help prevent costly repairs and extend the life of your washing machine.
How Often Should You Clean Your Washing Machine?
The frequency of cleaning your washing machine depends on several factors, including how often you use it and the type of laundry detergent you use. Here’s a general guideline to follow:
Monthly Cleaning For most households, cleaning your washing machine once a month is a good rule of thumb. This can help eliminate soap scum, mold, and bacteria that build up over time. If you use your washing machine daily, you might want to clean it more frequently.
After Every Few Loads (for Front-Load Washers) Front-load washers are especially prone to mold and mildew because of their airtight door seals. After every few loads, wipe down the door seal and leave the door ajar to allow the interior to air out. This can prevent the growth of mold.
When You Notice Odors If your washing machine starts to smell musty or funky, it’s time for a deep clean. A bad odor can be a sign of mold, mildew, or detergent residue. If this happens, give your washing machine an extra cleaning to get rid of the smell.
Every 6 Months (Deep Clean) In addition to monthly cleanings, it’s a good idea to perform a deep clean every six months. This includes cleaning the drum, the detergent drawer, and the filter. This is especially important if you use a washing machine regularly or have hard water, as mineral build-up can affect its performance.
How to Clean Your Washing Machine
Cleaning your washing machine doesn’t have to be difficult. Here’s a simple process you can follow:
Run an Empty Cycle with Hot Water Set your washing machine to the hottest water setting and run an empty cycle. Add two cups of white vinegar to the drum. This helps disinfect and remove soap scum and odors.
Wipe Down the Drum and Seal After the cycle is complete, wipe down the inside of the drum with a clean cloth. Don’t forget to wipe around the door seal and around the detergent drawer, as these areas can accumulate grime and mildew.
Clean the Filter and Detergent Tray Remove and clean the detergent tray regularly to remove any detergent build-up. Clean the filter (if applicable) to remove lint, dirt, and other debris.
Leave the Door Open After cleaning, leave the door open for a while to let the inside of the machine dry completely. This helps prevent the growth of mold and mildew.
Tips for Maintaining a Clean Washing Machine
Use the Right Detergent: Always use the recommended amount of detergent. Too much detergent can lead to a build-up of soap residue.
Don’t Overload: Overloading your washing machine can result in poor cleaning and excess moisture left in the drum. Make sure to leave enough space for clothes to move freely.
Check the Drain Hose: Ensure that the drain hose isn’t clogged, as this can prevent proper drainage and lead to water pooling in the machine.
Use a Washing Machine Cleaner: There are also specialized washing machine cleaners available that can help break down build-up. Use these as directed for extra cleaning power.
Cleaning your washing machine regularly is essential for keeping it in good working condition and extending its lifespan. While a monthly cleaning should be sufficient for most households, take care to clean certain areas more frequently (like the door seal and detergent tray) to keep odors at bay. By following a simple cleaning routine, your washing machine will continue to provide you with fresh, clean clothes for years to come.