We all have that one trusty cutting board—scratched, stained, slightly warped, and probably older than your dog. But what if it’s time for an upgrade? Specifically, what if it’s time to make the switch to glass cutting boards?
Yes, glass. Sleek, shiny, suspiciously clean-looking. Let’s cut into the pros, cons, and quirks of this unexpected kitchen upgrade.
🧼 The Hygiene Hero
Glass cutting boards are non-porous. Translation: They don’t soak up meat juices, onion smells, or the ghost of garlic past. A quick wash and they’re good as new—no stains, no lingering bacteria. For the cleanliness-obsessed, that’s a major win.
✨ Stylish and Modern
Let’s be honest—glass cutting boards just look cool. They’re like the kitchen equivalent of wearing sunglasses indoors. Available in all sorts of patterns and colors, they can actually match your kitchen décor… or your mood.
🔪 The Knife Controversy
Here’s the catch: glass is tough on knives. Like, really tough. If you’re the proud owner of an expensive chef’s knife, you might want to keep your old wooden board around for delicate slicing and dicing. Think of your glass board as the “backup dancer”—there when you need it, not always center stage.
☕ Multi-Purpose Marvel
Use it as a cheese board, a trivet for hot pans, or even a serving platter for snacks. Glass cutting boards moonlight as kitchen multitaskers. They’re the overachievers of the countertop world.
👂 Unexpected Bonus: ASMR Vibes?
The sound of chopping on glass is oddly satisfying to some and borderline annoying to others. You’ll either feel like you’re starring in your own cooking show… or like you’re rehearsing a tap dance with your knife.
Is switching to a glass cutting board right for everyone? Maybe not. But if you’re looking for easy cleaning, durability, and a touch of kitchen glam, it might just be time to retire that old plastic slab and give glass a try.
Just maybe don’t throw away your favorite knife sharpener while you’re at it
GFCI stands for Ground Fault Circuit Interrupter. It’s a type of electrical outlet designed to protect you from getting shocked by detecting when electricity is flowing in an unsafe way—like through water, or even through you.
If it senses that current is escaping the normal electrical path, it shuts off the power in a fraction of a second.
Why Are GFCI Outlets Important?
Because water and electricity don’t mix. GFCI outlets are life-saving devices commonly installed in areas where moisture is present, such as:
Bathrooms
Kitchens
Laundry rooms
Garages
Outdoor outlets
Basements
These outlets reduce the risk of electric shock, electrical fires, and even fatal electrocution.
Do You Need GFCI Outlets?
Yes, and in many cases, it’s required by building code. If your home doesn’t have GFCI outlets in the right places—especially near water—it’s a smart upgrade. They’re not expensive, and any licensed electrician can install them quickly.
Even older homes can be updated with GFCI outlets to meet modern safety standards.
How to Know If Yours Are Working
Every GFCI outlet has a “test” and “reset” button. You should:
Press the “test” button — the power should cut off.
Press the “reset” button — the power should come back on.
If it doesn’t respond, it might be time to replace it.
GFCI outlets may not be the most exciting part of home maintenance, but they’re one of the most important when it comes to keeping your family safe. A small upgrade can prevent a major tragedy.
When it comes to electricity, a little prevention goes a long way.
GFCI Adapter Outlet
Features: Adds GFCI protection to standard outlets, easy installation.
Ideal For: Temporary setups or areas without built-in GFCI.
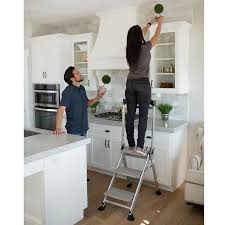
It’s not glamorous. It doesn’t require charging. It doesn’t even have Wi-Fi. But the step stool? It just might be one of the most useful tools in your entire home.
From reaching that top shelf in the pantry to helping little ones brush their teeth at the sink, a good step stool is the kind of household essential you don’t realize you need—until you need it.
Small But Mighty: Everyday Uses for a Step Stool
1. Reaching Higher (Safely!) No more wobbling on chairs or balancing on your tiptoes. A sturdy step stool keeps you safe while accessing top cabinets, changing lightbulbs, or hanging decorations.
2. Kitchen Helper Whether you’re grabbing a baking dish from the top shelf or involving kids in cooking, a step stool brings everything down to a safer, reachable level.
3. Bathroom Boost For kids learning independence, a step stool helps them wash hands, brush teeth, or even help put laundry away—all while feeling capable and grown-up.
4. Closet Climber Need to grab seasonal clothes from the top shelf or stow away those bulky comforters? A step stool makes the job easier (and quicker).
5. Home Projects Whether you’re painting a wall, dusting a ceiling fan, or installing curtains, a step stool gives you just the right height—without the bulk of a ladder.
Tips for Choosing the Right One
Look for stability – Rubber feet, a wide base, and solid construction are key.
Consider portability – A foldable or lightweight design makes it easy to move and store.
Think multi-use – Some stools double as seats, storage, or even plant stands!
A Small Tool That Lifts You Up (Literally)
Sometimes it’s the simplest things that make the biggest difference. A step stool won’t change your life—but it sure makes life easier. And safer. And a little more within reach.
So if you don’t already have one (or two), it might be time to step up your home game—literally.
There’s something special about everyone pitching in to tackle a project around the house. Whether it’s cleaning out the garage, sprucing up the yard, or giving a room a fresh coat of paint, when the whole family pulls together, amazing things happen—not just to the house, but to everyone’s spirit.
Why It’s So Great:
Teamwork builds pride. When everyone contributes, everyone feels proud of the results. It’s not just a cleaner house—it’s a family victory.
Life skills are learned. Kids (and sometimes even adults) learn how to paint, organize, garden, or fix things—skills that stay with them for life.
Memories are made. Projects often turn into moments of laughter, music blasting in the background, and maybe a few funny mishaps you’ll talk about for years.
It strengthens bonds. Working toward a common goal brings people closer. It’s about more than chores—it’s about teamwork and shared accomplishment.
How to Make It Fun:
Assign roles. Give everyone a job that matches their abilities or interests.
Make it a competition. Who can pull the most weeds or organize the most boxes?
Play music. A great playlist can turn work into a mini party.
Celebrate after. Pizza night, ice cream, or a family movie marathon is a perfect reward for a job well done.
When everyone chips in, the work gets done faster, and the feeling of accomplishment is even sweeter. Plus, it sends a powerful message: in this family, we show up for each other.
So the next time there’s a project looming, rally the crew. You’ll get a cleaner house—and an even stronger family.
When designing a room, we often focus on the walls, furniture, and flooring—leaving the ceiling as an afterthought. However, the ceiling is a blank canvas that offers a unique opportunity to elevate your space in a way that can transform an entire room. Adding texture and design to your ceiling can dramatically enhance the atmosphere, making it feel more inviting, luxurious, and thoughtfully designed.
1. Coffered Ceilings: A Classic Touch
A coffered ceiling is a timeless design element that adds depth and sophistication to any room. These ceilings consist of a series of recessed panels, which can be framed with wood, crown molding, or plaster. The depth created by the panels creates a sense of grandeur, and depending on the finish, coffered ceilings can complement both traditional and modern aesthetics. If you’re looking to add architectural interest, a coffered ceiling could be the perfect choice.
2. Textured Paint or Wallpaper
Textured paint can give your ceiling a unique look and feel. From subtle patterns to bold textures, the possibilities are endless. Adding a light stucco or sand texture can create depth, while a brushed pearl or metallic paint finish can add a touch of glamour. Alternatively, ceiling wallpaper with soft patterns, textures, or even bold designs can make a statement without being too overwhelming.
3. Wood Panels or Beams
Wood is a material that never goes out of style. Whether you opt for reclaimed wood panels, wood planks, or exposed beams, wood can create a cozy, rustic atmosphere. Installing beams across the ceiling can bring a natural, earthy feel to a room, and reclaimed wood adds character with its history. Alternatively, tongue-and-groove wood panels can offer a sleek, contemporary look, enhancing the sense of warmth and comfort.
4. Tray Ceilings: Subtle Yet Elegant
A tray ceiling features a raised central section that adds depth and elegance to a room. It’s a more subtle alternative to the coffered ceiling and is often complemented with crown molding or lighting. Tray ceilings are perfect for bedrooms, living rooms, or dining rooms, as they can make a space feel taller and airier. To further elevate the look, consider adding an accent color or subtle lighting along the edges.
5. Exposed Brick or Stone
For those who appreciate the industrial or rustic aesthetic, exposed brick or stone on the ceiling is a bold design move. This textured ceiling treatment adds instant character and creates a cozy, warm feeling that is ideal for urban lofts, kitchens, or even bedrooms. Exposed brick can also add charm and texture to a room while blending seamlessly with modern or vintage décor.
The ceiling is one of the most overlooked design elements in a room, but with the right textures and finishes, it can transform a space into something extraordinary.
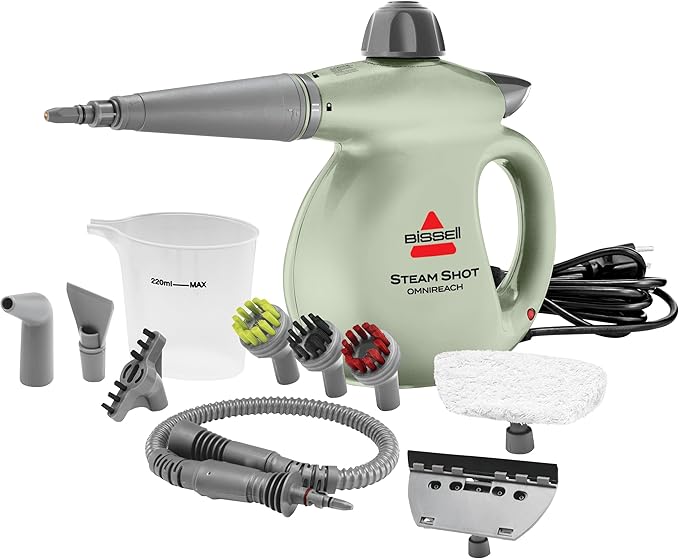
Spring is the perfect time to refresh your space and bring in the light—and while many of us remember to dust the shelves and swap out winter clothes, there are three often-overlooked areas that deserve some seasonal attention: tile, grout, and windowsills.
Tile: Shine It Up
Tile might look clean at a glance, but soap scum, water spots, and general buildup can dull its sparkle over time. Whether it’s in your kitchen backsplash or bathroom floor, give your tile a proper scrub this spring. A mix of warm water, dish soap, and a splash of vinegar can work wonders. For a deep clean, consider a tile-safe degreaser or steam cleaner.
Grout: Reclaim the White
Grout seems to attract everything you don’t want—mildew, stains, and grime. You don’t need harsh chemicals to bring it back to life. A paste of baking soda and water applied with an old toothbrush, followed by a light spray of vinegar, can lift years of buildup. Rinse and admire your handiwork!
Windowsills: Let the Sunshine In
Windowsills quietly collect dust, dead bugs, and sometimes even mold—especially in those corners where condensation lingers. Wipe them down with an all-purpose cleaner or a mix of vinegar and water. If you have wooden sills, follow up with a light polish or wood conditioner to protect the surface.
A Breath of Fresh Air
Spring cleaning isn’t just about tidying up—it’s about creating a home that feels renewed. Taking time to tackle these less-obvious areas can bring surprising satisfaction and a true sense of cleanliness.
So roll up your sleeves, open those windows, and let the fresh air (and light) flow freely again!
There’s nothing quite as off-putting as reaching for your favorite cup only to find it tastes or smells like soap, despite having just gone through the dishwasher. If you’ve noticed this problem with your dishes, you’re not alone! It’s a common issue, but the good news is that it’s usually fixable. Here are three simple steps to stop your cups from coming out of the dishwasher smelling and tasting like soap.
1. Check Your Dishwasher Detergent
The first thing to look at is the detergent you’re using. Too much detergent or a low-quality detergent can often leave residue on dishes, especially in the form of a soapy taste and smell. Here’s what to do:
Use the correct amount of detergent: Overusing detergent can lead to soap buildup, which ends up on your dishes. Check the detergent packaging for recommendations based on your water hardness.
Switch to a high-quality detergent: If you’re using a budget detergent, it might not rinse off as well, leaving residue behind. Consider switching to a high-quality brand or one that’s specially formulated for your dishwasher type.
Rinse aid: If your dishwasher doesn’t have a built-in rinse aid function, try using a rinse aid product. Rinse aid helps ensure that all detergent is washed away and leaves dishes sparkly clean without any soap residue.
2. Clean Your Dishwasher Regularly
Sometimes, the issue might not be with the detergent itself but with your dishwasher. If the machine is dirty or has soap buildup inside, it can transfer those smells and tastes onto your dishes. Here’s how to fix it:
Clean the dishwasher filter: Most dishwashers have a filter that can catch debris and food particles. Over time, this filter can get clogged and cause a buildup of grime. Remove and clean the filter regularly (about once a month) to keep things running smoothly.
Run a cleaning cycle: Many dishwashers have a dedicated cleaning cycle. Use this cycle with a dishwasher cleaner or white vinegar to remove mineral buildup, soap scum, and odors. Run the cycle with the dishwasher empty to give it a thorough cleanse.
Check for mold or mildew: If your dishwasher has a persistent odor, it might be caused by mold or mildew buildup, often found in hidden crevices. Wipe down the interior of the dishwasher with a vinegar solution or a specialized cleaner to eliminate any fungal growth.
3. Use the Right Dishwasher Setting
Not all dishwasher cycles are created equal. Sometimes, if you’re using a cycle that doesn’t get your dishes clean enough, detergent can be left behind, contributing to that soapy taste. Here’s what to do:
Choose a heavier cycle for tougher loads: If you’re washing cups that have stubborn residue, try using a more intensive cycle. It will give the detergent more time to break down food particles and soap, ensuring better rinse results.
Make sure the spray arms aren’t clogged: If the spray arms in your dishwasher aren’t rotating or spraying evenly, detergent can remain on your dishes. Regularly check that the spray arms are free from obstructions, such as food particles or mineral buildup.
Ensure proper water temperature: Hot water helps the detergent dissolve and rinse away properly. If your dishwasher isn’t heating the water to the correct temperature (usually between 120-150°F), it may not be rinsing thoroughly, leaving behind soap residue. If your dishwasher allows for temperature adjustment, make sure the setting is optimal.
Bonus Tip: Wash Cups Separately
If your cups are especially sensitive to soap residue, try washing them separately from dishes that are more likely to leave residue behind, like pans with grease. This will prevent soap buildup on the cups and keep them tasting and smelling fresh.
It’s frustrating when your cups come out of the dishwasher with a soapy taste, but by adjusting your detergent use, keeping your dishwasher clean, and using the right settings, you can say goodbye to that unpleasant smell and taste. These simple fixes will ensure your cups—and all your dishes—come out perfectly clean and ready to use.
Pro tip: If the problem persists after trying these steps, it could be worth checking your dishwasher’s performance or contacting a professional to ensure everything is functioning correctly.
A clean washing machine means cleaner clothes! Over time, detergent residue, hard water stains, and mold can build up on the inside glass of your washer, leaving it cloudy and less effective. Keeping the glass door clean not only improves your washer’s performance but also prevents unpleasant odors and bacteria buildup. Here’s a simple method to keep your washing machine’s glass crystal clear:
Step 1: Run a Hot Cycle with Vinegar or a Cleaner
Start by running an empty hot water cycle with either distilled white vinegar or a dedicated washing machine cleaner. Vinegar helps dissolve mineral buildup and kills mold, while commercial cleaners target grime and detergent residues.
Vinegar Method: Pour two cups of white vinegar directly into the detergent dispenser and run a hot cycle.
Washing Machine Cleaner: Follow the manufacturer’s instructions for the best results.
Step 2: Wipe Down the Glass Door
Once the cycle is complete, use a damp microfiber cloth or sponge to wipe down the glass door. Pay extra attention to any stubborn spots or streaks, using a bit of vinegar or mild dish soap if needed.
Step 3: Clean the Rubber Seal
The rubber seal around the door is notorious for trapping moisture, mold, and detergent buildup. Wipe it thoroughly with a cloth dampened in vinegar or an antibacterial cleaner. If there’s visible mold, scrub gently with an old toothbrush.
Step 4: Keep It Dry
After cleaning, leave the door slightly open to allow air circulation and prevent mold growth. Wiping the glass and rubber seal after each use also helps maintain cleanliness.
By following these simple steps regularly, you’ll keep your washing machine’s glass spotless and ensure your laundry stays fresh and clean!
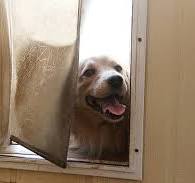
As pet owners, we all want to make life easier for both ourselves and our furry companions. From feeding to grooming, we are constantly thinking of ways to improve their lives. One solution that’s become increasingly popular in recent years is installing a doggy door. While it might seem like a simple addition, a doggy door offers a host of benefits for both pets and their owners.
Here’s why having a doggy door might just be one of the best decisions you make for your household.
1. Freedom for Your Furry Friend
Perhaps the most obvious benefit of a doggy door is the freedom it provides to your dog. No longer will your pet have to wait for you to open the door so they can relieve themselves or get some fresh air. For active dogs, this can be a game-changer, allowing them to explore the backyard or enjoy outdoor playtime without you having to constantly supervise or open the door.
This added independence can be especially beneficial for working professionals or those with a busy schedule. With a doggy door, your pet can go in and out as they please, reducing the chances of accidents in the house and giving them more space to burn off energy.
2. A More Convenient Life for You
If you’ve ever had to get up in the middle of the night to let your dog out, you’ll know that the convenience of a doggy door cannot be overstated. No more midnight trips to the door! Whether it’s a quick bathroom break or simply a desire to get some fresh air, your dog can do it all on their own. This can save you time, energy, and the hassle of getting dressed or braving the cold to let your dog out.
Additionally, if you have a puppy or a senior dog, a doggy door can be a great way to ease their transition to potty training or make life more comfortable for them as they age.
3. Reduced Stress for Pets
For dogs who experience separation anxiety or stress when left alone, a doggy door can offer some relief. Having the ability to move freely between the inside and outside of the house allows them to escape from stressful situations, such as being confined to a room or left in a crate for too long.
Plus, the ability to get outside for fresh air or to lounge in a sunny spot can help keep their stress levels lower when they’re home alone. They’ll appreciate the autonomy and comfort that comes with having access to their environment.
4. Improved Health and Well-being
Dogs are naturally active animals, and regular exercise is key to keeping them happy and healthy. Having a doggy door makes it easier for them to get the exercise they need, whether it’s by running around the yard or just exploring the outside world. This can help prevent obesity and improve overall health, especially for dogs who have high energy levels.
Additionally, for dogs that are sensitive to being indoors for long periods (especially during colder months), a doggy door allows them to go outside for bathroom breaks, which can help with digestive health and prevent urinary issues.
5. Peace of Mind for Pet Owners
A doggy door offers peace of mind because it provides your dog with the freedom to go outside as needed without you having to keep a close eye on them every second. You’ll feel less anxious about your dog being cooped up inside for hours, especially if you’re gone for long periods of time.
And for dog owners who live in areas with extreme weather, many modern doggy doors come with weatherproof features to prevent drafts or the elements from entering your home, ensuring that your space remains comfortable year-round.
6. Easy Installation and Customization
Doggy doors have come a long way from the basic flap models of the past. Today, there are a variety of options to suit your home and your pet’s needs. From manual flaps to automatic doors with microchip sensors, there’s a doggy door for every type of household and lifestyle.
Installation is relatively easy, especially with some of the more modern options that are designed to fit into existing doors or walls. Many pet stores and home improvement centers offer options for different types of doors, and professional installation can often be arranged for a more seamless experience.
7. Enhancing Your Relationship with Your Pet
Having a doggy door also enhances the bond you share with your pet. With the added convenience, both you and your dog will feel less stressed, making the relationship more enjoyable and fulfilling. Your dog will appreciate the added freedom, and you’ll appreciate not having to constantly cater to their needs.
Is a Doggy Door Right for You?
If you’re considering adding a doggy door to your home, take into account your pet’s personality, your home’s layout, and your lifestyle. Some pets love the freedom and convenience that a doggy door offers, while others may take a little time to get used to it.
But once your pet adjusts, you’ll likely find that it’s one of the best additions you can make for your home. Not only does it give your pet more autonomy, but it also makes life much more convenient for you as a pet owner.
When decorating your living space, one of the key focal points is often the area above the couch. But how do you know how high or low to hang your pictures to make sure everything looks balanced and beautiful? Here’s a simple rule that can help: leave about 12 inches between the back of your couch and the bottom of your picture. This simple guideline helps create a cohesive, well-proportioned look, ensuring your art isn’t too high or too low, but just right.
Why 12 Inches?
The 12-inch rule is an aesthetic choice that keeps the artwork grounded without overwhelming the space. If you hang your pictures too high, they may feel disconnected from the furniture below, creating an awkward visual gap. If they’re too low, they might feel cramped and crowd the seating area. The 12-inch distance strikes a harmonious balance, letting the art breathe while still feeling connected to the rest of the room.
How to Apply the 12-Inch Rule
Measure Carefully: Start by measuring 12 inches from the top of your couch. This is the space you’ll want to leave between the back of the couch and the bottom of the picture frame. Use a tape measure or a level to ensure that your art is hung at the right height.
Consider Your Artwork’s Size: Larger pieces of art may require a slightly more generous gap, especially if they have a heavy or dominant visual presence. On the other hand, smaller pieces might look great with a bit less space.
Groupings or Single Piece: Whether you’re hanging a single large artwork or a series of smaller pieces, the 12-inch rule remains a good starting point. When using a gallery wall approach, ensure that the cluster of images stays within that 12-inch space for consistency.
Adjust for Style: Keep in mind that personal style matters! The 12-inch rule isn’t a strict rule—just a helpful guideline. Feel free to adjust slightly based on your specific aesthetic or the visual flow of the room.
Bonus Tips for Hanging Art Behind Your Couch
Scale and Proportion: Be mindful of the size of the artwork in relation to your couch. Too small can make the art look lost in the space, while too large might dominate the room. Aim for artwork that’s roughly 60%-75% of the width of your couch for balance.
Stay Centered: Center the artwork above the couch, ensuring it’s level. Off-center art can throw off the flow of the room.
Use Proper Hanging Hardware: Always use sturdy picture hangers and hooks that can support the weight of your art. This will prevent damage to your walls and keep your pieces securely in place.
Add Lighting: Consider adding accent lighting to highlight your artwork. Wall sconces or picture lights can enhance the visual appeal and draw attention to the art.
By following the 12-inch rule and considering the size and placement of your pictures, you can create a stylish, balanced look in your living room. This simple guideline ensures that the art feels like an integrated part of the space, not an afterthought.