Rugs can completely transform a space—they add warmth, style, and comfort. But they can also be a hazard if they slip or bunch underfoot. That’s where a good non-slip rug pad comes in.
A high-quality pad keeps your rugs securely in place, so you don’t have to worry about tripping or sliding during everyday use. Whether you’re rushing to answer the door, chasing after kids, or just walking around in socks, a rug pad provides the stability you need.
But the benefits go beyond safety. A non-slip pad also protects your floors from wear and tear. High heels, active children, or moving furniture can all damage hardwood, laminate, or tile floors over time. By placing a pad under your rug, you create a cushion that absorbs impact and prevents scratches, dents, or scuffs.
Pro Tip: Look for pads that are easy to trim to fit your rug’s size and made from materials that won’t stain or stick to your flooring. This ensures maximum grip without any damage.
In short, a non-slip rug pad is a small investment that brings big peace of mind—protecting your floors and keeping your home safe and comfortable for everyone who lives there.
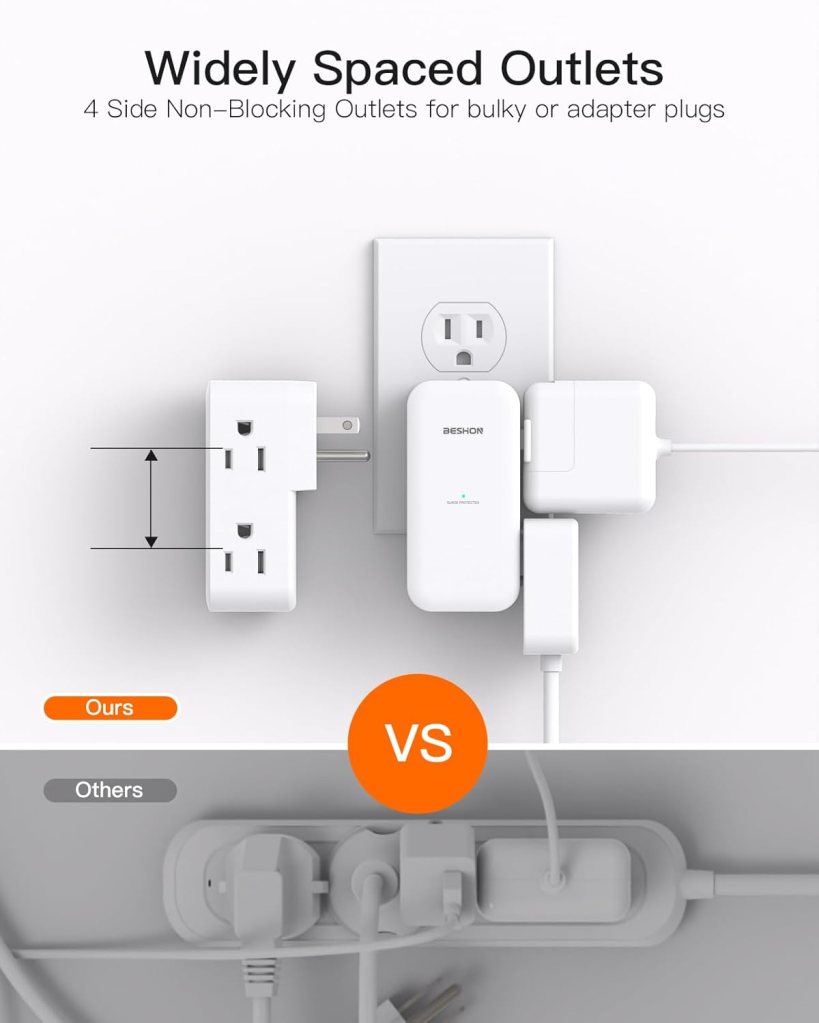
If you’ve ever tried to charge multiple devices in a tight corner of your home, you know the struggle—plugs bumping into each other, cords tangling, and some devices not fitting at all. That’s where a rotating surge protector outlet extender becomes a game-changer.
These clever gadgets not only protect your devices from power surges, but their rotating outlets allow you to plug in bulky chargers, vacuums, and other large adapters without blocking neighboring plugs. In small spaces like laundry rooms, closets, or behind furniture, they make what seemed impossible completely doable.
Here’s why I love them: I can charge my cordless vacuum, plug in a phone charger, and power a lamp—all in one outlet. The rotating design means I don’t have to contort cords or rearrange furniture. Plus, surge protection gives peace of mind for pricey devices.
Tips for using a rotating surge protector effectively:
Check the wattage: Make sure your devices don’t exceed the extender’s rating.
Keep it accessible: Place it where it’s easy to rotate the plugs without unplugging everything.
Use it for high-draw devices: Vacuums, heaters, or power tools often need more space—rotating extenders make it possible.
Avoid daisy-chaining: Don’t plug one extender into another; it can be a fire hazard.
For anyone dealing with cramped corners or multiple devices, a rotating surge protector outlet extender is a small investment with a big impact. It keeps your space organized, your devices safe, and your cords untangled—a win-win for any home.
Let’s talk about one of the simplest, most overlooked safety upgrades you can make to your home. It costs less than a fancy cup of coffee, takes five minutes, and could make a huge difference if someone ever tries to force their way through your front door.
Ready?
Replace those tiny screws in your door frame plates with 4-inch ones.
That’s it. That’s the tip.
But wait—let me explain why this tiny upgrade packs a big punch.
Why Your Door Isn’t as Secure as You Think
Most exterior doors come with a strike plate (that metal piece your door latch clicks into) and hinge plates—installed with laughably short screws. We’re talking half an inch to maybe an inch long. That means those screws are only anchoring into the flimsy door frame trim—not the sturdy wall studs.
Translation? If someone gives your door a good shoulder bash (or a well-placed kick), that strike plate could tear right out. Scary, right?
The 4-Inch Screw Fix
Here’s what you do:
Open your front (or back) door.
Take a screwdriver or drill and remove the short screws from the strike plate and hinge plates.
Replace them with 3.5- or 4-inch wood screws.
Make sure they bite deep into the wall stud behind the trim.
Just like that, your door is now far more resistant to brute force. Instead of the strike plate flying off with the door frame splintering like a toothpick, it’s got serious reinforcement backing it up.
Longer screws in the hinges help keep the door on the hinges if someone tries to kick it down.
When I Did This, I Slept Better
I made this change after seeing a video of a guy breaking down a door in under five seconds. FIVE. SECONDS.
That night, I rummaged through the garage, found some 4-inch wood screws, and got to work. It took maybe ten minutes total. Then I sat down on the couch and thought, That’s probably the most valuable ten minutes I’ve spent all week.
I’m not saying this is a substitute for a security system. But it’s a smart layer of defense—the kind of simple home improvement that pays for itself in peace of mind.
We spend so much time upgrading things like smart thermostats and fancy appliances. But sometimes, the smartest upgrades are the ones no one sees—the ones that keep your home (and everyone in it) safe.
Ever find yourself digging through drawers trying to find the manual for your dishwasher… or wondering when your roof was last replaced? Maybe you’re on hold with a repair service and you can’t remember the name of the company that fixed your HVAC last time. That’s where the “Home Binder” comes in.
What Is a Home Binder?
A Home Binder is exactly what it sounds like—a simple 3-ring binder or file folder where you keep all the essential information related to your home. Manuals, warranties, service records, contractor contact info, paint colors, appliance serial numbers—anything you might need when life gets chaotic or something needs fixing.
Why You Need One:
1. Save Time (and Sanity): Instead of scrambling when something breaks, you’ll know exactly where to look. No more internet rabbit holes or panicked searches.
2. Stay Organized: Keep everything in one spot—appliance manuals, receipts, warranty info, and service call notes.
3. Prepare for Selling Your Home: If you ever decide to sell, a home binder is a gold mine. Buyers love seeing records of care and upgrades. It can even help justify your asking price.
What to Include in Your Home Binder:
Appliance manuals & receipts
Warranty documents
Home improvement records
Contractor/business cards & service logs
Utility account info
Insurance policies
Emergency contacts
Paint colors or flooring info
HOA documents (if applicable)
Quick Tip to Get Started:
Don’t overthink it. Start with what you have right now—gather your recent receipts, any visible manuals, or contact info you know you’ll need. You can always build it over time.
A Home Binder isn’t fancy, but it’s one of those simple tools that can save you a ton of stress. Think of it as a gift to your future self. Because the next time something goes wrong… you’ll be the one who actually knows where the manual is.
If you’ve ever tossed a grimy shower curtain liner into the trash and headed out to buy a new one, you’re not alone. Most people don’t realize that you can actually clean your shower curtain liner—and it’s surprisingly easy.
Washing your liner not only saves money but also helps cut down on unnecessary waste. And the best part? You likely have everything you need already at home.
🛁 How to Wash Your Shower Curtain Liner
Step 1: Gather Your Supplies You’ll need your plastic or vinyl shower curtain liner, 2-3 soiled towels (these act as gentle scrubbers), baking soda, your usual detergent, and white vinegar.
Step 2: Toss It in the Washer Place the liner and towels in the washing machine. Add your regular amount of detergent plus ½ cup of baking soda.
Step 3: Add Vinegar During the Rinse Cycle When the rinse cycle begins, pour in ½ cup of white vinegar. This helps break down any leftover soap scum or mildew.
Step 4: Hang to Dry Once the cycle is complete, simply hang the liner back up to dry—no dryer needed!
🌿 Why This Works
The towels scrub away grime without damaging the liner.
Baking soda is a natural deodorizer and cleaner.
Vinegar kills bacteria and removes buildup.
It’s a simple trick that leaves your bathroom fresher and your wallet a little heavier.
Next time your shower curtain liner starts looking a little worse for wear, give it a spin in the washer before replacing it. It’s a small step that’s better for your budget—and the planet.
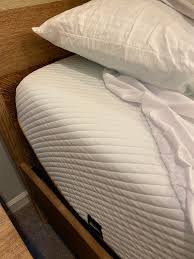
Is there anything more frustrating than waking up to find your fitted sheet has slipped off the corner of your bed again? You tug it back into place, but by the next morning—it’s popped off like a stubborn spring. If you’re tired of fighting with your sheets, you’re not alone.
Let’s talk about why it happens and, more importantly, how to fix it.
Why Do Fitted Sheets Come Off?
1. Your Sheet Isn’t the Right Size
The most common reason? The sheet just doesn’t fit. If it’s too small, it won’t stretch far enough to grip the mattress. Too big, and it bunches up and slides off.
💡 Fix: Always check the dimensions of your mattress—including the depth—and match it with your sheet size. Queen, King, and even California King mattresses can vary widely.
2. Mattress Too Deep (or Too Shallow)
Today’s mattresses often come with extra depth or plush toppers, but not all fitted sheets are made to handle that.
💡 Fix: Look for “deep pocket” or “extra deep pocket” fitted sheets, which are designed to stay put on thicker beds.
3. Elastic Has Worn Out
Over time, the elastic band on your fitted sheet may stretch out or lose its snap, making it ineffective.
💡 Fix: If the rest of the sheet is still in good shape, consider adding sheet suspenders (corner straps) or replacing the sheet with one that has reinforced elastic all around.
4. Slick Mattress Surface
Memory foam, latex, and smooth mattress protectors can make it hard for your fitted sheet to grip, especially if the sheet isn’t anchored securely.
💡 Fix: Use a grip pad under the sheet or opt for sheets made of materials with more friction, like brushed cotton or flannel.
5. You’re a Restless Sleeper
If you move a lot in your sleep, you’re naturally tugging on your sheets all night. Combine that with any of the issues above, and you’ve got a recipe for a popped corner.
💡 Fix: Again, deep-pocket sheets and sheet straps are your best friend here.
Make Your Bed Stay Made
We spend nearly a third of our lives in bed—so having bedding that actually stays in place makes a big difference in comfort, convenience, and even quality of sleep.
Investing in the right size sheets, adding simple reinforcements like straps, or upgrading your bedding setup can stop the nightly battle with your fitted sheet—for good.
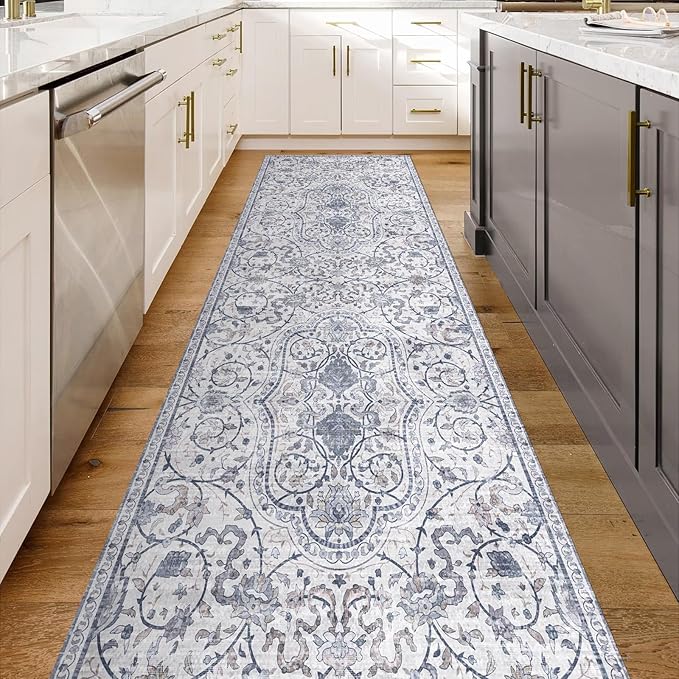
Your kitchen is one of the busiest places in your home. From meal prep to cleaning up spills, it takes a lot of foot traffic—and messes. That’s where a vinyl runner can make a big difference.
1️⃣ Protects Your Floors
A vinyl runner acts as a barrier between your floors and everyday wear and tear. It helps shield your hardwood, laminate, or tile from scratches, dents, and stains. This is especially helpful in front of sinks or stoves, where spills are most common.
2️⃣ Easy to Clean
Let’s face it: kitchens are messy. A vinyl runner can handle it. Unlike fabric rugs that absorb liquids and stains, vinyl runners wipe clean with a damp cloth or mop. No more worrying about dropping sauce or splashing water.
3️⃣ Slip-Resistant Safety
Many vinyl runners have a textured or non-slip backing to help them stay put. This can reduce the risk of slipping, especially when cooking or doing dishes. It adds peace of mind in a space where accidents can happen.
4️⃣ Comfort for Your Feet
Standing for long periods can be tough on your legs and back. A cushioned vinyl runner provides a little extra support underfoot, making kitchen tasks more comfortable.
5️⃣ Stylish and Practical
Vinyl runners come in many colors and patterns to match your kitchen décor. They add a sleek, finished look to your space while delivering practical benefits.
Small Upgrade, Big Impact
Adding a vinyl runner is an easy, affordable way to protect your floors, enhance comfort, and make cleanup a breeze. Give your kitchen the upgrade it deserves!
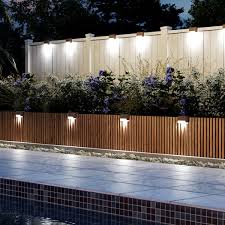
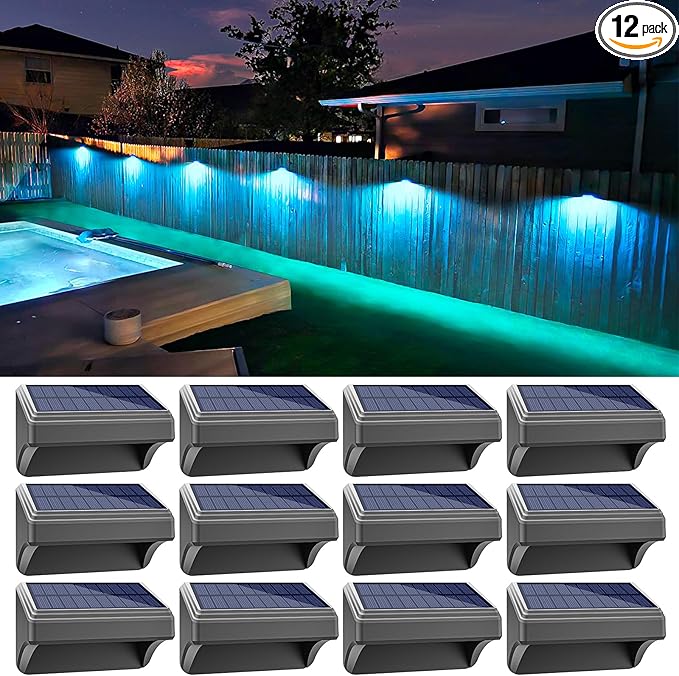
When it comes to improving your outdoor space, sometimes the simplest additions make the biggest impact. Installing solar lights on your fence or outdoor stairs is a smart, affordable, and eco-friendly way to add charm, safety, and functionality to your yard.
Why Choose Solar Lights?
No wiring required – Solar lights are powered by the sun, so there’s no need to hire an electrician or deal with tangled wires.
Energy-efficient – They charge during the day and automatically light up at night, saving energy and lowering utility bills.
Low maintenance – Once installed, they require minimal care beyond the occasional cleaning.
Stylish and versatile – From sleek modern designs to rustic lantern looks, there’s a solar light to match your style.
Fence Lighting: Subtle Beauty + Security
Adding solar lights along your fence gives your yard a warm, inviting glow while improving visibility. It also helps define your property line at night, adding a subtle layer of security.
💡 Tip: Space lights evenly for a balanced look, and choose weather-resistant models for durability.
Stair Lighting: Safety First
Outdoor stairs can be tricky to navigate at night. Solar lights mounted on or beside steps can prevent trips and falls while creating a cozy, welcoming atmosphere.
💡 Tip: Install lights at a low angle to softly illuminate each step without creating glare.
A Small Addition with Big Impact
Solar lights are an easy DIY upgrade that instantly boosts your home’s curb appeal, safety, and functionality. Whether you’re entertaining guests or simply enjoying a quiet evening outdoors, you’ll appreciate the added glow.
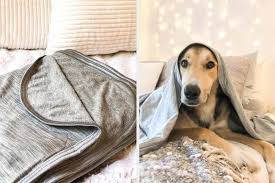
When summer heat rolls in, getting a good night’s sleep can feel impossible. Tossing, turning, and waking up sweaty are all too common when temperatures rise. That’s where cooling blankets come in—a simple solution to help you sleep comfortably even on the hottest nights.
What is a Cooling Blanket?
A cooling blanket is designed with special fabrics or technologies that help regulate your body temperature. Unlike regular blankets that trap heat, cooling blankets wick away moisture, promote airflow, and feel cool against your skin. Materials like bamboo, cotton, or advanced fibers such as Outlast® and Eucalyptus are often used.
Benefits of Using a Cooling Blanket
✅ Better Sleep Quality: Keeping your body at an optimal temperature helps you fall asleep faster and stay asleep longer.
✅ Moisture-Wicking: Cooling blankets pull sweat away from your body, helping you stay dry and comfortable.
✅ Lightweight Comfort: Many cooling blankets are thinner and more breathable, giving you that cozy feeling without overheating.
✅ Great for Hot Sleepers: If you naturally sleep warm or experience night sweats, a cooling blanket can be a game changer.
Features to Look For
When shopping for a cooling blanket, consider:
Material: Look for natural, breathable fabrics like bamboo, cotton, or Tencel.
Weight: Choose a weight that feels comfortable but not stifling.
Ease of care: Many cooling blankets are machine washable for easy upkeep.
A cooling blanket is an affordable and effective way to improve your summer sleep. Whether you’re battling heatwaves or just want to stay comfortable, it could be the small change that makes a big difference.
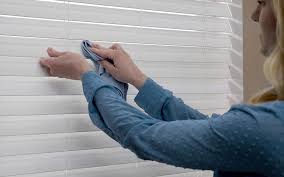
Wooden blinds bring warmth, texture, and timeless charm to any room. But when it comes to cleaning them? Let’s just say… it’s easy to put it off. Dust settles, grime builds, and suddenly those beautiful blinds are looking a little dull.
The good news? You don’t need fancy tools or harsh chemicals to bring them back to life. Just a little care—and the right technique.
Here are five easy, effective tips for cleaning wooden blinds while keeping them in great shape:
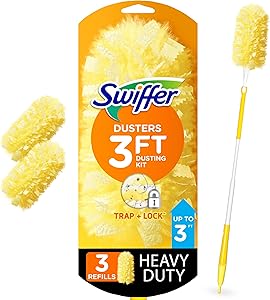
1. Dust Regularly With a Microfiber Cloth or Duster
Keeping up with dust prevents buildup and makes deep cleaning easier. Close the blinds and run a dry microfiber cloth or duster along each slat, then flip and repeat on the other side. A clean, dry sock over your hand works great too!
Work top to bottom to keep dust from falling on slats you’ve already cleaned.
2. Use a Vacuum With a Brush Attachment
If it’s been a while, a vacuum with a soft brush attachment can gently lift dust without spreading it around. Be gentle—wood can scratch easily!
Avoid using high suction or stiff bristles—these can damage the finish.
3. Damp Wipe for Stubborn Dirt
If dusting isn’t enough, lightly dampen a cloth with water and a tiny drop of mild dish soap. Wipe gently, then dry immediately with a soft towel.
Never soak wood blinds or let water sit—moisture can warp or stain the wood.
4. Tackle Sticky Spots With Care
Have spots near the kitchen? Grease and residue can collect over time. Use a damp cloth with vinegar diluted in water (50/50) for sticky areas—then dry right away.
Always test a small area first to ensure the solution doesn’t dull the finish.
5. Polish Occasionally for a Natural Shine
Want to keep your wooden blinds looking new? Use a wood-safe furniture polish or conditioner occasionally to restore shine and protect from drying out.
Avoid using polish every time you clean—once every few months is enough.
Consistency Matters
The best way to keep wooden blinds looking their best is regular care. A quick dust once a week keeps the grime away and saves you from bigger cleaning jobs later.