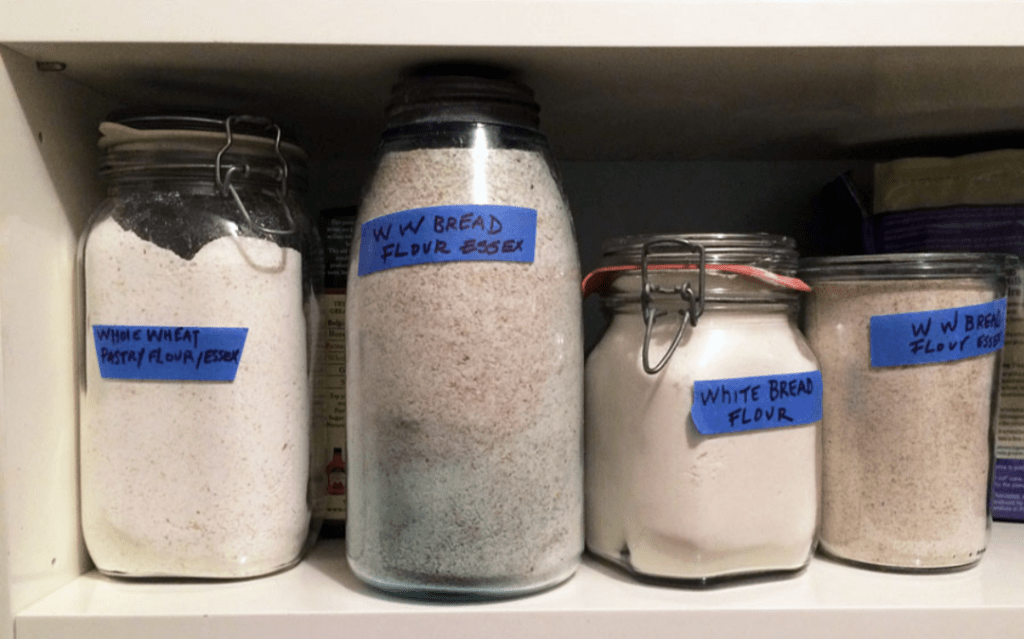
Blue painter’s tape is a versatile tool that many people underestimate. Sure, it’s great for taping up walls before painting or protecting surfaces during a renovation project, but did you know it has many other uses? Here are some of the many ways you can put blue painter’s tape to work:
Labeling: Need to label something but don’t want to make it permanent? Write on a piece of tape and stick it on the item in question.
Cable management: Use blue painter’s tape to keep cords and cables organized behind your desk or entertainment center.
Jar opener: Can’t get that pesky jar open? Wrap a piece of blue painter’s tape around the lid for extra grip.
Temporary hemming: If you need to hem your pants or skirt temporarily, use blue painter’s tape instead of sewing.
Clothing repair: Use blue painter’s tape to temporarily fix a torn hem or keep a bra strap in place.
Removing pet hair: Wrap some blue painter’s tape around your hand, sticky side out, and use it to remove pet hair from furniture and clothing.
Game night: Use blue painter’s tape to create a makeshift game board on any surface.
Decorating: Create temporary wall art by using blue painter’s tape to outline shapes or designs.
If you’re looking for a way to cool your home during the hot summer months, a whole-house fan (A whole house fan is a ventilation system installed in the ceiling of a home that draws cool outside air into the house and pushes hot, stale indoor air out through the attic or vents) might be the solution you need. Here are some of the benefits of having a whole-house fan installed in your home:
Lower Energy Bills: Whole house fans use significantly less energy than traditional air conditioning systems. This means you can save money on your energy bills while still keeping your home comfortable.
Improved Indoor Air Quality: By circulating fresh outdoor air throughout your home, a whole-house fan can help improve indoor air quality. This can be especially beneficial for individuals who suffer from allergies or respiratory problems.
Enhanced Comfort: Whole house fans provide a refreshing breeze throughout your home, making it more comfortable to live in during the hot summer months. They also help to reduce humidity levels, which can be a major source of discomfort during the summer.
Environmentally Friendly: Whole house fans are an environmentally friendly cooling option, as they use significantly less energy than traditional air conditioning systems. This makes them a great option for individuals looking to reduce their carbon footprint.
A whole house fan can help you save money on energy bills while improving indoor air quality, and enhancing comfort. If you’re looking for an effective and affordable way to cool your home during the summer months, a whole-house fan might be the perfect solution for you.
Thinking of moving or investing and need a referral for a Real Estate Broker, we can help: email us at TEAM@McDanielCallahan.com, fill in the form below or call 925-838-4300. Terry McDaniel DRE license #00941526
It’s Spring, and we have been spending a lot of time working in the yard. (so the reason for a few outdoor blog posts here) Neighbors stop to ask what we do to make our lawn look so good, one secret is edging…
Edging your lawn is an easy and effective way to do so. Edging your lawn involves creating a clean and distinct line between your lawn and any adjacent surfaces such as walkways, driveways, or flower beds. In this blog post, we’ll explore the benefits of edging your lawn and provide tips and tricks to help you achieve a perfectly edged lawn.
Improves curb appeal Edging your lawn can drastically improve the appearance of your property, adding to its curb appeal. A neatly edged lawn creates a polished look that will make your property stand out in your neighborhood. It also makes your property look well-maintained and cared for, which can increase your home’s value.
Defines your lawn’s borders Edging your lawn helps to define your lawn’s borders, creating a clear separation between your lawn and any adjacent surfaces. This can help prevent grass from encroaching onto your driveway or walkway and prevent weeds from creeping into your lawn.
Makes lawn maintenance easier Edging your lawn can make lawn maintenance easier by creating a clear separation between your lawn and any adjacent surfaces. This makes it easier to mow your lawn without worrying about cutting into your flower beds or other landscaping features.
Provides a professional look A well-edged lawn provides a professional and polished look to your property. It shows that you take pride in your home and take care of it regularly.
Now that we’ve discussed the benefits of edging your lawn, here are some tips and tricks to help you achieve a perfectly edged lawn.
Choose the right edging tool There are many different types of edging tools available, such as manual or electric edgers, rotary edgers, and even gas-powered edgers. Choose the right tool based on the size and complexity of your lawn and your level of comfort with using the tool.
Be consistent Consistency is key when edging your lawn. Try to create a uniform edge around your entire lawn, keeping the same distance from the edge of your lawn throughout the entire process.
Maintain your edging Regular maintenance is important to keep your edges looking sharp and well-defined. Use a weed trimmer or edger to maintain the edge between mowings, and re-edge your lawn as needed to keep it looking fresh.
Edging your lawn is a simple yet effective way to take your lawn care to the next level. It provides many benefits, such as improving curb appeal, defining your lawn’s borders, making lawn maintenance easier, and providing a professional look. By following these tips and tricks, you can achieve a perfectly edged lawn that will make your property stand out
Thinking of moving or investing and need a referral for a Real Estate Broker, we can help: email us at TEAM@McDanielCallahan.com, fill in the form below or call 925-838-4300. Terry McDaniel DRE license #00941526
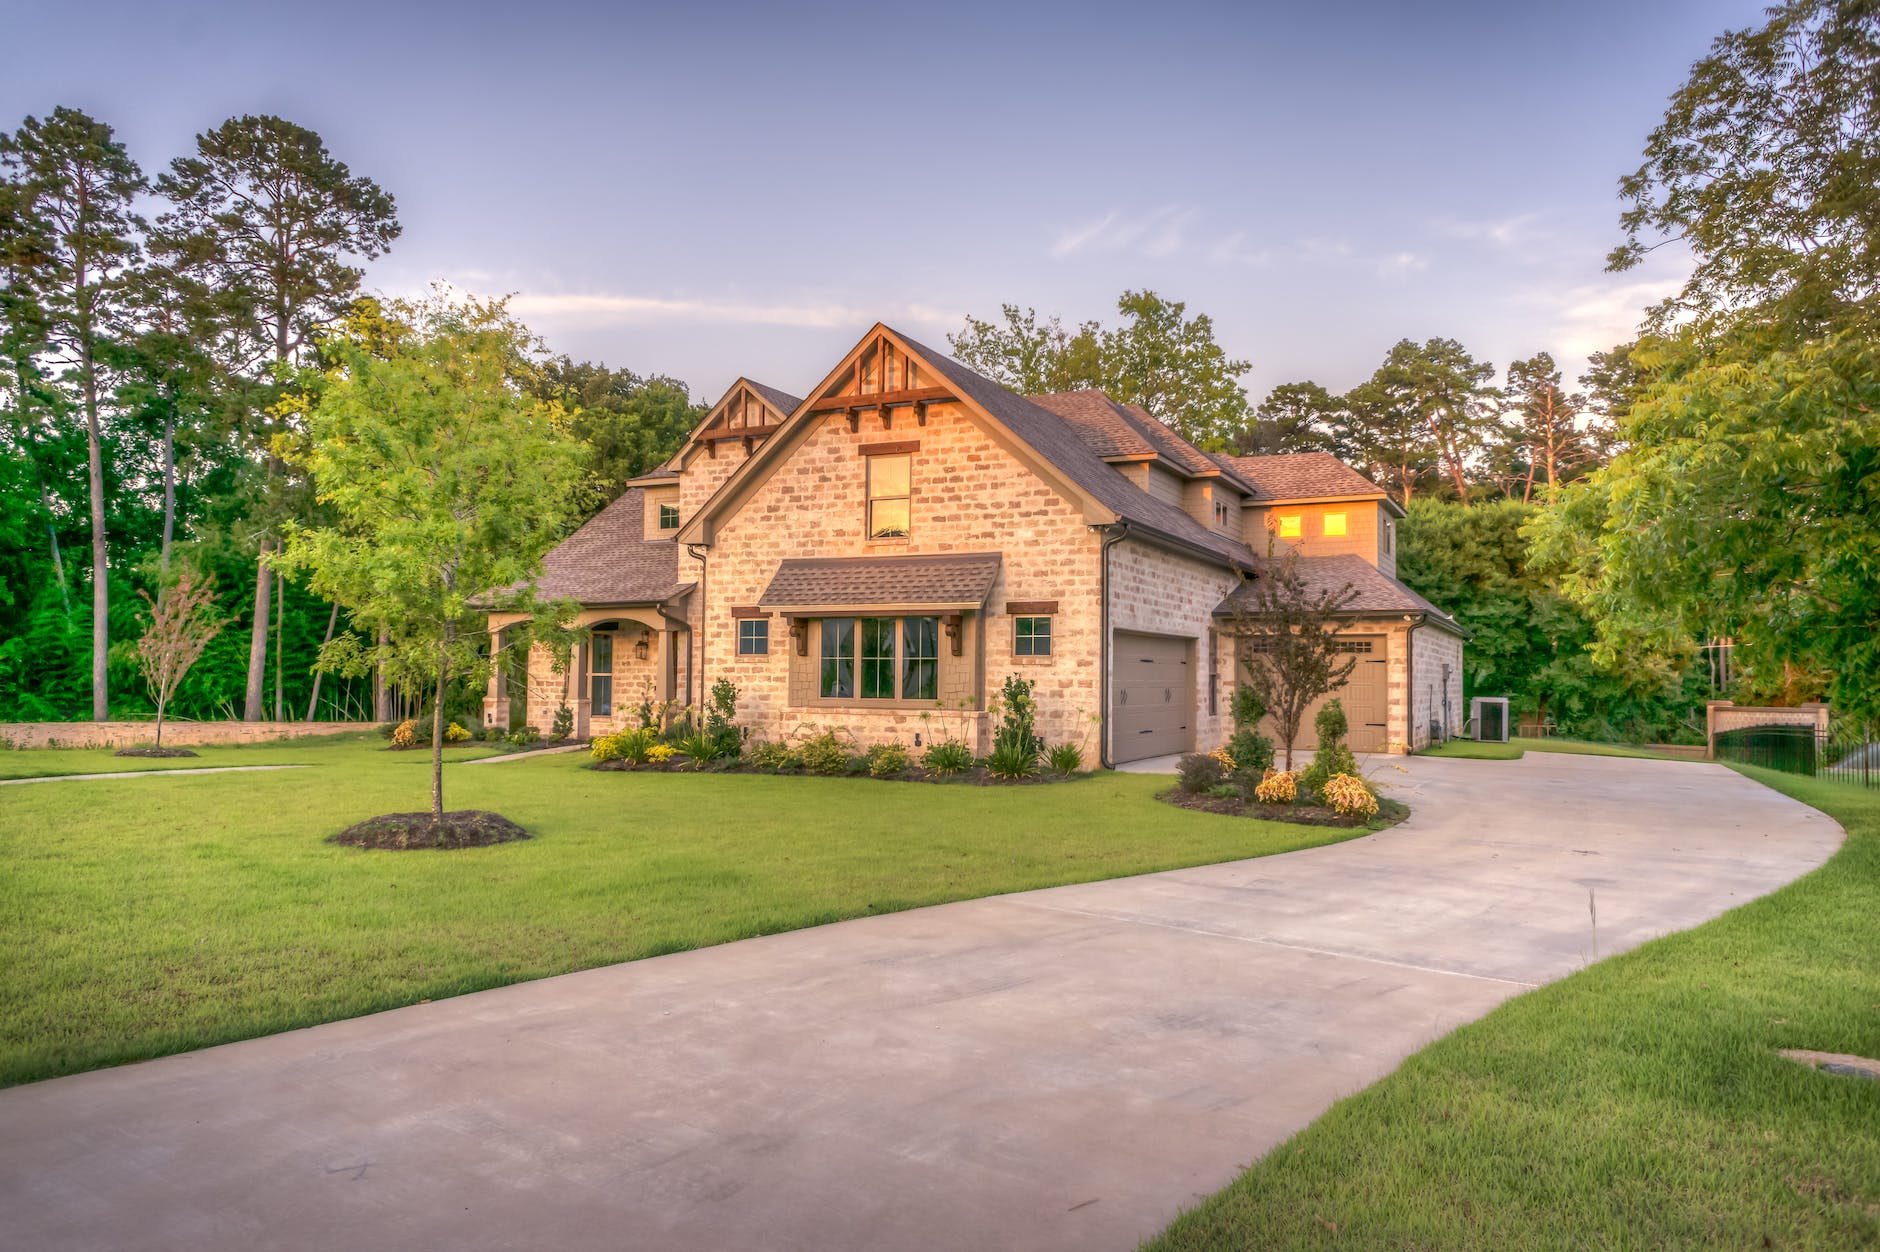
When it comes to selling your home, first impressions matter. A potential buyer’s initial impression of your home can make or break a sale. That’s why it’s essential to focus on curb appeal when preparing your home for sale. One often-overlooked element of curb appeal is mulch.
Mulch is an affordable and easy way to add a pop of color and texture to your landscaping. It not only enhances the look of your garden beds but also provides practical benefits. Mulch helps to retain moisture in the soil, suppress weeds, and regulate soil temperature.
Adding mulch to your landscaping is a quick and simple task that can have a significant impact on the overall appearance of your home. A fresh layer of mulch can instantly make your landscaping look more polished and well-maintained.
When choosing mulch, it’s important to consider the color and texture of the mulch in relation to the colors and style of your home. For example, if you have a red brick home, a dark brown or black mulch will provide a beautiful contrast. On the other hand, if you have a lighter-colored home, a lighter colored mulch may be a better fit.
Another benefit of mulch is that it can increase the perceived value of your home. Potential buyers are more likely to view a home with well-maintained landscaping and attractive curb appeal as being worth more money.
When preparing your home for sale, don’t overlook the importance of mulch. It’s a simple and affordable way to enhance the appearance of your landscaping and increase the perceived value of your home. So, whether you’re getting ready to list your home or just looking to give your curb appeal a boost, remember that mulch matters!
Keeping your lawn healthy and lush requires more than just watering and mowing. Over time, the soil underneath the grass can become compacted, depleted of nutrients, and develop thatch build-up. Topdressing is a process that can help improve the quality of the soil and promote healthy growth in your lawn.
Topdressing involves adding a layer of soil on top of your lawn. The material used for topdressing can vary, but common options include topsoil, sand, or compost. Adding topdressing can help address issues such as dry areas, thatch build-up, uneven areas, slow growth rate, and drainage problems. By adding a layer of nutrient-rich soil, you can promote healthy grass growth and improve the overall health of your lawn.
If you’re considering top-dressing your lawn, you’ll need a few tools to get started. An aerator or power rake can help break up thatch layers and prepare the lawn for topdressing. You’ll also need topdressing material, grass seed, a regular rake, a garden fork or shovel, and a lawn mower.
The process of topdressing your lawn involves several steps. First, you’ll need to prepare the lawn by breaking up any thatch layers with an aerator or power rake. Then, mow the grass short to make it easier to work with. Next, sprinkle grass seed over the lawn to help fill in any bare spots. Once the grass seed is in place, it’s time to add the top dressing. Spread a ¼-inch layer of topdressing material evenly over the entire lawn. Use a rake to work the topdressing material into the grass and ensure that it reaches the soil. After topdressing, water the lawn thoroughly to help settle the soil and activate the grass seed.
It’s important to note that after topdressing, you should avoid walking on the lawn and mowing it for at least 10 days. This will give the grass time to establish roots in the new soil and prevent any damage to the lawn. Once the 10-day period has passed, you can resume normal lawn care routines.
Topdressing your lawn can be an effective way to improve soil quality and promote healthy grass growth. By following the proper steps and using the right tools, you can help address issues such as thatch build-up, slow growth rate, and drainage problems. Remember to give your lawn time to recover after topdressing and avoid walking on it or mowing it for at least 10 days. With a little effort, you can achieve a healthy and beautiful lawn that you’ll enjoy for years to come.
Thinking of moving or investing and need a referral for a Real Estate Broker, we can help: email us at TEAM@McDanielCallahan.com, fill in the form below or call 925-838-4300. Terry McDaniel DRE license #00941526
One of the biggest challenges that homeowners face when renovating is finding the right balance between high and low-end materials. It’s important to strike a balance between quality and affordability to ensure that your renovation is both beautiful and functional. Here are some tips for balancing high and low-end materials for your home renovation.
Determine your budget: Before you begin any renovation project, it’s important to determine your budget. This will help you to identify what materials you can afford and where you need to cut costs. Consider allocating more of your budget to high-traffic areas such as kitchens and bathrooms, and less to areas that are less frequently used.
Invest in quality where it matters: When it comes to materials, it’s important to invest in quality where it matters most. For example, if you’re renovating your kitchen, consider investing in high-quality cabinets and countertops. These are items that will be used daily and will have a significant impact on the functionality and aesthetics of your space.
Mix high and low-end materials: Mixing high and low-end materials can create a unique and personalized look for your home. For example, you could pair high-end marble countertops with affordable subway tile backsplash. This will allow you to achieve the look you want while staying within your budget.
Consider second-hand materials: Don’t overlook second-hand materials when renovating your home. Reclaimed wood, vintage light fixtures, and salvaged hardware can add character and charm to your space while also being more affordable than new materials.
DIY where possible: DIY projects can help you save money on your renovation. Consider tackling simple projects such as painting or installing your own hardware to cut costs. Just be sure to leave more complex projects to the professionals to avoid costly mistakes.
Balancing high and low-end materials for your home renovation is all about finding the right balance between quality and affordability. By determining your budget, investing in quality where it matters most, mixing materials, considering second-hand options, and DIYing where possible, you can create a beautiful and functional space without breaking the bank.
Thinking of moving or investing and need a referral for a Real Estate Broker, we can help: email us at TEAM@McDanielCallahan.com, fill in the form below or call 925-838-4300. Terry McDaniel DRE license #00941526
There are certain features that I love about houses. One of my favorites is high ceilings. High ceilings can make a room feel more spacious and airy, and they can add a touch of elegance to any home. However, there is a downside to high ceilings: changing a light bulb.
Replacing a light bulb in a high ceiling can be a real challenge, especially if you don’t have the right tools or ladder. The good news is that there are a few things you can do to make the process a little easier.
First, invest in a sturdy ladder that can reach your ceiling. A step ladder may be sufficient for some rooms, but for higher ceilings, you may need an extension ladder. Make sure the ladder is stable and level before climbing up to replace the bulb.
Second, consider investing in longer-lasting bulbs. LED bulbs can last up to 25,000 hours, which means you won’t have to replace them as often. This can save you time and effort in the long run.
Third, if you’re still having trouble reaching the bulb, consider using a light bulb changer. These tools can be found at most hardware stores and allow you to change the bulb without having to climb up on a ladder.
High ceilings are a beautiful feature of any home, but they can make it difficult to replace a light bulb. With the right tools and a little bit of preparation, however, you can make the process easier and safer. And if all else fails, don’t hesitate to call in a professional to get the job done.
This is your friendly Spring Time reminder to check your Smoke and carbon monoxide (CO2) detectors. They are some of the most important safety devices in your home. These simple devices can save lives by alerting you to potential danger before it’s too late. Yet, many homeowners overlook the importance of these detectors or forget to check them regularly.
Here are a few reasons why smoke and CO2 detectors are so important:
Early Detection Saves Lives: Smoke and CO2 detectors can detect danger early and alert you before it’s too late. In the event of a fire or carbon monoxide leak, these detectors can give you and your family valuable time to evacuate and seek safety.
They are Required by Law: Smoke and CO2 detectors are required by law in most states. Neglecting to install them or failing to maintain them could result in costly fines or legal repercussions.
They are Affordable and Easy to Install: Smoke and CO2 detectors are relatively inexpensive and easy to install. Many models come with simple instructions and can be installed in a matter of minutes.
Regular Maintenance is Important: It’s not enough to simply install smoke and CO2 detectors. Regular maintenance is crucial to ensure that they are working properly. Be sure to test them regularly and replace the batteries as needed.
Peace of Mind: Knowing that you and your family are protected can give you peace of mind. Smoke and CO2 detectors can help you sleep easier at night knowing that you have taken steps to keep your home and family safe.
Smoke and CO2 detectors are essential safety devices that should not be overlooked. They are affordable, easy to install, and can save lives in the event of an emergency. Remember to test your detectors regularly and replace the batteries as needed to ensure they are working properly. By taking these simple steps, you can protect your home and family from potential danger
The kitchen is often considered the heart of a home, and a well-designed kitchen can enhance your lifestyle and add value to your property. When it comes to kitchen islands, finding the right size and proportion can make a big difference in the functionality and aesthetics of your space. In this post, I’ll guide you through some important considerations for determining the ideal size of a kitchen island in proportion to the room’s footprint.
Firstly, let’s discuss the minimum size for a built-in kitchen island. A kitchen island should be at least four feet by two feet, with an average of 36 to 42 inches of clearance all the way around. You can stretch the surrounding space to 48 inches or shrink it to 30 inches, but it’s crucial to check building codes on accessibility. If your kitchen is less than 13 feet wide, it is unlikely that a built-in island will be possible.
Secondly, it’s important to consider the height of the kitchen island. The standard height for a kitchen island is 36 inches, but if your island will also be used for dining, you should raise it to 42 inches. This height is ideal for bar stool seating and offers enough space for a breakfast bar, where you can enjoy simple meals and snacks. Make sure that bar stools have at least two feet of clearance for access and comfort.
Lastly, it’s a good idea to refer to resources like The Thirty-One Kitchen Design Rules, based on standards set by the National Kitchen and Bath Association, to ensure that your kitchen meets building codes and functional design rules. This guide offers comprehensive advice on all aspects of kitchen design, including layout, storage, and safety.
Thinking of moving or investing and need a referral for a Real Estate Broker, we can help: email us at TEAM@McDanielCallahan.com, fill in the form below or call 925-838-4300. Terry McDaniel DRE license #00941526
Garage floors are often overlooked when it comes to home improvement projects, but they can make a huge difference in the overall look and functionality of your garage. One popular option is epoxy garage floors.
Epoxy is a durable and long-lasting material that can be applied to concrete floors to provide a smooth and shiny surface. It’s also resistant to stains, chemicals, and abrasions, making it a great option for garages where spills and heavy use are common.
In addition to its functional benefits, epoxy can also enhance the aesthetic appeal of your garage. It’s available in a variety of colors and finishes, allowing you to create a custom look that complements the rest of your home.
Installing an epoxy garage floor is a relatively simple process, but it’s important to hire a professional if you aren’t into DIY projects to ensure that the job is done correctly. The process typically involves cleaning and preparing the existing concrete floor, applying the epoxy coating, and allowing it to dry and cure.
Once installed, epoxy garage floors require minimal maintenance. Regular cleaning with a mop or broom and occasional resealing can help to maintain the surface’s durability and appearance.
Epoxy garage floors are a smart investment for any homeowner looking to enhance the functionality and appearance of their garage. With its durability, low maintenance, and customizable options, it’s no wonder why epoxy is becoming such a popular choice for garage flooring.
Thinking of moving or investing and need a referral for a Real Estate Broker, we can help: email us at TEAM@McDanielCallahan.com, fill in the form below or call 925-838-4300. Terry McDaniel DRE license #00941526