Hosting friends and family for the holidays? Make your guest room a haven of comfort and warmth with these 5 thoughtful touches that are sure to make your visitors feel right at home.
1. Cozy Bedding
Nothing feels more welcoming than a comfortable bed. Invest in soft linens, extra blankets, and plush pillows to ensure your guests enjoy a restful night. Fresh, cozy bedding makes a huge difference in making them feel at ease.
2. Essential Storage & Amenities
Help your guests unpack easily with extra hangers, a luggage rack, and toiletries like soap, towels, and toiletries. Simple storage solutions keep the space tidy and organized.
3. Warm Décor & Ambiance
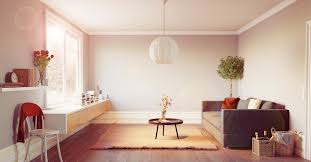
Add a personal touch with soft lighting, a few decorative items like fresh flowers or cozy throws. These small details create a homey atmosphere and make guests feel comfortable and appreciated.
4. Charging Stations & Wi-Fi Info
Set up charging stations with accessible outlets and leave Wi-Fi details easily accessible. Guests will appreciate having convenient access to power and connection without having to search.
5. Comfortable Seating & Workspace
A cozy chair or small desk can provide a dedicated spot for reading or working. These extra touches offer versatility and comfort for guests who want a quiet space.
Who doesn’t want their home to have that luxurious, polished look? You don’t need to spend a fortune to make your space feel like it’s been professionally designed. With a few simple updates and clever decorating ideas, you can elevate the feel of your home in a way that looks far more expensive than it really is.
1. Decorate with Large Art and Framed Photographs
One of the simplest and most impactful ways to make your home look more expensive is by incorporating large art pieces or framed photographs. Hanging oversized artwork creates a dramatic focal point and elevates the room’s atmosphere. Even framing family photos in a uniform, matching style can give your home a gallery-like feel. For example, one client spent just $200 framing black-and-white family photos, and guests thought it was an expensive, professionally done gallery wall. So, whether it’s vintage posters, engineering prints, or personal photos.
2. Update Hardware
Small details can make a world of difference. If you’re looking for a quick upgrade, replace outdated hardware like drawer pulls, knobs, and handles. A simple swap for sleek, modern finishes like matte black, brushed brass, or polished nickel can instantly make a kitchen or bathroom look more high-end. It’s a low-cost update that packs a punch!
3. Hang Decorative Mirrors
Mirrors not only add elegance and visual interest, but they can also make your space feel larger and brighter. A strategically placed large framed mirror can enhance the sense of luxury and depth in any room. Plus, mirrors reflect light, which instantly brightens up even the darkest corners. Try hanging mirrors with ornate frames in living rooms or bathrooms to make your space feel expansive and chic without overspending.
Making your home feel more luxurious doesn’t require a hefty budget or extensive renovations. By focusing on these simple, stylish upgrades, like large art pieces, updated hardware, and decorative mirrors, you can add instant sophistication and create an elevated atmosphere in your home. So, if you want to impress guests or just enjoy a more refined environment, start with these easy and cost-effective changes.
Winter can be challenging for houseplants, as the colder months bring shorter days, reduced sunlight, and drier indoor air from heating systems. However, with a few thoughtful adjustments, your plants can thrive until spring. Here are some essential tips to keep your greenery healthy and vibrant this winter:
1. Adjust Light Exposure
Maximize available light: Place plants near south- or west-facing windows, where they can receive the most sunlight during shorter days.
Clean windows: Dust and dirt can block light; keeping them clean ensures more light reaches your plants.
Supplement with grow lights: If natural light is insufficient, consider using LED grow lights to mimic sunlight and support photosynthesis.
2. Water Wisely
Reduce watering frequency: Plants grow more slowly in winter, meaning they need less water. Check the soil moisture before watering—if the top inch feels dry, it’s time for a drink.
Use room-temperature water: Cold water can shock plant roots, so let tap water sit out to reach room temperature before use.
Avoid overwatering: Excess water can lead to root rot, a common issue during winter when evaporation is slower.
3. Manage Indoor Humidity
Combat dry air: Heaters can drastically lower indoor humidity, which some plants dislike. Increase humidity by:
Grouping plants together.
Using a humidifier near your plants.
Placing a tray of water and pebbles beneath pots (without submerging roots).
Mist sparingly: Misting can help, but do so cautiously to avoid over-wetting leaves, which can invite fungal issues.
4. Maintain Proper Temperatures
Keep it consistent: Most houseplants prefer temperatures between 60–75°F. Avoid placing them near cold drafts or direct heat sources like radiators.
Move tropical plants: If your home gets chilly, consider relocating tropical plants to warmer rooms.
5. Dust and Rotate
Clean leaves regularly: Dusty leaves block light and reduce the plant’s ability to photosynthesize. Gently wipe leaves with a damp cloth every few weeks.
Rotate plants: Turn plants periodically to ensure even light exposure and balanced growth.
6. Fertilize Sparingly
Pause feeding: Most plants go dormant in winter and don’t need fertilizer. Resume feeding in spring when growth picks up.
7. Be Observant
Watch for pests: Dry indoor air can invite pests like spider mites. Inspect plants regularly and treat infestations promptly with insecticidal soap or neem oil.
Check for stress signs: Wilting, yellowing leaves, or stunted growth can indicate issues like under- or over-watering or insufficient light.
Winter Plant Care Benefits
Caring for your houseplants not only helps them thrive but also boosts your well-being. Their greenery adds life to your home, improves air quality, and provides a relaxing hobby to enjoy during the cold months. By nurturing them through winter, you’re investing in a flourishing indoor jungle for the rest of the year.
As the days grow shorter and the weather turns colder, our homes can start to feel a little darker and gloomier. The lack of natural sunlight can have a significant impact on our mood and overall well-being, but with a few clever tweaks, you can make the most of the daylight you do get and even make your space feel brighter and more inviting.
Here are some easy and effective ways to boost natural light indoors during the darker months:
1. Use Mirrors to Reflect Light
Mirrors are one of the simplest and most effective ways to amplify natural light in a room. By strategically placing mirrors opposite windows or in areas where light can bounce off them, you can create the illusion of more space and brightness. A large mirror or a group of smaller ones placed thoughtfully can reflect light into darker corners, making your home feel sunnier and more spacious.
Mirrors with light-colored frames or frameless mirrors will blend seamlessly with your décor while maximizing the reflective effect.
2. Opt for Light Curtains or Blinds
Heavy drapes or dark blinds may block out light, making a room feel even dimmer. Instead, choose light-colored or sheer curtains that allow more daylight to filter through. If you prefer blinds, go for ones in light, neutral shades. These subtle changes can make a world of difference in the amount of natural light entering a room.
Keep curtains open during the day to let as much light in as possible, and close them at night for warmth and privacy.
3. Use Light Colors for Walls and Furniture
Dark-colored walls and furniture can absorb light, making a room feel smaller and more cramped. Instead, opt for lighter shades such as whites, light grays, pastels, or off-whites to create a brighter, more open atmosphere. Light-colored furniture and accessories will reflect light rather than absorbing it, helping to brighten up the space.
If you’re not ready to repaint, start with smaller accents like throw pillows, rugs, and table lamps in light shades to add brightness.
4. Strategically Place Furniture
The way you arrange your furniture can make a big impact on how natural light flows throughout the room. Avoid blocking windows with large pieces of furniture, and instead, arrange seating or shelving near walls where light can bounce off. Open up the flow of the room to ensure that light doesn’t get trapped in corners.
Keep the space around windows as clear as possible to allow natural light to reach every corner of the room.
5. Maximize Natural Light in Your Entryway
If your entryway tends to be dark, consider installing a glass door, adding a transom window, or placing a mirror near the entrance. This will help draw natural light into your home as soon as you walk through the door.
Add a light-colored rug and an inviting piece of artwork to create an even brighter and more welcoming entryway.
6. Add Plants Near Windows
Not only do plants bring life and freshness to your home, but they can also help optimize light. Place them near windows to enhance your natural lighting while adding a natural, calming touch. Plus, plants can help purify the air, improving both the atmosphere and the light quality in your home.
Opt for low-maintenance plants like snake plants or succulents if you’re short on time.
By incorporating some of these strategies into your home, you can brighten up the space, enhance your mood, and make your home feel more vibrant, even when the days are short and the skies are overcast. Whether it’s with a mirror, lighter curtains, or a rearranged furniture layout, small adjustments can create big improvements in how you experience natural light indoors. Plus, who doesn’t love a bright, sunny home during the colder months?
Let the light in and enjoy the seasonal warmth—inside and out!
As temperatures drop and energy bills rise, it’s the perfect time to ensure your home is winter-ready. One often-overlooked energy saver? Insulating your hot water heater. If your unit is older or has an R-value below 24 (check the label or manual), it could be losing heat unnecessarily. Here’s how to keep it cozy and efficient.
Why Wrap Your Water Heater?
Think of a water heater insulation blanket as a jacket for your tank. Made from materials like foil or fiberglass, these wraps reduce heat loss by 25-45%. This means your water heater doesn’t have to work as hard, saving energy and lowering utility costs by 7-16%. Over the course of a year, the savings often pay for the cost of the blanket.
How to Tell If Your Water Heater Needs Wrapping
Touch Test: If your water heater feels warm, it’s losing heat.
Check the R-Value: If it’s less than 24, it’s a good candidate for insulation.
Choosing the Right Blanket
Water heater blankets come in various sizes, so make sure to pick one that fits your tank. Options range from budget-friendly foil wraps to thicker fiberglass models. Look for kits that include adhesive or straps for easy installation.
Quick Installation Tips
Turn off the water heater: Safety first!
Cut around controls: Ensure vents, knobs, and access panels are unobstructed.
Secure tightly: Use the straps provided to snugly wrap the blanket around the tank.
Bonus: Eco-Friendly and Budget-Friendly
By insulating your water heater, you’re not just saving money—you’re reducing your home’s energy consumption, which is great for the environment.
Wrapping It Up (Pun Intended)
Prepping for winter doesn’t have to be complicated. Small upgrades, like wrapping your hot water heater, can lead to big savings and a cozier home. So, grab that insulation blanket and give your water heater the winter jacket it deserves!
As the crisp autumn air rolls in, there’s nothing like turning your home into a cozy haven that invites warmth and relaxation. Whether you’re hosting friends or enjoying a quiet evening, here are a few tips to make your space feel irresistibly inviting this fall:
1. Lean into Layered Textures
Nothing says “cozy” quite like layers. Drape multiple blankets on your sofas and beds, mixing materials like chunky knits, sherpa, and lightweight throws. Swapping out summer’s linen sheets for plush flannel is a simple yet effective way to add warmth—literally and visually.
2. Light It Up
Lighting sets the mood. Embrace warm-toned lights and bring out your favorite candles. Scented candles with fall fragrances like cinnamon, pumpkin spice, or cedarwood can elevate the ambiance. Want something extra magical? String fairy lights along mantels or bookshelves for a soft, inviting glow.
3. Add Seasonal Touches
Incorporate natural elements like mini pumpkins, acorns, or dried leaves in your decor. A bowl of apples on the dining table or a vase filled with dried flowers adds a touch of autumn charm. Keep it simple and organic to stay grounded in the season.
4. Create Nooks for Relaxation
Transform a corner of your living room or bedroom into a reading nook. Add a cozy chair, a soft throw, and a small side table for your tea or coffee. This little space becomes a personal retreat to savor the season.
5. Bring in Fall Scents
Beyond candles, try simmer pots with cinnamon sticks, orange slices, and cloves, or use an essential oil diffuser with fall-inspired scents. These subtle aromas make your home feel as comforting as your favorite fall sweater.
A comfortable living space is more than just a luxury—it’s essential for your well-being and enjoyment. Whether you’re relaxing after a long day, hosting friends, or simply spending time with family, creating a cozy and inviting environment can make all the difference. Here’s how to make your home a place where comfort and enjoyment are top priorities.
Why Comfort Matters
1. Enhances Relaxation
A well-designed, comfortable space helps you unwind and relax:
Stress Reduction: A cozy environment can help lower stress levels and promote relaxation.
Restful Sleep: Comfortable bedding and a peaceful bedroom environment improve sleep quality.
2. Boosts Enjoyment
An inviting home enhances your overall enjoyment:
Entertaining Guests: A comfortable setting makes entertaining more enjoyable for both you and your guests.
Daily Happiness: Being in a space you love can lift your mood and contribute to daily happiness.
3. Supports Well-Being
A comfortable home supports your physical and mental well-being:
Health Benefits: Ergonomic furniture and good airflow contribute to physical health.
Mental Calm: A well-organized and aesthetically pleasing space promotes mental clarity and peace.
Tips for Creating a Comfortable Living Space
1. Invest in Quality Furniture
Quality furniture enhances comfort and durability:
Choose Ergonomic Pieces: Opt for chairs and sofas that support good posture and offer comfort.
Consider Fabric and Cushions: Soft, durable fabrics and comfortable cushions add to the coziness of your furniture.
2. Layer Your Textiles
Textiles add warmth and comfort to your space:
Use Throw Blankets: Drape soft throw blankets over sofas and chairs for added comfort.
Add Plush Rugs: Area rugs can add warmth and softness underfoot.
3. Optimize Lighting
Proper lighting sets the mood and enhances comfort:
Incorporate Multiple Light Sources: Use a mix of overhead, task, and ambient lighting to create a warm and inviting atmosphere.
Choose Soft Bulbs: Opt for soft, warm light bulbs for a cozy and relaxing environment.
4. Create a Cozy Atmosphere
Design elements that promote coziness:
Incorporate Warm Colors: Use warm tones like beige, soft brown, or muted greens to create a soothing environment.
Add Personal Touches: Display personal items like photos, artwork, or souvenirs to make the space uniquely yours.
5. Ensure Proper Temperature Control
Temperature plays a significant role in comfort:
Use Fans and Heaters: Invest in fans and heaters to maintain a comfortable temperature throughout the year.
Consider Window Treatments: Use curtains or blinds to regulate indoor temperature and light.
6. Maintain Cleanliness and Organization
A clean, organized space contributes to comfort:
Declutter Regularly: Keep your space tidy to reduce stress and create a more enjoyable environment.
Create Storage Solutions: Use shelves, cabinets, and baskets to keep items organized and out of sight.
7. Incorporate Nature
Bringing nature indoors can enhance comfort:
Add Houseplants: Plants improve air quality and bring a touch of nature indoors.
Use Natural Materials: Incorporate materials like wood, stone, or woven fibers to create a warm, natural feel.
8. Personalize Your Space
Customize your space to reflect your preferences:
Choose Comfortable Fabrics: Select fabrics and materials that you find pleasing and comfortable.
Create Relaxation Zones: Designate areas for relaxation, such as reading nooks or meditation spaces.
9. Include Functional Elements
Functional features add to overall comfort:
Invest in Multi-Functional Furniture: Choose furniture that serves multiple purposes, like storage ottomans or sleeper sofas.
Include Practical Accessories: Items like cozy throws, soft pillows, and a well-stocked coffee station can enhance comfort.
Creating a comfortable living space is all about designing an environment that supports relaxation, enjoyment, and well-being. By investing in quality furniture, optimizing lighting, and adding personal touches, you can transform your home into a cozy haven that enhances your daily life. Embrace these tips and make your space a place where you truly feel at ease.
For many, the beauty of a garden can be overshadowed by allergy symptoms triggered by pollen. If sneezing and sniffles are common in your life, it’s time to rethink your garden strategy. Fortunately, there are plenty of low-allergen plants that can create a beautiful and inviting outdoor space without exacerbating your allergies.
Why Choose Low-Allergen Plants?
Low-allergen plants produce less pollen, which means fewer triggers for those sensitive to allergens. By selecting the right species, you can enjoy your garden without the worry of sneezing fits and other allergic reactions. Here are some popular low-allergen plants to consider:
Recommended Low-Allergen Plants
Sage This aromatic herb not only enhances your culinary dishes but also offers beautiful foliage and flowers with minimal pollen.
Rosemary Another versatile herb, rosemary thrives in sunny spots and is known for its fragrant leaves. It’s a great addition to both gardens and kitchens.
Thyme Thyme is a hardy, low-growing plant that requires little maintenance. Its tiny flowers are less likely to trigger allergies.
Abelia This flowering shrub produces lovely blooms and is a great option for hedges. Its low pollen count makes it ideal for allergy sufferers.
Phlox With its vibrant colors, phlox adds beauty to any garden. It’s a perennial favorite that attracts fewer allergens.
Periwinkle This ground cover plant offers lovely blue flowers and thrives in various conditions. It’s a low-maintenance choice with minimal pollen production.
Tips for Reducing Allergens in Your Garden
Larger Flowers Are Better: Look for plants with larger flowers, as they are often pollinated by animals rather than the wind, resulting in lower pollen counts.
Limit Grass Areas: If you suffer from grass allergies, consider reducing lawn space. This not only helps with allergens but also lowers maintenance needs, pollution, and water consumption.
Mulch Wisely: Using mulch can help suppress weeds and reduce the need for mowing, which can stir up pollen and dust.
Creating an allergy-friendly garden is achievable with careful plant selection and thoughtful landscaping. By incorporating low-allergen plants like sage, rosemary, and phlox, you can enjoy a beautiful outdoor space without the sneezing fits. Additionally, reducing grassy areas can further alleviate allergy symptoms.
Living in a clutter-free, organized home not only enhances your living space but also brings a sense of calm and order to your daily life. One of the simplest yet most effective ways to maintain a tidy home is by keeping a donation box handy. This small change can have a big impact on reducing clutter and helping you stay organized. Here’s how you can use a donation box to simplify your home.
The Concept of the Donation Box
The idea is simple: place a box in a convenient location, such as your closet or laundry room, and use it to collect items you no longer need or use. This box serves as a designated spot for anything you decide to part with, making the decluttering process more manageable and continuous.
Benefits of Keeping a Donation Box Handy
Continuous Decluttering: By having a donation box readily available, you can declutter your home on an ongoing basis. Instead of waiting for a big spring cleaning session, you can gradually remove items you no longer need, keeping your space consistently tidy.
Ease of Use: The donation box simplifies the process of deciding what to keep and what to donate. Whenever you come across an item that you no longer use, you can quickly place it in the box without having to overthink or delay the decision.
Encourages Minimalism: Keeping a donation box encourages a minimalist mindset. It prompts you to regularly evaluate your belongings and focus on what truly adds value to your life, rather than holding onto unnecessary items.
Helps Others: Donating items you no longer need is a great way to give back to your community. Your gently used clothes, toys, and household items can benefit those in need, making your decluttering efforts even more rewarding.
How to Set Up and Use Your Donation Box
Choose a Location: Select a spot in your home that is easily accessible. The closet or laundry room are ideal locations because they are places you visit frequently and are often associated with sorting through belongings.
Use a Suitable Container: Find a sturdy box or bin that can hold a variety of items. It doesn’t have to be fancy—a cardboard box, plastic bin, or reusable shopping bag will do the trick.
Label the Box: Label the box clearly with “Donations” so everyone in your household knows its purpose. This can also serve as a gentle reminder to regularly add items to the box.
Set a Donation Routine: Once your donation box is full, make it a habit to take it to your local donation center. Establish a routine, such as donating once a month or whenever the box fills up, to ensure items are regularly leaving your home.
Involve the Whole Family: Encourage everyone in your household to participate in using the donation box. Teach children the value of giving and involve them in the process of selecting items to donate. This not only helps maintain a clutter-free home but also instills good habits and values in your children.
Incorporating a donation box into your home is a small yet impactful way to simplify your living space. By continuously decluttering, making quick decisions about what to keep, and regularly donating items, you can create a more organized, peaceful, and minimalist environment. Plus, you’ll be contributing to your community by providing others with items they might need. Embrace the power of the donation box and enjoy the benefits of a simplified home.
In real estate, every detail counts, and color plays a crucial role in shaping buyers’ perceptions and decisions. Whether you’re staging a home for sale or decorating your own space, understanding the psychological effects of color can significantly enhance your strategy.
The Power of Color Psychology
Colors evoke emotions and influence mood in profound ways. When potential buyers step into a property, the colors they encounter can subconsciously affect how they feel about the space. Here’s a breakdown of how different colors can impact real estate:
1. Neutral Tones: Versatile and Appealing
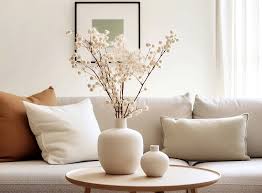
Neutral colors like white, beige, and light gray are popular choices for home interiors. They create a sense of spaciousness, cleanliness, and neutrality, which can appeal to a wide range of buyers. Neutral tones also provide a blank canvas, allowing buyers to envision their own furniture and décor in the space.
2. Warm Colors: Inviting and Cozy
Warm colors such as shades of red, orange, and yellow can create a welcoming atmosphere. They stimulate emotions and promote a sense of comfort and intimacy. In living rooms or dining areas, warm hues can make buyers feel at home and encourage social interaction.
3. Cool Colors: Calming and Serene
Cool colors like blue, green, and purple evoke feelings of tranquility and relaxation. These colors are ideal for bedrooms, bathrooms, and home offices, where a serene atmosphere is desirable. Cool tones can also convey a sense of sophistication and modernity.
4. Accent Colors: Adding Personality
Strategic use of accent colors can inject personality and style into a property. Bold accents like deep blues, rich greens, or vibrant yellows can draw attention to architectural features or highlight specific areas of a room. However, it’s essential to use accents sparingly to avoid overwhelming potential buyers.
Applying Color Psychology in Real Estate
1. Staging for Success
When staging a property for sale, consider the target market and the desired emotional response. Use neutral tones for walls and large furniture pieces to create a sense of space and neutrality. Incorporate warm accents like cushions, throws, or artwork to add warmth and create a welcoming ambiance.
2. Exterior Appeal
The exterior color scheme of a home also plays a critical role in curb appeal. Neutral tones with contrasting accents can make a home appear well-maintained and inviting. Consider the architectural style of the property and the surrounding environment when choosing exterior colors.
3. Personalization vs. Universality
While personal preference influences color choices, sellers should prioritize universal appeal when preparing a home for sale. Opting for neutral and universally liked colors can broaden the property’s appeal and attract a broader range of potential buyers.
Color psychology is a powerful tool in real estate marketing and home staging. By understanding the emotional and psychological impact of colors, sellers and real estate professionals can create environments that resonate with buyers’ emotions and aspirations. Whether preparing a property for sale or designing a dream home, harnessing the power of color can make a significant difference in attracting buyers and achieving a successful sale.