Why Microfiber Towels Are a Cleaning Game-Changer
When it comes to cleaning smarter—not harder—microfiber towels… Whether you’re wiping down windows, drying your car, or dusting your shelves, these little cloths pack a big punch.
What Is Microfiber, Anyway?
Microfiber is made of super fine synthetic fibers—usually polyester and polyamide—that are smaller than a human hair. The tiny fibers are split during production, creating more surface area and allowing them to trap dirt, dust, and moisture far more effectively than regular cotton cloths.
Why Microfiber Towels Are a Must-Have
🧼 1. They Clean Without Chemicals
Thanks to their ultra-fine fibers, microfiber towels can grab grime and bacteria using just water. Great for eco-conscious or allergy-sensitive households.
🧽 2. Super Absorbent
Microfiber holds up to 7x its weight in water, making it perfect for spills, drying dishes, or even drying off the dog.
🌟 3. Streak-Free & Lint-Free Finish
Say goodbye to streaks on your windows, mirrors, and stainless steel. These towels leave surfaces shiny and clean without lint residue.
💪 4. Durable & Long-Lasting
With proper care, microfiber towels can last hundreds of washes, saving you money and reducing waste.
🌬️ 5. Fast Drying
They dry quickly, which makes them less likely to develop odors or harbor bacteria.
Best Uses for Microfiber Towels
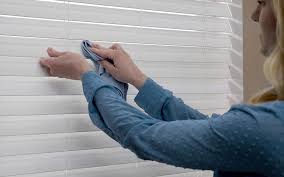
- Cleaning windows and mirrors
- Dusting electronics and surfaces
- Wiping down kitchen counters and appliances
- Drying cars without scratching paint
- Polishing furniture or chrome
- Removing pet hair from fabric surfaces
How to Care for Microfiber Towels
To keep your microfiber towels working like new:
- Wash separately (especially from cotton)
- Use cold or warm water—not hot
- Avoid fabric softener (it clogs the fibers)
- Air dry or use low heat in the dryer
Microfiber towels may look simple, but don’t underestimate their power. They’re tough on messes, gentle on surfaces, and a smart swap for wasteful paper towels or ineffective rags.
So if you haven’t stocked up yet, now’s the time. Once you start using microfiber, you’ll wonder how you ever cleaned without it.