A cluttered desk can make it harder to stay focused and productive throughout the day. Papers pile up, sticky notes get lost, and important reminders can easily slip through the cracks. Sometimes a small, simple tool can make a big difference in how organized and efficient your workspace feels.
One helpful solution is a desktop glass whiteboard.
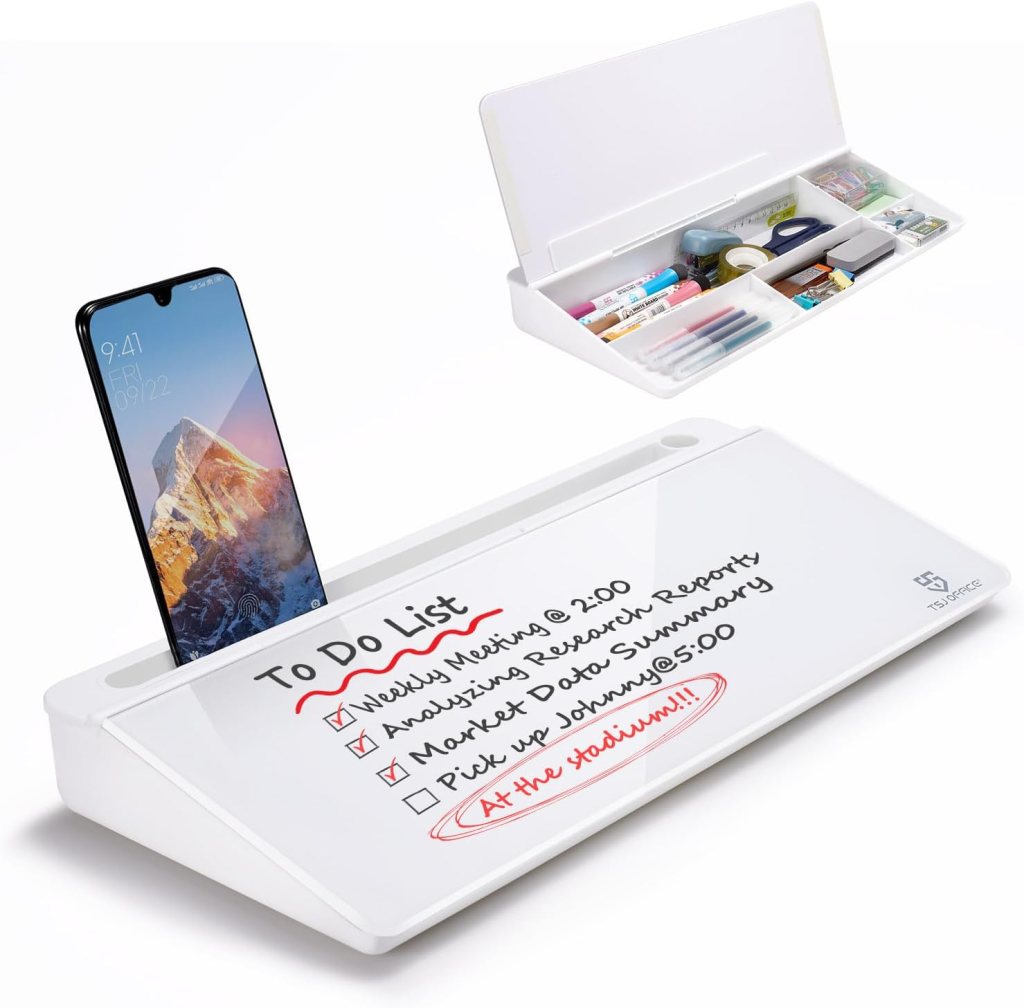
Designed to sit neatly between your keyboard and monitor, a desktop whiteboard helps maximize your work area while keeping important notes directly in front of you. The angled design makes it comfortable to read and write, and it can even double as a slight keyboard stand depending on your setup.
The smooth glass dry-erase surface allows you to quickly jot down reminders, to-do lists, meeting notes, or ideas throughout the day. When you’re finished, it wipes clean easily so you can start fresh again. Unlike paper notes that pile up or get thrown away, a reusable whiteboard helps keep your workspace tidy.
Another useful feature is the built-in storage. Many desktop whiteboards include a hidden drawer where you can store markers, erasers, or other small desk accessories. This helps reduce clutter while keeping the tools you need within reach.
Some models also include accessory trays along the top or side, giving you a convenient place to hold your phone, notepad, or extra markers. Instead of spreading items across your desk, everything stays organized in one compact space.
A desktop whiteboard can be useful for many different purposes. You might use it to track daily tasks, write quick reminders, plan your schedule, or brainstorm ideas during the workday. Because it sits directly in your line of sight, it helps keep your priorities front and center.
For people who work from home, study, or spend long hours at a computer, having a clear and organized workspace can make a noticeable difference in productivity and focus.
Sometimes the best productivity tools are the simplest ones. A desktop whiteboard gives you a clean, reusable space to capture ideas, stay organized, and keep your desk looking neat and efficient every day.