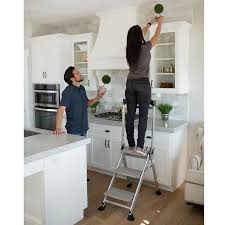
It’s not glamorous. It doesn’t require charging. It doesn’t even have Wi-Fi. But the step stool? It just might be one of the most useful tools in your entire home.
From reaching that top shelf in the pantry to helping little ones brush their teeth at the sink, a good step stool is the kind of household essential you don’t realize you need—until you need it.
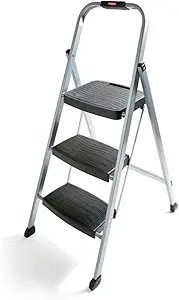
Small But Mighty: Everyday Uses for a Step Stool
1. Reaching Higher (Safely!)
No more wobbling on chairs or balancing on your tiptoes. A sturdy step stool keeps you safe while accessing top cabinets, changing lightbulbs, or hanging decorations.
2. Kitchen Helper
Whether you’re grabbing a baking dish from the top shelf or involving kids in cooking, a step stool brings everything down to a safer, reachable level.
3. Bathroom Boost
For kids learning independence, a step stool helps them wash hands, brush teeth, or even help put laundry away—all while feeling capable and grown-up.
4. Closet Climber
Need to grab seasonal clothes from the top shelf or stow away those bulky comforters? A step stool makes the job easier (and quicker).
5. Home Projects
Whether you’re painting a wall, dusting a ceiling fan, or installing curtains, a step stool gives you just the right height—without the bulk of a ladder.
Tips for Choosing the Right One
- Look for stability – Rubber feet, a wide base, and solid construction are key.
- Consider portability – A foldable or lightweight design makes it easy to move and store.
- Think multi-use – Some stools double as seats, storage, or even plant stands!
A Small Tool That Lifts You Up (Literally)
Sometimes it’s the simplest things that make the biggest difference. A step stool won’t change your life—but it sure makes life easier. And safer. And a little more within reach.
So if you don’t already have one (or two), it might be time to step up your home game—literally.