Effortless Furniture Moving: The Benefits of Furniture Movers

Moving heavy furniture can be a daunting task, often leading to scratches, scuffs, and strained muscles. However, with the help of furniture movers, you can slide your furniture effortlessly across various surfaces without causing damage or exerting excessive effort. In this blog post, we’ll explore the benefits of using furniture movers and how they can make your life easier.

What Are Furniture Movers?

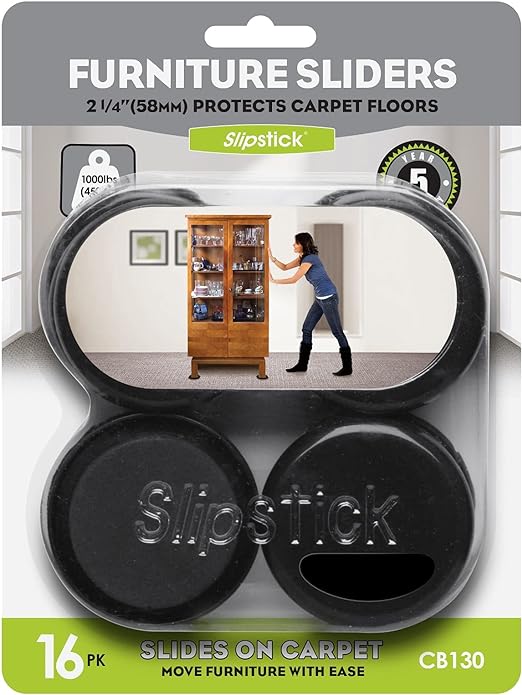
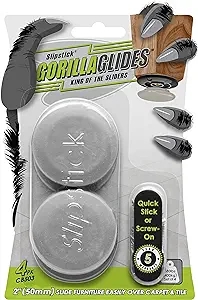
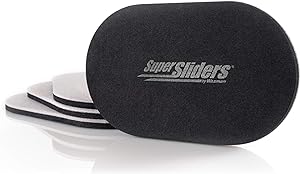
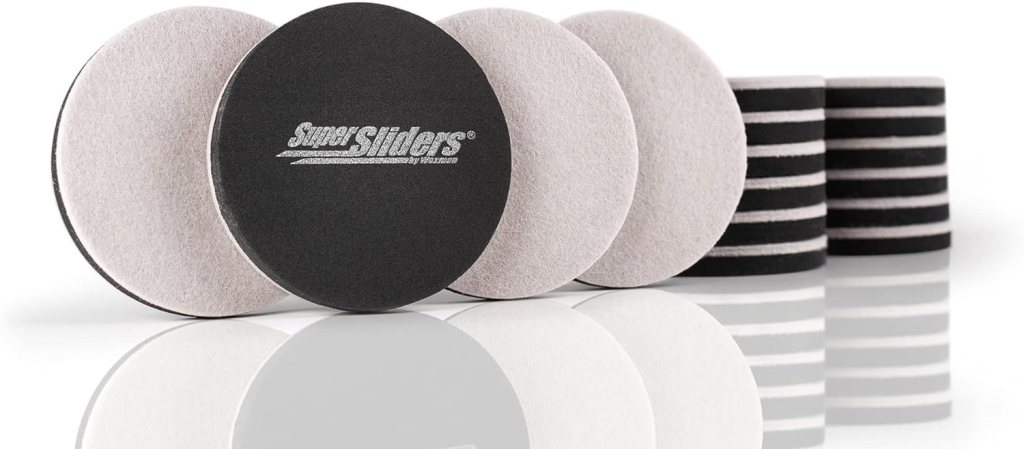
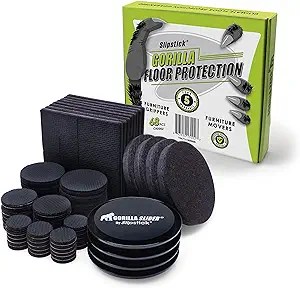
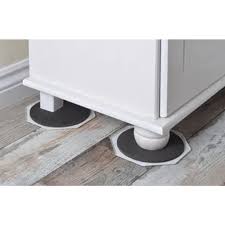
Furniture movers, also known as sliders or gliders, are small, often disk-shaped tools that are placed underneath the legs or corners of heavy furniture. These sliders are typically made of durable materials like plastic or rubber and have smooth surfaces that allow furniture to glide easily across floors without scratching or damaging them.

Benefits of Using Furniture Movers

  1. Protect Your Floors: One of the primary benefits of furniture movers is their ability to protect your floors from scratches, dents, and scuffs. By reducing friction between the furniture and the floor, sliders prevent damage caused by dragging or sliding heavy items.
  2. Effortless Moving: Furniture movers make moving heavy furniture much easier and less strenuous. Instead of lifting and carrying heavy items, you can simply slide them across the floor with minimal effort, reducing the risk of strain or injury.
  3. Versatility: Furniture movers can be used on various surfaces, including hardwood, tile, laminate, carpet, and vinyl. Whether you’re rearranging furniture in your living room or moving appliances in the kitchen, sliders provide a versatile solution for easy mobility.
  4. Preserve Your Furniture: In addition to protecting your floors, furniture movers also help preserve the integrity of your furniture. By eliminating the need to lift and drag heavy items, sliders reduce the risk of damage to the furniture itself, such as scratches, dents, or loose joints.

How to Use Furniture Movers

Using furniture movers is simple:

  1. Place a slider under each leg or corner of the furniture you want to move.
  2. Once in position, gently push or pull the furniture in the desired direction. The sliders will allow it to glide smoothly across the floor.
  3. When you’ve reached the desired location, remove the sliders and enjoy your newly arranged space.

Furniture movers are a simple yet effective solution for moving heavy furniture with ease and preventing damage to your floors and furniture. Whether you’re rearranging your home or preparing for a move, sliders provide a convenient and versatile way to make furniture mobility effortless. Invest in a set of furniture movers and say goodbye to the hassle of heavy lifting and potential floor damage.

Protect Your Floors and Furniture: Non-Slip Furniture Pads

Your floors and furniture are valuable investments that deserve protection. Non-slip furniture pads offer a simple yet effective solution to prevent scratches, scuffs, and damage caused by moving furniture. Let’s explore the benefits of non-slip furniture pads and how to use them to safeguard your floors and furniture.

Why Use Non-Slip Furniture Pads?

  1. Floor Protection: Non-slip furniture pads act as a barrier between your furniture and the floor, preventing scratches, dents, and marks caused by sliding or dragging.
  2. Furniture Stability: These pads provide stability and prevent furniture from shifting or sliding, reducing the risk of accidents and injuries caused by unstable furniture.
  3. Noise Reduction: By cushioning the contact between furniture and floors, non-slip pads help reduce noise caused by moving chairs, tables, and other furniture.
  4. Extended Furniture Lifespan: Protecting your furniture from scratches and damage helps maintain its appearance and extend its lifespan, preserving its value over time.

Choosing the Right Pads

When selecting non-slip furniture pads, consider factors such as:

  • Material: Look for pads made from durable materials such as rubber, felt, or silicone, which provide excellent grip and protection.
  • Size: Choose pads that match the size and shape of your furniture legs or base for optimal coverage and stability.
  • Adhesive: Some pads come with adhesive backing for easy installation, while others simply grip the furniture surface without adhesive.

Where to Use Non-Slip Pads

Non-slip furniture pads can be used on various types of furniture, including:

  • Chairs
  • Tables
  • Sofas and couches
  • Beds
  • Cabinets and dressers
  • Entertainment centers

How to Install Non-Slip Pads

  1. Clean the Surface: Ensure the furniture legs or base are clean and free of dust and debris.
  2. Attach the Pads: Peel off the backing from adhesive pads and press them firmly onto the bottom of the furniture legs or base. For non-adhesive pads, simply place them underneath the furniture.
  3. Check Stability: Once installed, test the furniture to ensure it is stable and does not slide or wobble.

Maintenance Tips

  • Regularly check and replace worn or damaged pads to maintain optimal protection.
  • Clean the pads and furniture legs periodically to remove dirt and debris that may affect grip.
  • When moving furniture, lift rather than drag to avoid damaging both the furniture and the pads.

Non-slip furniture pads are an affordable and effective way to protect your floors and furniture from damage while improving stability and reducing noise. By choosing the right pads and installing them correctly, you can safeguard your home and preserve the beauty and longevity of your floors and furniture for years to come.

Crafting Your Perfect Sanctuary: Creating a Reading Nook and Home Office

Finding moments of peace and relaxation can feel like a luxury. But in truth, it’s a necessity for our mental well-being. One way to cultivate tranquility in your home is by creating a space just for you—a reading nook that doubles as a home office. Let’s explore how to craft your perfect sanctuary where you can unwind, read, work, and simply be.

Embrace Comfort

The cornerstone of any reading nook or home office is comfort. Choose a cozy chair or chaise lounge where you can sink in and forget about the world for a while. Look for plush cushions, soft upholstery, and good lumbar support. Remember, this is your sanctuary, so prioritize your comfort above all else.

Lighting Matters

Good lighting is essential for both reading and working. Position your reading nook near a window to take advantage of natural light during the day. Invest in a quality reading lamp for evening hours. Adjustable lighting is ideal, allowing you to set the ambiance for different activities.

Personalize Your Space

Make your reading nook and home office uniquely yours by adding personal touches. Display your favorite books on nearby shelves or in a small bookcase. Hang artwork or photographs that inspire you. Incorporate elements that bring you joy and reflect your personality.

Declutter and Organize

Clutter can disrupt the tranquility of your space and hinder productivity. Keep your reading nook and home office tidy by organizing books, papers, and supplies. Invest in storage solutions like baskets, bins, or shelves to keep everything in its place. A clutter-free environment fosters a clear mind.

Blend Functionality and Serenity

Your reading nook should serve as a haven for relaxation, but it can also be a functional workspace. Choose furniture that multitasks, such as a desk with ample storage or a side table that can hold your coffee mug and laptop. Strike a balance between functionality and serenity to create a space that meets all your needs.

Bring Nature Indoors

Incorporating elements of nature can enhance the peaceful ambiance of your reading nook. Place a potted plant or vase of fresh flowers nearby to add color and life to your space. Natural elements can have a calming effect and help you feel more connected to the outdoors, even when you’re indoors.

Unplug and Unwind

Lastly, make your reading nook a tech-free zone, at least during designated relaxation times. Turn off your phone, step away from the computer, and allow yourself to fully disconnect. Use this time to immerse yourself in a good book, practice mindfulness, or simply enjoy the silence.

Creating a space in your home dedicated to relaxation is essential for your well-being. Whether it’s a cozy reading nook, a functional home office, or a combination of both, prioritize comfort, personalization, and tranquility.

What to Look for in a Floor Cleaner for Laminate Flooring

Laminate flooring has become a popular choice for homeowners seeking the look of hardwood or tile without the hefty price tag. However, to maintain its beauty and longevity, proper cleaning is essential. Here’s what to look for in a floor cleaner for laminate flooring:

Gentle Formulation

When selecting a floor cleaner for laminate flooring, opt for a gentle formulation. Harsh chemicals can damage the protective layer of laminate, leading to dullness and premature wear. Look for cleaners specifically designed for laminate floors, which are typically pH-balanced and free of harsh abrasives.

Damp Mopping Capability

Unlike some other types of flooring, laminate floors require damp mopping rather than wet mopping. Too much moisture can seep into the seams and cause warping or swelling. Choose a floor cleaner that allows for damp mopping, providing just enough moisture to clean the surface without saturating it.

Non-Streaking Formula

Streaks and residue left behind by floor cleaners can detract from the beauty of laminate flooring. Look for a cleaner with a non-streaking formula that leaves floors sparkling clean without any unsightly streaks or film. This will ensure that your laminate floors maintain their sleek appearance.

Easy-to-Use Design

Cleaning your floors should be a hassle-free task. Look for a floor cleaner that is easy to use, whether it comes in a spray bottle, ready-to-use solution, or concentrate that can be diluted with water. A convenient design will make cleaning your laminate floors a quick and efficient process.

Safe for Pets and Children

If you have pets or children in your home, it’s essential to choose a floor cleaner that is safe for them. Look for products that are non-toxic and free from harmful chemicals, ensuring the health and safety of your family and furry friends.

Environmentally Friendly

For those who are eco-conscious, consider opting for an environmentally friendly floor cleaner. Look for products that are biodegradable, phosphate-free, and made from sustainable ingredients. Not only will you be protecting the environment, but you’ll also create a healthier indoor space for your family.

Maintaining the beauty of laminate flooring requires the right cleaning products. When choosing a floor cleaner, prioritize gentle formulations, damp mopping capability, non-streaking formulas, ease of use, safety, and environmental friendliness. With the right cleaner, you can keep your laminate floors looking like new for years to come.

Don’t Forget! Degrease Your BBQ This Spring for a Sizzling Summer

It’s time to dust off the barbecue grill and prepare for the upcoming summer season of outdoor cooking . While the prospect of firing up the grill for backyard gatherings and cookouts is exciting, it’s essential to remember an often overlooked yet crucial step: degreasing your BBQ. Here’s why this task deserves a prime spot on your spring cleaning checklist and how to tackle it.

The Importance of Degreasing

Over time, the grates and surfaces of your barbecue accumulate layers of grease, oil, and food residue from previous cooking sessions. Not only can this buildup affect the flavor of your grilled delights, but it also poses potential health hazards. Grease buildup can become a breeding ground for harmful bacteria and increase the risk of flare-ups and fires during cooking. Degreasing your BBQ helps maintain hygiene, prevent safety hazards, and ensure optimal grilling performance.

Spring Cleaning Checklist

As you prepare your outdoor space for the season ahead, don’t forget to include BBQ degreasing in your spring cleaning routine. Here’s a step-by-step guide to help you get started:

  1. Gather Supplies: Equip yourself with gloves, a grill brush or scraper, dish soap, warm water, a sponge or cloth, and a bucket.
  2. Preheat the Grill: Start by preheating the grill for about 15 minutes. This will soften stubborn grease and make it easier to remove.
  3. Scrub the Grates: Using a grill brush or scraper, scrub the grates vigorously to remove any stuck-on debris and grease buildup. Focus on both the top and bottom surfaces of the grates.
  4. Clean the Interior: Remove the grates and set them aside. Wipe down the interior surfaces of the BBQ, including the burner covers, heat plates, and walls, using warm soapy water and a sponge or cloth.
  5. Degrease the Grates: In a bucket, mix warm water with a small amount of dish soap. Submerge the grates in the soapy water and let them soak for several minutes. Then, scrub the grates again to remove any remaining grease and residue.
  6. Rinse and Dry: Rinse the grates and interior surfaces thoroughly with clean water to remove soap residue. Allow them to air dry completely before reassembling the grill.
  7. Inspect and Maintain: Take this opportunity to inspect other components of your BBQ, such as the burner tubes and igniter, for signs of wear or damage. Replace any worn parts to ensure optimal performance.

By incorporating BBQ degreasing into your spring cleaning routine, you’ll set the stage for a safe, enjoyable, and delicious summer of outdoor cooking adventures. Remember to clean your grill regularly throughout the season to maintain hygiene and prevent grease buildup. With a clean and well-maintained BBQ, you can savor every moment of summer gatherings with family and friends.

Prevent Weeds Before They Sprout: 3 Tips to Prep Your Lawn for a Weed-Free Summer

As the vibrant hues of spring begin to bloom, it’s time to prepare your lawn for the upcoming season. While lush green grass is the goal, pesky weeds can quickly overrun your yard if not addressed early on. To ensure a weed-free summer, here are three essential tips to get your lawn in top shape:

1. Early Intervention with Pre-Emergent Herbicides

The key to weed control is tackling the issue before it becomes a problem. Pre-emergent herbicides are your first line of defense against weeds, as they work to prevent weed seeds from germinating in the soil. Apply a quality pre-emergent herbicide early in the spring to target common summer weeds such as crabgrass and dandelions. This proactive approach stops weeds in their tracks, giving your grass a fighting chance to thrive.

2. Implement Proper Lawn Maintenance Practices

A healthy lawn is better equipped to resist weed invasions. Start by maintaining the proper mowing height for your grass type, as taller grass shades the soil, making it less hospitable for weed growth. Aim to mow frequently but avoid cutting more than one-third of the grass blade length at a time. Additionally, ensure your lawn receives adequate water and nutrients by following a regular watering and fertilization schedule. Well-fed and hydrated grass will develop strong root systems, crowding out weeds and creating a dense turf that’s less susceptible to invasion.

3. Revitalize Your Lawn Through Aeration and Overseeding

Over time, soil compaction can hinder grass growth and create ideal conditions for weed proliferation. Combat this issue by aerating your lawn, which involves removing small cores of soil to alleviate compaction and improve air and water penetration. Follow up with overseeding to introduce new grass seed varieties and fill in thin or bare areas. The newly seeded grass will establish quickly, outcompeting weeds for space and resources. Consider overseeding with a grass variety known for its vigorous growth and ability to withstand weed pressure, such as tall fescue or perennial ryegrass.

Don’t let weeds sabotage your lawn’s beauty and vitality this summer. By taking proactive steps to prepare your lawn for the growing season, you can create an environment where lush, healthy grass thrives while weeds struggle to gain a foothold. With early intervention using pre-emergent herbicides, proper lawn maintenance practices, and revitalization through aeration and overseeding, you’ll be well on your way to enjoying a weed-free oasis in your backyard all summer long.

4 Compelling Reasons Why Power Washers Are Essential Tools

Power washers, also known as pressure washers, have become indispensable tools for homeowners and professionals alike. With their ability to blast away dirt, grime, and stains with ease, power washers offer a range of benefits that make them a must-have for any toolkit. Let’s explore four compelling reasons why power washers are essential tools:

  1. Efficient Cleaning Power: Power washers deliver high-pressure water streams that can quickly and effectively clean a variety of surfaces, including driveways, sidewalks, decks, fences, and siding. With their ability to remove built-up dirt, mold, mildew, and stubborn stains, power washers make cleaning tasks faster, easier, and more efficient than traditional methods like scrubbing or hosing.
  2. Time-Saving Convenience: Say goodbye to hours spent scrubbing surfaces with a brush or sponge – power washers can tackle cleaning jobs in a fraction of the time. With their powerful jets of water, power washers can cover large areas quickly, allowing you to complete cleaning projects in record time and freeing up more time for leisure activities or other household chores.
  3. Versatility and Adaptability: Power washers come with a range of nozzles and attachments that allow you to customize the water pressure and spray pattern to suit different surfaces and cleaning tasks. Whether you’re blasting away grime from concrete or gently rinsing delicate surfaces like windows or outdoor furniture, power washers offer versatility and adaptability for a variety of cleaning needs.
  4. Cost-Effective Maintenance: Regular cleaning and maintenance can help extend the lifespan of outdoor surfaces and equipment, saving you money on costly repairs or replacements in the long run. By investing in a power washer, you can keep your home, driveway, and outdoor spaces looking pristine year-round, preventing dirt and grime from accumulating and causing damage over time.

Power washers are more than just cleaning tools – they’re time-saving, versatile, and cost-effective solutions for a wide range of outdoor maintenance tasks. From efficient cleaning power to unexpected benefits like spider repellent, power washers offer a compelling combination of practicality and humor that makes them indispensable additions to any homeowner’s toolkit.

Enhance Your Home’s Style and Efficiency: Upgrading Your Faucet with an Aerator

Are you looking to give your kitchen or bathroom a fresh, updated look while also saving money on your water bill? Look no further than upgrading your faucet and adding an aerator. This simple yet impactful home improvement project can enhance both the aesthetics and functionality of your space. Here’s why you should consider making the switch:

  1. Improved Aesthetics: Outdated faucets can drag down the overall look of your kitchen or bathroom. By replacing your old faucet with a modern, stylish option, you can instantly elevate the appearance of the room. Choose a faucet that complements your existing decor and reflects your personal style for a cohesive and polished look.
  2. Enhanced Functionality: In addition to improving aesthetics, upgrading your faucet can also enhance functionality. Look for features such as single-handle operation, pull-out sprayers, and touchless technology to make everyday tasks like washing dishes and hands-free operation a breeze. Choose a faucet with a swivel spout for added convenience and versatility.
  3. Water Conservation: Adding an aerator to your new faucet is not only eco-friendly but also cost-effective. Aerators work by mixing air into the water stream, reducing water usage without sacrificing water pressure. This helps conserve water and lower your water bill over time. In fact, installing a low-flow aerator can reduce water usage by up to 30% without compromising performance.
  4. Easy Installation: Swapping out your old faucet for a new one with an aerator is a straightforward DIY project that can be completed in just a few simple steps. Start by turning off the water supply to the faucet, then disconnect the old faucet and install the new one following the manufacturer’s instructions. Adding an aerator is as simple as screwing it onto the faucet’s spout.
  5. Cost Savings: While upgrading your faucet and adding an aerator may require a small upfront investment, the long-term cost savings can be significant. By reducing water usage and lowering your water bill, you’ll recoup your investment over time while also doing your part to conserve precious natural resources.

Upgrading your faucet and adding an aerator is a win-win solution for enhancing your home’s style and efficiency. With a wide range of stylish options available, you can find the perfect faucet to suit your taste and budget. Make the switch today and enjoy the benefits of a more beautiful, functional, and eco-friendly home.

Navigating Interior Design: Embracing Timelessness

Interior design is a deeply personal journey—one that reflects our individual tastes, preferences, and personality. Yet, for those who find themselves at a crossroads, unsure of which direction to take with their interiors, the prospect of making design decisions can feel daunting. In such moments of uncertainty, there is one guiding principle that reigns supreme: embrace timelessness.

Honoring Individuality while Embracing Timelessness:

While some individuals may have a clear affinity for ultra-modern aesthetics or a deep-seated love for midcentury charm, not everyone finds themselves firmly anchored in a particular design style. And that’s perfectly okay. When faced with indecision, the key is to prioritize timelessness over trendiness.

Why Timeless Design Matters:

Timeless design transcends fleeting trends and fads, offering a sense of enduring elegance and sophistication that stands the test of time. It speaks to a classic sensibility that is both refined and versatile, allowing for seamless integration with a variety of design elements and personal touches.

Tips for Embracing Timelessness:

  1. Focus on Quality: Invest in well-crafted furniture and accessories that boast timeless appeal and superior craftsmanship. Opt for classic silhouettes and durable materials that will retain their beauty and functionality for years to come.
  2. Neutral Foundations: Start with a neutral color palette as the foundation of your design scheme. Timeless hues such as white, beige, gray, and navy provide a versatile backdrop that can be easily accessorized and adapted to suit evolving tastes.
  3. Classic Patterns: Incorporate timeless patterns such as stripes, checks, herringbone, and florals into your decor. These enduring motifs add visual interest and depth to your space without overpowering the overall aesthetic.
  4. Balanced Proportions: Strive for balance and harmony in your design by paying attention to proportions and scale. Avoid overly cluttered or asymmetrical arrangements, opting instead for a symmetrical layout that exudes a sense of balance and serenity.
  5. Iconic Pieces: Integrate iconic furniture pieces and design elements that have stood the test of time. From Eames lounge chairs to Saarinen tulip tables, these timeless classics add a touch of sophistication and refinement to any interior.

Embracing timelessness in interior design offers a sense of grounding and reassurance. It allows us to create spaces that not only reflect our individuality but also stand as enduring testaments to timeless elegance and sophistication. So whether you’re drawn to ultra-modern aesthetics or midcentury charm, remember that when in doubt, going timeless is always a wise choice.

The Great Shoe Debate: Enhancing Productivity with House Shoes

In the ongoing debate of whether to wear shoes indoors, the concept of house shoes emerges as a compelling solution. While some prefer the comfort of bare feet or socks, others find that wearing shoes at home can boost productivity. Let’s delve into this topic and explore how incorporating house shoes into your routine can elevate your efficiency and comfort levels.

The Shoe Conundrum: To Wear or Not to Wear?

For many, the decision to wear shoes indoors boils down to personal preference and cultural norms. Some argue that going shoeless allows for a greater sense of relaxation and connection with the home environment. However, others contend that wearing shoes provides a psychological cue for productivity and readiness to tackle tasks.

The Role of House Shoes

Enter house shoes – the middle ground between bare feet and outdoor footwear. House shoes offer the best of both worlds by providing comfort, support, and protection without the heaviness or formality of regular shoes. They serve as a practical solution for individuals seeking to maintain cleanliness while enjoying the benefits of wearing footwear indoors.

Boosting Productivity with Shoes

Surprisingly, wearing shoes at home can have a positive impact on productivity. Psychologically, putting on shoes signals a transition from leisure mode to work mode, helping to create a sense of structure and focus. Additionally, shoes provide physical support and stability, which can contribute to better posture and energy levels throughout the day.

Finding the Right Balance

While house shoes offer undeniable benefits, it’s essential to strike a balance between comfort and productivity. Opt for lightweight, breathable designs that provide adequate support without sacrificing comfort. Additionally, consider alternating between house shoes and bare feet or socks to give your feet a break and maintain overall foot health.

Stepping Into Productivity

In the eternal debate of shoes on or off indoors, house shoes emerge as a versatile solution that combines comfort, cleanliness, and productivity. Whether you choose to don a pair of house shoes or go barefoot, finding what works best for you is key. So, lace up those house shoes, or kick them off – whichever helps you step into productivity and comfort in your home environment.