Your refrigerator’s water dispenser is a convenient way to get fresh, cold water, but over time, it can accumulate bacteria, mold, and mineral buildup. Regular cleaning is essential to keep it sanitary and functioning properly. Here’s how to do it and how often it should be cleaned.
How Often Should You Clean Your Water Dispenser?
Experts recommend cleaning your refrigerator’s water dispenser every two to three months. If you notice changes in taste, odor, or water flow, it may be time for a more thorough cleaning.
What You’ll Need
White vinegar or mild dish soap
Warm water
A soft sponge or cloth
A small brush (like a toothbrush)
A clean, dry towel
A bowl or container
Step-by-Step Guide to Cleaning Your Water Dispenser
1. Turn Off the Water Supply
Before cleaning, locate the water shut-off valve (usually behind the fridge) and turn it off to prevent leaks or spills.
2. Clean the Exterior
Wipe down the exterior of the dispenser with a cloth and warm, soapy water to remove fingerprints, grime, and any visible buildup.
3. Flush the System
Fill a bowl with equal parts white vinegar and water. Pour the mixture into the dispenser’s water reservoir, then let it sit for 10-15 minutes to break down buildup inside the system.
4. Scrub the Nozzle and Drip Tray
Use a toothbrush or small brush to scrub around the nozzle and inside the drip tray, where bacteria and mold can accumulate.
5. Rinse Thoroughly
After the vinegar solution has done its work, flush the system by running fresh water through the dispenser until the smell of vinegar is gone.
6. Dry and Reassemble
Use a clean towel to wipe down all parts before reassembling. Turn the water supply back on and test the dispenser.
Final Tips
Change the water filter regularly, as recommended by your refrigerator’s manufacturer.
Check for mold inside the dispenser and clean promptly if you see any signs of growth.
Use filtered water to reduce mineral deposits and keep your dispenser cleaner longer.
Keeping your refrigerator’s water dispenser clean ensures fresh, great-tasting water for you and your family. Make it a part of your routine, and you’ll always have crisp, clean water at your fingertips!
Your washing machine works hard, day in and day out, to keep your clothes fresh and clean. But like any appliance, it needs some TLC to keep performing at its best. Over time, detergent residue, dirt, and even mold can build up inside, affecting both the machine’s efficiency and your laundry. So, how often should you clean your washing machine to ensure it’s working properly?
Why You Should Clean Your Washing Machine
Your washing machine isn’t just responsible for cleaning your clothes—it also needs to be cleaned itself. Here’s why:
Prevent Build-Up: Over time, detergent, fabric softener, and dirt can build up in the drum, pipes, and seals. This can lead to unpleasant odors and potential mold growth.
Maintain Efficiency: A clean machine operates more efficiently, using less energy and water. This can save you money in the long run.
Extend Lifespan: Regular cleaning can help prevent costly repairs and extend the life of your washing machine.
How Often Should You Clean Your Washing Machine?
The frequency of cleaning your washing machine depends on several factors, including how often you use it and the type of laundry detergent you use. Here’s a general guideline to follow:
Monthly Cleaning For most households, cleaning your washing machine once a month is a good rule of thumb. This can help eliminate soap scum, mold, and bacteria that build up over time. If you use your washing machine daily, you might want to clean it more frequently.
After Every Few Loads (for Front-Load Washers) Front-load washers are especially prone to mold and mildew because of their airtight door seals. After every few loads, wipe down the door seal and leave the door ajar to allow the interior to air out. This can prevent the growth of mold.
When You Notice Odors If your washing machine starts to smell musty or funky, it’s time for a deep clean. A bad odor can be a sign of mold, mildew, or detergent residue. If this happens, give your washing machine an extra cleaning to get rid of the smell.
Every 6 Months (Deep Clean) In addition to monthly cleanings, it’s a good idea to perform a deep clean every six months. This includes cleaning the drum, the detergent drawer, and the filter. This is especially important if you use a washing machine regularly or have hard water, as mineral build-up can affect its performance.
How to Clean Your Washing Machine
Cleaning your washing machine doesn’t have to be difficult. Here’s a simple process you can follow:
Run an Empty Cycle with Hot Water Set your washing machine to the hottest water setting and run an empty cycle. Add two cups of white vinegar to the drum. This helps disinfect and remove soap scum and odors.
Wipe Down the Drum and Seal After the cycle is complete, wipe down the inside of the drum with a clean cloth. Don’t forget to wipe around the door seal and around the detergent drawer, as these areas can accumulate grime and mildew.
Clean the Filter and Detergent Tray Remove and clean the detergent tray regularly to remove any detergent build-up. Clean the filter (if applicable) to remove lint, dirt, and other debris.
Leave the Door Open After cleaning, leave the door open for a while to let the inside of the machine dry completely. This helps prevent the growth of mold and mildew.
Tips for Maintaining a Clean Washing Machine
Use the Right Detergent: Always use the recommended amount of detergent. Too much detergent can lead to a build-up of soap residue.
Don’t Overload: Overloading your washing machine can result in poor cleaning and excess moisture left in the drum. Make sure to leave enough space for clothes to move freely.
Check the Drain Hose: Ensure that the drain hose isn’t clogged, as this can prevent proper drainage and lead to water pooling in the machine.
Use a Washing Machine Cleaner: There are also specialized washing machine cleaners available that can help break down build-up. Use these as directed for extra cleaning power.
Cleaning your washing machine regularly is essential for keeping it in good working condition and extending its lifespan. While a monthly cleaning should be sufficient for most households, take care to clean certain areas more frequently (like the door seal and detergent tray) to keep odors at bay. By following a simple cleaning routine, your washing machine will continue to provide you with fresh, clean clothes for years to come.
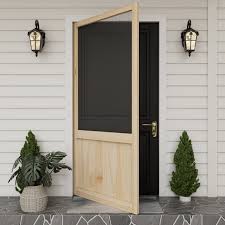
With warmer weather just around the corner, many of us are looking forward to the fresh air and outdoor moments. One of the best ways to enjoy the breeze without the bugs is by installing a new screen door. But how do you ensure that your new screen door fits perfectly? It all starts with accurate measurements.
Follow this easy guide to measure for a new screen door:
Step 1: Measure the Width of the Door Frame
Start by measuring the width of the door frame at three points: the top, middle, and bottom. This will help you get an accurate reading, as door frames may not always be perfectly uniform.
Use a metal measuring tape for accuracy.
Measure across the top, middle, and bottom of the frame.
Record all three measurements, then note the smallest one.
For example, if the top width is 36 inches, the middle is 35.8 inches, and the bottom is 36 inches, your final width measurement will be 35.8 inches. This ensures your new screen door fits snugly in the narrowest part of the frame.
Step 2: Measure the Height of the Door Frame
Next, measure the height of the door frame. Use the same process as before: measure at the left, middle, and right sides of the frame and record the smallest measurement. This ensures your new screen door will be properly aligned vertically.
Step 3: Take Note of Potential Door Swelling
It’s important to keep in mind that door frames may swell or shrink depending on the season. Humidity during the warmer months or the cold of winter can affect the fit of your door. If you’re measuring during a season where this may be a concern, be sure to account for it. You might want to add a little extra clearance to ensure your screen door doesn’t get stuck or fail to close properly as the door frame adjusts.
Step 4: Double-Check Before You Buy
Before purchasing your new screen door, double-check your measurements to make sure they’re accurate. It’s also a good idea to confirm with the manufacturer’s sizing chart for the best fit.
A well-measured screen door provides you with a perfect fit, protecting your home from bugs while allowing the fresh air to come in. So, take a few minutes to measure carefully, and soon you’ll be enjoying a bug-free breeze all summer long!
If you need help picking out or installing your new screen door, don’t hesitate to reach out for professional guidance.
Our homes are more than just a place to rest our heads; they are our sanctuaries—spaces where we unwind, recharge, and foster our emotional well-being. In today’s fast-paced world, creating a home environment that nurtures our mental health has never been more important. Whether you’re designing a new space or rearranging what you already have, there are simple, effective ways to create an environment that promotes relaxation, creativity, and mental peace.
1. Embrace Natural Light
Natural light has a profound impact on our mood and mental clarity. Sunlight boosts serotonin levels, helping to combat feelings of anxiety and depression. To harness the power of natural light in your home, open up curtains or blinds during the day and consider placing mirrors strategically to reflect light around the room. If you live in a space with limited natural light, consider using full-spectrum light bulbs or light therapy lamps that simulate daylight.
2. Declutter Your Space
Clutter can cause stress, anxiety, and a feeling of being overwhelmed. To create a peaceful environment, prioritize organization. Keep your home tidy by creating systems for storing everyday items and getting rid of unnecessary things. You don’t need to have a minimalist approach, but a home that is organized and clutter-free provides more mental space for relaxation and creativity. Consider adding storage solutions like baskets, shelves, or storage ottomans to reduce visual clutter.
3. Incorporate Calming Colors
The colors in your home can influence your emotional state. Soft, neutral colors like pastels or earthy tones promote relaxation, while bold and vibrant colors can evoke energy and creativity. For spaces meant for rest and relaxation, such as bedrooms or living rooms, opt for soothing colors like light blues, soft greens, and warm neutrals. If you want to stimulate creativity, consider a splash of energizing colors like yellow or orange in your home office or creative nook.
4. Bring in Nature
Nature has a calming effect on the mind. Bringing the outdoors inside can help reduce stress and create a more peaceful home environment. You can add houseplants, flowers, or natural elements like wood and stone to your décor. Plants such as aloe vera, peace lilies, or spider plants not only add beauty to your home but also improve air quality, which further supports mental well-being. Nature-inspired décor, such as artwork featuring landscapes, can also enhance the mood of any room.
5. Create Spaces for Relaxation
Designate areas in your home specifically for relaxation. A cozy reading nook, a meditation corner, or a comfortable spot by the window can help you unwind and recharge. Add soft furniture, cozy throws, and calming accessories like scented candles, diffusers, or soft music to set the mood. These spaces offer a sanctuary where you can escape from the stresses of daily life and focus on your mental health.
6. Promote Movement and Activity
Your home should also support physical well-being, as physical health and mental health are deeply connected. Create spaces where you can engage in physical activity, whether it’s a small yoga area, a home gym, or a spot for dance or stretching. Staying physically active helps to reduce stress, boosts mood, and improves overall mental health. Even adding an area to stretch or take a short walk can help increase your emotional well-being.
7. Personalize Your Space
Personalization is key to making your home feel like a reflection of yourself. Surround yourself with items that bring you joy, comfort, and peace. Whether it’s family photos, favorite artwork, or meaningful objects, these personal touches can foster a sense of belonging and emotional connection. Personalizing your space helps you feel grounded and supported, creating a positive atmosphere that nurtures your mental health.
8. Mind the Sounds
Noise pollution, even in your own home, can increase stress levels and hinder relaxation. To promote peace, think about the sounds in your environment. Consider incorporating soothing sounds like gentle music, nature sounds, or white noise. Soft background music can enhance relaxation, while silence can help you recharge. If your space is noisy, invest in noise-canceling headphones or soundproofing to reduce unwanted distractions.
9. Simplify Your Space
A home that reflects simplicity can help reduce mental clutter. Aim for a design that’s clean and uncluttered, allowing for a sense of calm and ease. Avoid overcrowding rooms with too much furniture or excessive decorations. Keep it simple by choosing key pieces that offer function and beauty. A simpler space gives the mind a chance to relax, making it easier to find peace and tranquility.
10. Use Aromatherapy
Certain scents can have a calming effect on the mind and body. Consider using essential oils or scented candles in your home to create an atmosphere of relaxation. Lavender, chamomile, and eucalyptus are all known for their soothing properties. Aromatherapy can also help with concentration and mental clarity, making it a great addition to your home office or study area.
Your home should be a space that supports and nurtures your mental well-being. By creating an environment that promotes relaxation, creativity, and peace, you can transform your home into a sanctuary for both your body and mind. Incorporate natural light, calming colors, and elements of nature, and prioritize spaces for relaxation and physical activity. In doing so, you’ll create a space where you can thrive emotionally and find the balance needed to live your best life.
Did you know that over half of Americans have never tested their water? Winter is an ideal time to make sure you’re not overlooking the quality of the water you use every day, from drinking and cooking to showering and cleaning. Testing your water can not only improve your health but can also save you money on plumbing repairs, maintenance, and appliance longevity.
Why Test Your Water?
One common water issue is hard water, which contains high levels of minerals like calcium and magnesium. While these minerals might not be harmful to your health, they can cause significant damage to your home. Hard water leads to:
Mineral buildup on faucets, showerheads, and appliances, making cleaning more difficult.
Scaling in plumbing pipes and water heaters, reducing the lifespan of your plumbing system and resulting in costly repairs or replacements.
Testing your water is the first step toward understanding what’s in your water and addressing any potential issues before they escalate.
How to Test Your Water
Testing your water is simple and can be done at home with a water testing kit. A great option to consider is the Safe Home Drinking Water Test Kit, which consistently ranks highly in reviews. This kit allows you to send a water sample to an EPA-certified lab, where it will be analyzed for a variety of contaminants such as lead, chlorine, bacteria, and hardness levels.
Once the lab tests your water, you will receive a detailed report outlining the quality of your water and potential risks. The results will help you understand the exact components of your water supply and what specific treatment it may need.
What to Do with Your Water Test Results
After receiving your water quality report, it’s time to make decisions about improving your water system. This might involve investing in a whole-house water filter, especially if you’re dealing with issues like hard water or contamination. Understanding your water’s unique characteristics is essential to selecting the right filtration system for your home.
For instance, if your water contains high mineral levels, a water softener might be necessary to protect your plumbing and appliances from the damaging effects of hard water. A whole-house filtration system can also address concerns like chlorine taste or the presence of harmful bacteria.
Pro Tip: Get Expert Advice
While testing your water is an important first step, it’s highly recommended that you seek the expertise of a water treatment professional. These experts can conduct further evaluations, test for other water quality factors that may not have been covered by your at-home kit, and provide recommendations for a customized treatment system based on your specific needs.
If you plan to start your spring garden soon, knowing your water’s quality will help you make informed choices about irrigation and fertilization. Some plants may not thrive with certain water contaminants, and a water filter may be just what you need to ensure the health and success of your garden.
Water testing is one of those small tasks that can make a big difference, both for your home and your health. As the winter months provide a perfect time to check on your water quality, taking the initiative now can save you significant trouble—and money—down the road. Plus, by proactively improving your water quality, you’ll be better prepared for the year ahead, whether that means enhancing your home’s water systems or boosting the success of your spring garden.
Winter has arrived with a bang, and if you’re living in an area that’s been hit with more snow than usual, you might be finding it a bit tricky to keep your garage clean. Snow, salt, and dirt can wreak havoc on your garage floor, leaving behind a mess that’s tough to clean up. But fear not! Here are some effective tips to keep your garage floor clean and your home free from the snow and slush that comes in on your boots and tires.
1. Invest in Quality Floor Mats
One of the most effective ways to keep your garage floor clean in snowy conditions is by using floor mats. These mats are designed to catch snow, ice, and water before they reach the floor.
Under Your Car: A mat placed under your car can catch the mess from your tires, especially after driving through snow, slush, or puddles. Rubber car mats or specially designed garage floor mats with raised edges are perfect for absorbing moisture and preventing it from seeping onto your garage floor.
Entryway Mats: Place a large, absorbent mat at the entrance to your garage. These mats can catch snow and dirt from your shoes and prevent them from spreading into the rest of the garage.
Boot Scrapers: For those particularly wet, snowy days, add a boot scraper to the mat. This helps remove snow and ice before stepping into the garage, keeping the floor cleaner.
2. Sweep or Vacuum Regularly
Snow, especially the wet kind, can easily be tracked inside your garage. Regular sweeping or using a shop vac can help remove the snow, salt, and dirt before they have a chance to settle. This is especially important near the entrance where snow is most likely to accumulate. Don’t forget to clean corners and edges, as snow tends to pile up in hard-to-reach spots.
3. Use Floor Sealers
If you’re looking to prevent snow, salt, and water from damaging your garage floor, consider applying a concrete floor sealer. These sealers will create a protective layer on your garage floor, making it easier to wipe off stains and dirt. It can also prevent long-term damage caused by salt corrosion, which is especially important if you live in areas that use salt to treat roads in the winter.
4. Create a Snow Removal Station
Set up a designated snow removal station inside your garage. Keep a container of floor cleaner, a mop, or towels for wiping off the excess water that might come in on your car or shoes. If you regularly have snow on your tires, it might also help to keep a small shovel or broom handy for brushing off excess snow before entering the garage.
5. Keep Your Driveway and Walkways Clear
While this doesn’t directly impact your garage floor, keeping your driveway and walkways clear of snow can minimize the amount of snow you track into the garage. If your driveway is consistently clear, you’re less likely to bring snow in on your tires, boots, and car interior.
6. Dry Your Tires Before Entering the Garage
If you can, take a moment to dry your car’s tires before driving into the garage. A dry towel or chamois can help absorb any snow or ice that’s stuck to the tires, ensuring that less moisture is brought inside.
7. Maintain Your Garage Door Seals
Garage doors are the first line of defense against the elements. Make sure the seals around your garage door are in good condition and tight-fitting. This helps prevent snow from blowing into the garage and causing further mess or water buildup.
8. Use Salt in Moderation
While using salt on your driveway is often necessary for traction, it can be harmful to your garage floor if overused. Excessive salt can be difficult to clean and may damage the floor over time. Try to use it sparingly, and clean it up promptly when it’s tracked into the garage.
Incorporating nature into our homes isn’t just about aesthetics—it’s also a matter of health and well-being. Modern design trends are focusing on expanding the connection between indoor and outdoor spaces, allowing more natural light to flow into our homes. The result? A brighter, healthier, and more energy-efficient living environment.
Why Now?
Emerging research continues to demonstrate the positive effects of natural light and access to nature on mental and physical health. In response, home design has embraced larger, custom-designed windows, doors, and skylights to bring the outdoors inside. According to Andersen Windows and Doors’ 2025 report, homeowners are increasingly investing in these upgrades for both their beauty and their functionality.
Key Changes in Window and Door Design
Walls of Light
Multi-glide doors that stack together allow homeowners to create entire walls of glass. These innovative designs maximize views and light, seamlessly blending the indoor and outdoor worlds.
Triple-Pane Glass for Energy Efficiency
As energy codes become stricter, triple-pane glass is gaining popularity. Not only does it meet energy requirements, but it also enhances insulation, keeping homes comfortable year-round while lowering utility bills.
Dark Colors for Temperature Control
Dark-colored window frames are more than a style choice. They reduce heat absorption, making them both functional and fashionable in sun-drenched areas.
Accessibility-Friendly Designs
Wider doorways and accessible handles ensure that these glazing solutions work for everyone, including those who use wheelchairs or walkers. This makes homes not just beautiful, but inclusive.
Tech Meets Design: AI and Glazing
Some design firms are now leveraging AI to study site lines, natural light patterns, and views before installing windows and doors. This data-driven approach ensures every home gets the best possible combination of functionality and aesthetics, turning every window into a picture-perfect frame.
Why It Matters
Natural light isn’t just visually appealing; it’s linked to improved mood, productivity, and overall health. With innovations like energy-efficient triple panes and expansive glazing, homeowners can enjoy these benefits without sacrificing sustainability or comfort.
Takeaway
The trend toward more glazing isn’t just a passing fad—it’s a lifestyle upgrade. By incorporating larger windows, custom doors, and smart designs into your home, you’re not just enhancing its beauty; you’re investing in your health and well-being.
As we age, maintaining comfort, accessibility, and safety in our homes becomes increasingly important. Simple modifications can make daily tasks easier and create a space that supports independence. Here are four key home updates designed with aging individuals in mind.
1. Replace Cabinet and Door Handles
Traditional knobs can be challenging for individuals with arthritis or limited dexterity. Consider replacing them with D-shaped handles, which are easier to grasp and don’t require twisting motions. This small change can significantly enhance functionality while maintaining style. These handles are available in a wide range of designs, ensuring your home stays both practical and aesthetically pleasing.
2. Install Grab Bars and Railings
Grab bars are essential safety features, particularly in areas prone to slips and falls, like the bathroom. They provide stability for movements and can double as a resting handhold. Proper installation is key to ensuring they support weight effectively. Railings along stairs or outdoor steps can also be lifesavers, offering additional balance and confidence for homeowners.
3. Widen Doorways to 36 Inches, at Minimum
Mobility aids like wheelchairs and walkers require sufficient space to navigate. Standard doorways are often too narrow, creating obstacles. By widening doorways to at least 36 inches, you ensure easier movement throughout the home. This modification promotes long-term accessibility, making it possible to age in place comfortably.
4. Update Flooring for Safety
Slippery or uneven flooring poses a significant risk for falls. Consider replacing slick surfaces with non-slip materials like textured vinyl, rubber, or carpet tiles. Additionally, ensure any area rugs have non-slip backing or are secured to the floor to prevent tripping.
Aging Gracefully at Home
These thoughtful modifications enhance safety, accessibility, and overall quality of life. Whether you’re planning for yourself or helping a loved one, taking proactive steps ensures that home remains a haven for years to come.
By making these updates, you can create a space that adapts to your needs and allows you to age comfortably and independently.
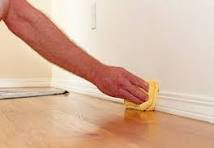
When it’s time to give your home a thorough deep clean, it’s easy to overlook the baseboards. However, these small details can make a big difference in how fresh and tidy your space feels. Cleaning your baseboards once a month can keep them looking great and prevent the buildup of dust and grime. Here’s how to tackle them efficiently and keep them clean longer.
Step-by-Step Guide to Cleaning Your Baseboards
Vacuum First Start by vacuuming the baseboards to remove dust, pet hair, and loose debris. Use the brush attachment on your vacuum for the best results.
Wash the Baseboards
Mix warm water with dish soap or vinegar for an effective cleaning solution.
Dip a sponge or rag into the solution and scrub any marks or stains you see.
For stubborn spots, a Mr. Clean Magic Eraser works wonders.
If you’re short on time, a baby wipe can be a quick fix for light cleaning.
For stained wood baseboards, opt for a cleaner specifically designed for wood to avoid damage.
Dry and Shine Once clean, dry the baseboards with a microfiber cloth to avoid streaks or watermarks.
Keep Them Dust-Free Longer
To maintain your hard work, rub the clean baseboards with a dryer sheet. This trick offers two benefits:
The antistatic properties repel dust and hair.
It leaves a pleasant, fresh scent in the room.
Why Baseboards Matter
Baseboards may not be the focal point of your home, but they frame your walls and floors, playing a subtle yet significant role in your home’s overall appearance. Regular maintenance ensures your living spaces look polished and well-kept.
There’s nothing cozier than a new throw blanket—until you notice it leaving a trail of fluff all over your home! Shedding is common with new blankets, especially those made from synthetic or loosely woven fibers. Here are a few practical steps to stop the shedding and enjoy your blanket worry-free:
1. Wash It First
Before using your new throw, give it a good wash. Use a gentle cycle with cold water and avoid harsh detergents. Adding a cup of white vinegar to the rinse cycle can help seal the fibers and reduce shedding.
2. Dry with Care
After washing, tumble dry your blanket on a low-heat setting. Toss in a few dryer balls or clean tennis balls to help loosen excess fibers. Avoid over-drying or high heat, as it can damage the material and make shedding worse.
3. Brush the Blanket
A fabric brush or lint roller can help remove loose fibers from the surface. Gently brush the blanket in the direction of the weave before and after washing to minimize shedding.
4. Limit Friction
Shedding increases with wear and friction. Avoid rubbing the blanket against clothing, furniture, or other textiles. Use it as a decorative piece or layer it over other fabrics to reduce direct contact.
5. Consider a Fabric Protector
For natural fiber blankets, using a fabric protector spray can help reduce shedding. Make sure it’s suitable for your blanket’s material and follow the instructions carefully.