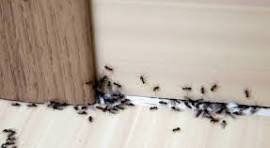
Elevating Your Space: Adding Texture and Design to Your Ceiling

When designing a room, we often focus on the walls, furniture, and flooring—leaving the ceiling as an afterthought. However, the ceiling is a blank canvas that offers a unique opportunity to elevate your space in a way that can transform an entire room. Adding texture and design to your ceiling can dramatically enhance the atmosphere, making it feel more inviting, luxurious, and thoughtfully designed.

1. Coffered Ceilings: A Classic Touch

A coffered ceiling is a timeless design element that adds depth and sophistication to any room. These ceilings consist of a series of recessed panels, which can be framed with wood, crown molding, or plaster. The depth created by the panels creates a sense of grandeur, and depending on the finish, coffered ceilings can complement both traditional and modern aesthetics. If you’re looking to add architectural interest, a coffered ceiling could be the perfect choice.

2. Textured Paint or Wallpaper

Textured paint can give your ceiling a unique look and feel. From subtle patterns to bold textures, the possibilities are endless. Adding a light stucco or sand texture can create depth, while a brushed pearl or metallic paint finish can add a touch of glamour. Alternatively, ceiling wallpaper with soft patterns, textures, or even bold designs can make a statement without being too overwhelming.

3. Wood Panels or Beams

Wood is a material that never goes out of style. Whether you opt for reclaimed wood panels, wood planks, or exposed beams, wood can create a cozy, rustic atmosphere. Installing beams across the ceiling can bring a natural, earthy feel to a room, and reclaimed wood adds character with its history. Alternatively, tongue-and-groove wood panels can offer a sleek, contemporary look, enhancing the sense of warmth and comfort.

4. Tray Ceilings: Subtle Yet Elegant

A tray ceiling features a raised central section that adds depth and elegance to a room. It’s a more subtle alternative to the coffered ceiling and is often complemented with crown molding or lighting. Tray ceilings are perfect for bedrooms, living rooms, or dining rooms, as they can make a space feel taller and airier. To further elevate the look, consider adding an accent color or subtle lighting along the edges.

5. Exposed Brick or Stone

For those who appreciate the industrial or rustic aesthetic, exposed brick or stone on the ceiling is a bold design move. This textured ceiling treatment adds instant character and creates a cozy, warm feeling that is ideal for urban lofts, kitchens, or even bedrooms. Exposed brick can also add charm and texture to a room while blending seamlessly with modern or vintage décor.

The ceiling is one of the most overlooked design elements in a room, but with the right textures and finishes, it can transform a space into something extraordinary.

Hearth or No Hearth: Making the Right Choice for Your Stone Fireplace

A stone fireplace is often seen as a centerpiece of the home, offering warmth, beauty, and a welcoming atmosphere. One of the most important design choices you will face when it comes to your fireplace is whether to add a hearth or not. While the hearth has been a traditional feature of fireplaces for centuries, there are pros and cons to consider before deciding if it’s the right choice for your stone fireplace.

What is a Hearth?

A hearth is the floor space directly in front of the fireplace, typically made of non-combustible materials such as stone, brick, or tile. Historically, it served as a safety feature, protecting the floor from sparks, ash, and heat. Over time, it has become a decorative element, as well as an extension of the fireplace’s design.

The Benefits of Adding a Hearth

  1. Aesthetic Appeal: A well-designed hearth can enhance the look of your stone fireplace and create a more traditional, cozy atmosphere. The hearth acts as a grounding focal point that can complement your décor.
  2. Safety: Especially for wood-burning fireplaces, a hearth helps prevent sparks or embers from damaging the flooring. This added layer of protection can give you peace of mind.
  3. Functionality: A hearth can provide additional space for placing firewood or decorative items like candles and plants. Some homeowners also use the hearth as a seating area, particularly with raised hearths.
  4. Increased Value: Adding a hearth can be an attractive feature for potential homebuyers. Many people associate a hearth with a more functional and aesthetically pleasing fireplace.

Why You Might Skip the Hearth

  1. Modern Style: If you’re looking for a sleek, minimalist look, forgoing a hearth might be a good decision. A hearth-free fireplace, particularly one made of natural stone, can create a clean, streamlined appearance.
  2. Space Considerations: In smaller spaces, a hearth can take up valuable floor space. If you’re looking to maximize your living area, skipping the hearth can help maintain a sense of openness.
  3. Maintenance: Without a hearth, you eliminate an area that collects ash, soot, and debris. For those who prefer a more low-maintenance space, this can be a practical reason to forgo the hearth altogether.
  4. Cost: Installing a hearth can add to the cost of the fireplace project. If you’re on a budget or prefer a more straightforward design, you might decide that the hearth is an unnecessary expense.

How to Decide

Ultimately, whether or not to include a hearth in your stone fireplace design depends on your personal preferences and how you plan to use the space. If you value the safety and functionality of a traditional hearth or want a more classic, warm look, adding one could be the right choice. However, if you lean toward a modern aesthetic or want to maximize your floor space, skipping the hearth could be the best option.

Your stone fireplace can be both beautiful and functional with or without a hearth. It’s all about your lifestyle, design goals, and what fits best within the room. Whether you add a hearth for warmth, safety, or style—or choose to keep things simple—you can be confident that your stone fireplace will continue to be a stunning focal point in your home.

Spring Cleaning Spotlight: Don’t Skip the Tile, Grout, and Windowsills

Spring is the perfect time to refresh your space and bring in the light—and while many of us remember to dust the shelves and swap out winter clothes, there are three often-overlooked areas that deserve some seasonal attention: tile, grout, and windowsills.

Tile: Shine It Up

Tile might look clean at a glance, but soap scum, water spots, and general buildup can dull its sparkle over time. Whether it’s in your kitchen backsplash or bathroom floor, give your tile a proper scrub this spring. A mix of warm water, dish soap, and a splash of vinegar can work wonders. For a deep clean, consider a tile-safe degreaser or steam cleaner.

Grout: Reclaim the White

Grout seems to attract everything you don’t want—mildew, stains, and grime. You don’t need harsh chemicals to bring it back to life. A paste of baking soda and water applied with an old toothbrush, followed by a light spray of vinegar, can lift years of buildup. Rinse and admire your handiwork!

Windowsills: Let the Sunshine In

Windowsills quietly collect dust, dead bugs, and sometimes even mold—especially in those corners where condensation lingers. Wipe them down with an all-purpose cleaner or a mix of vinegar and water. If you have wooden sills, follow up with a light polish or wood conditioner to protect the surface.

A Breath of Fresh Air

Spring cleaning isn’t just about tidying up—it’s about creating a home that feels renewed. Taking time to tackle these less-obvious areas can bring surprising satisfaction and a true sense of cleanliness.

So roll up your sleeves, open those windows, and let the fresh air (and light) flow freely again!

https://amzn.to/4j5E96B

🐾 Living with a Shedding Dog: A Lesson in Letting Go (and Vacuuming Often)

There’s dog hair on the couch. On your clothes. In your coffee mug. On the ceiling fan. How? You don’t know. But if you’ve got a dog that sheds, you know exactly what I’m talking about.

Trying to keep up with a shedding dog can feel like a full-time job. You sweep, you vacuum, you lint roll your entire outfit just to walk out the door… only to discover a rogue hair clinging to your lip halfway through a conversation.

It’s a Daily Battle—and a Lesson in Grace

At some point, you realize: you’ll never totally win the war against the fur. And strangely, that realization is freeing.

It becomes less about controlling every hair and more about managing your expectations, finding a rhythm, and letting go of the need for perfection.

Life Is Messy. So Is Love.

Dogs don’t worry about fur on the floor. They care about belly rubs, walks, and wagging their tails when you come home. The mess is a small price to pay for unconditional love, loyal companionship, and a face that lights up every time you say, “Wanna go for a ride?”

3 Quick Tips to Cope with the Fur Flood:

  1. Brush often – Daily brushing can dramatically reduce shedding (and doubles as quality time).
  2. Invest in a good vacuum – One that can handle fur like a champ. It’s worth it.
  3. Keep a lint roller in every room and car – You’ll thank yourself later.

Trying to keep up with a shedding dog is a little like life—it’s messy, a bit chaotic, and full of surprises. But when you embrace it instead of fight it, it becomes part of the joy.

And honestly? A little fur never hurt anybody. It just means you’re loved by a four-legged friend.


https://amzn.to/4lc4125
https://amzn.to/3YgOOD2
https://amzn.to/3R3a6A9

How to Stop Your Cups from Tasting and Smelling Like Soap After a Dishwasher Cycle

There’s nothing quite as off-putting as reaching for your favorite cup only to find it tastes or smells like soap, despite having just gone through the dishwasher. If you’ve noticed this problem with your dishes, you’re not alone! It’s a common issue, but the good news is that it’s usually fixable. Here are three simple steps to stop your cups from coming out of the dishwasher smelling and tasting like soap.

1. Check Your Dishwasher Detergent

The first thing to look at is the detergent you’re using. Too much detergent or a low-quality detergent can often leave residue on dishes, especially in the form of a soapy taste and smell. Here’s what to do:

  • Use the correct amount of detergent: Overusing detergent can lead to soap buildup, which ends up on your dishes. Check the detergent packaging for recommendations based on your water hardness.
  • Switch to a high-quality detergent: If you’re using a budget detergent, it might not rinse off as well, leaving residue behind. Consider switching to a high-quality brand or one that’s specially formulated for your dishwasher type.
  • Rinse aid: If your dishwasher doesn’t have a built-in rinse aid function, try using a rinse aid product. Rinse aid helps ensure that all detergent is washed away and leaves dishes sparkly clean without any soap residue.

2. Clean Your Dishwasher Regularly

Sometimes, the issue might not be with the detergent itself but with your dishwasher. If the machine is dirty or has soap buildup inside, it can transfer those smells and tastes onto your dishes. Here’s how to fix it:

  • Clean the dishwasher filter: Most dishwashers have a filter that can catch debris and food particles. Over time, this filter can get clogged and cause a buildup of grime. Remove and clean the filter regularly (about once a month) to keep things running smoothly.
  • Run a cleaning cycle: Many dishwashers have a dedicated cleaning cycle. Use this cycle with a dishwasher cleaner or white vinegar to remove mineral buildup, soap scum, and odors. Run the cycle with the dishwasher empty to give it a thorough cleanse.
  • Check for mold or mildew: If your dishwasher has a persistent odor, it might be caused by mold or mildew buildup, often found in hidden crevices. Wipe down the interior of the dishwasher with a vinegar solution or a specialized cleaner to eliminate any fungal growth.

3. Use the Right Dishwasher Setting

Not all dishwasher cycles are created equal. Sometimes, if you’re using a cycle that doesn’t get your dishes clean enough, detergent can be left behind, contributing to that soapy taste. Here’s what to do:

  • Choose a heavier cycle for tougher loads: If you’re washing cups that have stubborn residue, try using a more intensive cycle. It will give the detergent more time to break down food particles and soap, ensuring better rinse results.
  • Make sure the spray arms aren’t clogged: If the spray arms in your dishwasher aren’t rotating or spraying evenly, detergent can remain on your dishes. Regularly check that the spray arms are free from obstructions, such as food particles or mineral buildup.
  • Ensure proper water temperature: Hot water helps the detergent dissolve and rinse away properly. If your dishwasher isn’t heating the water to the correct temperature (usually between 120-150°F), it may not be rinsing thoroughly, leaving behind soap residue. If your dishwasher allows for temperature adjustment, make sure the setting is optimal.

Bonus Tip: Wash Cups Separately

If your cups are especially sensitive to soap residue, try washing them separately from dishes that are more likely to leave residue behind, like pans with grease. This will prevent soap buildup on the cups and keep them tasting and smelling fresh.

It’s frustrating when your cups come out of the dishwasher with a soapy taste, but by adjusting your detergent use, keeping your dishwasher clean, and using the right settings, you can say goodbye to that unpleasant smell and taste. These simple fixes will ensure your cups—and all your dishes—come out perfectly clean and ready to use.

Pro tip: If the problem persists after trying these steps, it could be worth checking your dishwasher’s performance or contacting a professional to ensure everything is functioning correctly.

How to Clean the Inside Glass of Your Washing Machine for a Sparkling Finish

A clean washing machine means cleaner clothes! Over time, detergent residue, hard water stains, and mold can build up on the inside glass of your washer, leaving it cloudy and less effective. Keeping the glass door clean not only improves your washer’s performance but also prevents unpleasant odors and bacteria buildup. Here’s a simple method to keep your washing machine’s glass crystal clear:

Step 1: Run a Hot Cycle with Vinegar or a Cleaner

Start by running an empty hot water cycle with either distilled white vinegar or a dedicated washing machine cleaner. Vinegar helps dissolve mineral buildup and kills mold, while commercial cleaners target grime and detergent residues.

  • Vinegar Method: Pour two cups of white vinegar directly into the detergent dispenser and run a hot cycle.
  • Washing Machine Cleaner: Follow the manufacturer’s instructions for the best results.

Step 2: Wipe Down the Glass Door

Once the cycle is complete, use a damp microfiber cloth or sponge to wipe down the glass door. Pay extra attention to any stubborn spots or streaks, using a bit of vinegar or mild dish soap if needed.

Step 3: Clean the Rubber Seal

The rubber seal around the door is notorious for trapping moisture, mold, and detergent buildup. Wipe it thoroughly with a cloth dampened in vinegar or an antibacterial cleaner. If there’s visible mold, scrub gently with an old toothbrush.

Step 4: Keep It Dry

After cleaning, leave the door slightly open to allow air circulation and prevent mold growth. Wiping the glass and rubber seal after each use also helps maintain cleanliness.

By following these simple steps regularly, you’ll keep your washing machine’s glass spotless and ensure your laundry stays fresh and clean!

Water Stains on Ceilings: Causes, Removal, and Prevention

Nothing can be more alarming than discovering a water stain on your ceiling. It can start with a small, discolored patch, but over time, these stains can become a bigger problem. Water stains on ceilings are common, but understanding their causes, how to remove them, and how to prevent them can save you time, money, and stress. In this post, we’ll dive into the causes of water stains, how to remove them, and tips to prevent them from happening again.

Causes of Water Stains on Ceilings

Water stains on your ceiling are often a sign of an underlying issue. Several potential causes can lead to water infiltration, resulting in these unsightly spots. Let’s look at some of the most common culprits:

1. Roof Leaks

Roof leaks are among the most common causes of water stains. Faulty roof flashing, damaged shingles, or even small holes from improperly installed nails can cause water to seep into your home. Over time, this water can trickle down to your ceilings, leaving behind a stain. Issues like old pipe boots or worn-out roof flashing are typical offenders.

2. Plumbing Problems

Plumbing issues, particularly in bathrooms, are another major cause of water stains. Leaky pipes, old caulking, or deteriorating seals around toilets and sinks can lead to water escaping and finding its way to the ceiling below. Toilets and sinks are often where leaks are most noticeable, but they can be hard to detect until the damage has already been done.

3. Condensation

Poor ventilation in high-humidity areas like kitchens, bathrooms, or laundry rooms can lead to condensation. When warm, moist air meets a cold surface, it can cause water droplets to form, which can lead to stains. If you’re seeing a stain in a bathroom or kitchen, this could be the problem.

4. HVAC System Issues

Your HVAC system can also contribute to water stains. A leaking duct, clogged drain lines, or a cracked drip pan can all lead to water accumulation in your ceiling. If your HVAC system is aging, it may be time to have it checked.

5. Foundation Issues

Sometimes, water stains are caused by leaks in the foundation of the home. This could be due to cracks in the foundation, around windows, or near chimneys. These areas might not always be easy to detect, so regular inspections are key to catching foundation issues early.

How to Identify the Source of Water Stains

Before you take action, it’s important to identify where the water is coming from. Here’s how to start:

  1. Visual Inspection: Examine the ceiling for discoloration. If it’s near a bathroom, kitchen, or laundry room, condensation might be the culprit. If it’s near a roofline, it could be a leak.
  2. Check the Roof: If the roof is easily accessible, inspect it for missing shingles or areas that might be worn down. Check the attic for water damage or mold growth, which can help you spot leaks.
  3. Inspect the Plumbing: Look for leaks around sinks, toilets, and bathtubs. Pay attention to areas with old caulking or seals, as these are often prime areas for leaks.
  4. Use a Moisture Meter: This tool can help you pinpoint areas with excess moisture, allowing you to focus on the source of the water.
  5. Call a Professional: If you’re unable to determine the cause, it’s a good idea to call a leak detection professional. They can assess areas you may not be able to reach, such as pipes behind walls or the roof.

How to Remove Water Stains on Ceilings

Once you’ve identified the source of the water and made necessary repairs, you can begin the process of cleaning and repairing the water stain. Here’s how to do it:

  1. Fix the Leak: Before removing the stain, make sure the source of the water is completely fixed. If there’s an ongoing leak, the stain will likely reappear.
  2. Prepare the Area: Ventilate the room by opening windows and doors. Protect the area around the stain with a drop cloth, and wear protective gloves and goggles.
  3. Remove the Stain: Use a putty knife to scrape off any damaged materials, such as peeling paint or plaster. Gently clean the stained area with a damp cloth and mild detergent, then let it dry completely.
  4. Repair the Damage: If there are holes in the ceiling, fill them with spackle or drywall compound. Once the area is dry, sand it smooth before painting over the stain to match the surrounding ceiling color.

How to Prevent Water Stains on Ceilings

The best way to deal with a water stain is to prevent it from happening in the first place. Here are some proactive steps to help you avoid ceiling water stains:

  1. Regular Roof Inspections: Especially if your home is older, schedule a roof inspection every 1-2 years. Look for any missing or damaged shingles, worn-out flashing, or other areas that might lead to leaks.
  2. Address Plumbing Issues Early: Regularly inspect pipes and caulking in bathrooms and kitchens. Fix any leaks, and replace old seals to prevent water from escaping.
  3. Maintain Proper Ventilation: Ensure that bathrooms, kitchens, and laundry rooms are properly ventilated. Install or repair exhaust fans to help reduce moisture buildup.
  4. Inspect Your HVAC System: Have your HVAC system professionally inspected to avoid leaks from ducts, pans, or clogged lines that could lead to water damage.
  5. Address Foundation Issues: If you notice cracks or water pooling near the foundation, address these issues early. Cracks in the foundation can lead to water leaks into your home.

Water stains on your ceiling are more than just an eyesore—they can be a sign of a serious problem. Understanding the causes of water stains, knowing how to identify the source, and following a solid plan for repair and prevention will save you from further headaches down the line. Don’t ignore water stains—acting quickly can prevent more significant damage to your home. Regular maintenance and inspections are key to keeping your home dry, safe, and damage-free.

The Convenience and Joy of Having a Doggy Door: Why Every Pet Owner Needs One

As pet owners, we all want to make life easier for both ourselves and our furry companions. From feeding to grooming, we are constantly thinking of ways to improve their lives. One solution that’s become increasingly popular in recent years is installing a doggy door. While it might seem like a simple addition, a doggy door offers a host of benefits for both pets and their owners.

Here’s why having a doggy door might just be one of the best decisions you make for your household.

1. Freedom for Your Furry Friend

Perhaps the most obvious benefit of a doggy door is the freedom it provides to your dog. No longer will your pet have to wait for you to open the door so they can relieve themselves or get some fresh air. For active dogs, this can be a game-changer, allowing them to explore the backyard or enjoy outdoor playtime without you having to constantly supervise or open the door.

This added independence can be especially beneficial for working professionals or those with a busy schedule. With a doggy door, your pet can go in and out as they please, reducing the chances of accidents in the house and giving them more space to burn off energy.

2. A More Convenient Life for You

If you’ve ever had to get up in the middle of the night to let your dog out, you’ll know that the convenience of a doggy door cannot be overstated. No more midnight trips to the door! Whether it’s a quick bathroom break or simply a desire to get some fresh air, your dog can do it all on their own. This can save you time, energy, and the hassle of getting dressed or braving the cold to let your dog out.

Additionally, if you have a puppy or a senior dog, a doggy door can be a great way to ease their transition to potty training or make life more comfortable for them as they age.

3. Reduced Stress for Pets

For dogs who experience separation anxiety or stress when left alone, a doggy door can offer some relief. Having the ability to move freely between the inside and outside of the house allows them to escape from stressful situations, such as being confined to a room or left in a crate for too long.

Plus, the ability to get outside for fresh air or to lounge in a sunny spot can help keep their stress levels lower when they’re home alone. They’ll appreciate the autonomy and comfort that comes with having access to their environment.

4. Improved Health and Well-being

Dogs are naturally active animals, and regular exercise is key to keeping them happy and healthy. Having a doggy door makes it easier for them to get the exercise they need, whether it’s by running around the yard or just exploring the outside world. This can help prevent obesity and improve overall health, especially for dogs who have high energy levels.

Additionally, for dogs that are sensitive to being indoors for long periods (especially during colder months), a doggy door allows them to go outside for bathroom breaks, which can help with digestive health and prevent urinary issues.

5. Peace of Mind for Pet Owners

A doggy door offers peace of mind because it provides your dog with the freedom to go outside as needed without you having to keep a close eye on them every second. You’ll feel less anxious about your dog being cooped up inside for hours, especially if you’re gone for long periods of time.

And for dog owners who live in areas with extreme weather, many modern doggy doors come with weatherproof features to prevent drafts or the elements from entering your home, ensuring that your space remains comfortable year-round.

6. Easy Installation and Customization

Doggy doors have come a long way from the basic flap models of the past. Today, there are a variety of options to suit your home and your pet’s needs. From manual flaps to automatic doors with microchip sensors, there’s a doggy door for every type of household and lifestyle.

Installation is relatively easy, especially with some of the more modern options that are designed to fit into existing doors or walls. Many pet stores and home improvement centers offer options for different types of doors, and professional installation can often be arranged for a more seamless experience.

7. Enhancing Your Relationship with Your Pet

Having a doggy door also enhances the bond you share with your pet. With the added convenience, both you and your dog will feel less stressed, making the relationship more enjoyable and fulfilling. Your dog will appreciate the added freedom, and you’ll appreciate not having to constantly cater to their needs.


Is a Doggy Door Right for You?

If you’re considering adding a doggy door to your home, take into account your pet’s personality, your home’s layout, and your lifestyle. Some pets love the freedom and convenience that a doggy door offers, while others may take a little time to get used to it.

But once your pet adjusts, you’ll likely find that it’s one of the best additions you can make for your home. Not only does it give your pet more autonomy, but it also makes life much more convenient for you as a pet owner.

Hanging Pictures Behind Your Couch: The Perfect 12-Inch Rule

When decorating your living space, one of the key focal points is often the area above the couch. But how do you know how high or low to hang your pictures to make sure everything looks balanced and beautiful? Here’s a simple rule that can help: leave about 12 inches between the back of your couch and the bottom of your picture. This simple guideline helps create a cohesive, well-proportioned look, ensuring your art isn’t too high or too low, but just right.

Why 12 Inches?

The 12-inch rule is an aesthetic choice that keeps the artwork grounded without overwhelming the space. If you hang your pictures too high, they may feel disconnected from the furniture below, creating an awkward visual gap. If they’re too low, they might feel cramped and crowd the seating area. The 12-inch distance strikes a harmonious balance, letting the art breathe while still feeling connected to the rest of the room.

How to Apply the 12-Inch Rule

  1. Measure Carefully: Start by measuring 12 inches from the top of your couch. This is the space you’ll want to leave between the back of the couch and the bottom of the picture frame. Use a tape measure or a level to ensure that your art is hung at the right height.
  2. Consider Your Artwork’s Size: Larger pieces of art may require a slightly more generous gap, especially if they have a heavy or dominant visual presence. On the other hand, smaller pieces might look great with a bit less space.
  3. Groupings or Single Piece: Whether you’re hanging a single large artwork or a series of smaller pieces, the 12-inch rule remains a good starting point. When using a gallery wall approach, ensure that the cluster of images stays within that 12-inch space for consistency.
  4. Adjust for Style: Keep in mind that personal style matters! The 12-inch rule isn’t a strict rule—just a helpful guideline. Feel free to adjust slightly based on your specific aesthetic or the visual flow of the room.

Bonus Tips for Hanging Art Behind Your Couch

  • Scale and Proportion: Be mindful of the size of the artwork in relation to your couch. Too small can make the art look lost in the space, while too large might dominate the room. Aim for artwork that’s roughly 60%-75% of the width of your couch for balance.
  • Stay Centered: Center the artwork above the couch, ensuring it’s level. Off-center art can throw off the flow of the room.
  • Use Proper Hanging Hardware: Always use sturdy picture hangers and hooks that can support the weight of your art. This will prevent damage to your walls and keep your pieces securely in place.
  • Add Lighting: Consider adding accent lighting to highlight your artwork. Wall sconces or picture lights can enhance the visual appeal and draw attention to the art.

By following the 12-inch rule and considering the size and placement of your pictures, you can create a stylish, balanced look in your living room. This simple guideline ensures that the art feels like an integrated part of the space, not an afterthought.

Essential Plumbing and Water Maintenance Tips for a Smooth-Running Home

Keeping your plumbing and water systems in top shape is crucial for avoiding unexpected problems and ensuring everything runs smoothly. Regular maintenance can help extend the life of your appliances, prevent costly repairs, and improve the efficiency of your home. Here are some key plumbing and water maintenance tasks you can easily tackle to keep things flowing without a hitch.

1. Check the Water Softener and Replenish Salt if Necessary

If you have a water softener, it’s important to check the salt level regularly. Hard water can leave deposits on your pipes, faucets, and appliances, which can lead to clogs, mineral buildup, and reduced efficiency. The water softener works by removing minerals like calcium and magnesium, and replenishing the salt ensures that it continues to function properly.

To maintain your water softener:

  • Open the salt tank and check the level. If it’s low, add more salt, making sure you use the recommended type (usually sodium chloride or potassium chloride).
  • Clean the tank every six months to remove any salt bridges or clumps that can block the salt from dissolving properly.
  • If you notice an increase in water hardness or residue build-up, consider recharging or servicing your softener.

2. Clean the Garbage Disposal

Garbage disposals are a convenient tool for eliminating food waste, but they can easily develop odors or get clogged. A simple cleaning routine can keep it working efficiently and smelling fresh. Here’s how you can clean your garbage disposal:

  1. Grind ice cubes: Fill the disposal with ice cubes and turn it on. Grinding the ice helps dislodge debris and sharpens the blades.
  2. Flush with hot water: Run hot water through the disposal after grinding the ice to clear away any remaining bits of food and residue.
  3. Baking soda and vinegar: Pour ½ cup of baking soda followed by ½ cup of vinegar into the disposal. Let it sit for a few minutes, then flush with hot water. This helps break down grease and neutralize odors.

For an extra boost, consider using lemon peels or a disposal cleaning product specifically designed to combat odors and residue.

3. Inspect Tub and Sink Drains for Debris; Unclog if Necessary

Clogged drains are one of the most common plumbing issues homeowners face. Whether it’s hair in the bathroom or food particles in the kitchen, buildup in drains can slow down water flow and lead to bigger blockages over time. Here’s what you can do to keep your drains running smoothly:

  • Remove visible debris: For tub and sink drains, start by inspecting the drain covers and removing any visible hair, soap scum, or debris that may be blocking the flow.
  • Use a drain snake or plunger: If you notice slow drainage, try using a drain snake or plunger to dislodge the obstruction. For tougher clogs, a mixture of baking soda and vinegar can help break down buildup.
  • Preventive measures: Consider using drain catchers in sinks and tubs to collect hair and other debris before it enters the drain. This can prevent clogs from forming in the first place.

Regular drain cleaning can prevent buildup from turning into a major plumbing headache.

4. Flush Out Hot Water from the Water Heater

Over time, sediment and minerals from hard water can accumulate in the bottom of your water heater tank, which can affect its efficiency and lifespan. Flushing the water heater helps remove this sediment, ensuring it operates efficiently and extends its life.

To flush your water heater:

  1. Turn off the power and water supply: For electric water heaters, turn off the power at the breaker. For gas heaters, set the thermostat to the lowest setting. Turn off the water supply to the heater.
  2. Attach a hose to the drain valve: Place the other end of the hose in a drain or outside where the water can flow out safely.
  3. Open the drain valve: Allow the water to flow out, taking any sediment with it. You might hear a gurgling sound or notice some cloudy water at first.
  4. Flush with clean water: Once the water runs clear, turn the water supply back on to rinse the tank.
  5. Close the valve and restore power: Once you’ve finished, close the drain valve, remove the hose, and turn the water and power supply back on.

Flushing the tank once a year helps maintain the efficiency of your water heater and prevent issues like reduced heating capacity or premature failure.

Regular Maintenance Saves Time and Money

Taking care of your plumbing and water systems is an essential part of homeownership. By checking and replenishing your water softener, cleaning the garbage disposal, unclogging drains, and flushing out your water heater, you can avoid costly repairs and improve the overall efficiency of your home’s water system. With these simple tasks, you can keep your home running smoothly and enjoy peace of mind knowing that you’re preventing bigger problems down the road.