As the new year approaches, it’s the ideal moment to review and strengthen your home’s preparedness for unexpected events. Creating a detailed home inventory is a simple yet powerful step—whether facing fire, theft, or other disasters, having a thorough record can make recovery faster and less stressful, helping you get back on track with ease.
Don’t Let a Disaster Set You Back
- The First Line of Defense: A Home Inventory In the aftermath of a disaster, your insurance agent’s first request will likely be for your home inventory. This detailed list of your belongings serves as the cornerstone for expediting the insurance claims process. It provides clarity on what was lost or damaged, facilitating a faster and more accurate assessment.
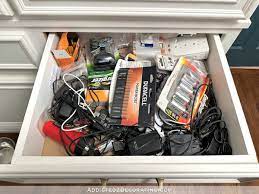
- Documenting the Essentials Begin your home inventory by documenting the essentials. Capture high-value items such as electronics, jewelry, furniture, and appliances. Note down serial numbers, purchase dates, and any relevant receipts. Include detailed descriptions and, if possible, take photographs or videos to create a visual record.
- Room-by-Room Approach To ensure a thorough inventory, adopt a systematic, room-by-room approach. Begin with one area and meticulously list each item. Move through your home, covering every room, closet, and storage space. This methodical process not only aids in organization but also minimizes the chances of overlooking items.
- Utilize Technology for Efficiency Leverage technology to streamline the inventory process. Consider using home inventory apps that allow you to catalog your belongings digitally. These apps often come with features like cloud storage, making it easier to access your inventory from anywhere, especially in the event of an emergency.
- Store Your Inventory Securely Once compiled, ensure your home inventory is stored securely. Whether it’s a physical document kept in a safe or a digital file stored in a secure cloud service, having a backup is crucial. This ensures that your inventory remains accessible, even if the original documentation is lost or damaged during a disaster.
- Update Regularly A home inventory is not a one-time task; it requires regular updates. As you acquire new items or part with old ones, revisit and revise your inventory. This practice guarantees that your documentation is always reflective of your current possessions, enhancing its accuracy and usefulness.
A proactive approach to peace of mind. Don’t let a disaster set you back; instead, empower yourself with the assurance that you are well-prepared for whatever the future may hold.
Download our free guide here:
https://bh-url.com/TerryMcDaniel/guide/LR6tWOpVT0WXvwd0qenMdg