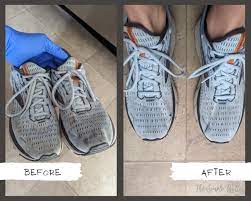
Our shoes carry us through life’s adventures, accumulating dirt and grime along the way. Unleash the transformative power of a deep clean by stripping your shoes. The step-by-step process to revitalize your footwear and step into a world of freshness.
1. Gather Your Tools:
Before diving in, gather the essentials for an effective cleaning session.
- Action Steps:
- Shoe brush or an old toothbrush
- Mild detergent or shoe cleaner
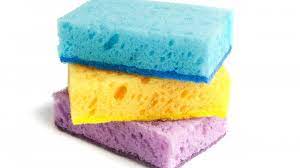
- Clean cloth or sponge
- Water
2. Remove Laces and Insoles:
Start by removing laces and insoles to ensure every nook and cranny gets the attention it deserves.
- Action Steps:
- Untie and remove laces.
- Take out insoles for a thorough clean.
3. Brush Away Surface Dirt:
Use a shoe brush or an old toothbrush to remove surface dirt and debris.
- Action Steps:
- Gently brush all exterior surfaces.
- Pay extra attention to seams and crevices.
4. Prepare Cleaning Solution:
Mix a small amount of mild detergent or specialized shoe cleaner with water.
- Action Steps:
- Create a soapy solution in a bowl.
- Ensure the detergent is suitable for the shoe material.
5. Wipe Down Exterior:
Dip a clean cloth or sponge into the soapy solution and wipe down the shoe’s exterior.
- Action Steps:
- Clean one section at a time.
- Use a gentle, circular motion for effective cleaning.
6. Clean Laces Separately:
Soak laces in the soapy water or, if applicable, replace them with new ones.
- Action Steps:
- Scrub laces with a toothbrush or replace if heavily soiled.
- Allow them to air-dry completely.
7. Dry Thoroughly:
After cleaning, let your shoes air-dry completely before reassembling.
- Action Steps:
- Place shoes in a well-ventilated area.
- Avoid direct sunlight or heat sources.
Stripping your shoes for a deep clean is a rewarding process that not only rejuvenates their appearance but also extends their lifespan.