Seasonal Maintenance Checklist: Essential Home Tasks to Complete Before Winter

It might still be 100 where you live, but Costco has Winter decorations out!

Proper seasonal maintenance not only ensures your home stays warm and energy-efficient but also prevents costly repairs down the road. Here’s your essential checklist to tackle before winter sets in.

1. Inspect and Clean Your HVAC System

Your HVAC system works hard to keep you comfortable through the winter. Before the temperature drops, schedule a professional inspection and cleaning. A technician can check for any issues, clean the system, and ensure everything is running efficiently. Additionally, replace or clean filters to maintain good air quality and system performance.

2. Seal Drafts and Insulate

Cold drafts can make your home uncomfortable and lead to higher energy bills. Inspect windows and doors for any gaps or leaks and seal them with weatherstripping or caulk. Don’t forget to check areas like electrical outlets and pipes that might need additional insulation. Adding or replacing insulation in attics and basements can also help keep your home warm and reduce heating costs.

3. Clean and Inspect Gutters

Fallen leaves and debris can clog your gutters and downspouts, leading to water damage and ice dams. Clean out gutters and downspouts thoroughly and ensure they’re properly attached and draining away from your home’s foundation. Installing gutter guards can also help reduce future clogs.

4. Check Roof and Chimney

Inspect your roof for any missing or damaged shingles that could lead to leaks. If you have a chimney, schedule a professional inspection and cleaning to prevent dangerous chimney fires and ensure proper ventilation.

5. Test Smoke and Carbon Monoxide Detectors

Cold weather can lead to increased use of heating systems and potentially dangerous indoor air quality issues. Test smoke and carbon monoxide detectors to ensure they’re working correctly and replace batteries as needed. Consider installing additional detectors if you don’t have them in key areas.

6. Prepare Outdoor Plumbing

To prevent pipes from freezing, insulate exposed outdoor pipes and disconnect garden hoses. Drain and store hoses, and if you have a sprinkler system, follow the manufacturer’s instructions for winterizing it.

7. Check Driveways and Walkways

Inspect your driveways and walkways for cracks or damage that could worsen with freezing temperatures. Repair any cracks and consider applying a sealant to protect the surfaces from ice and snow.

8. Stock Up on Winter Supplies

Ensure you have necessary winter supplies such as salt or sand for de-icing driveways and walkways, a snow shovel or snow blower for clearing snow, and emergency supplies like flashlights and batteries in case of power outages.

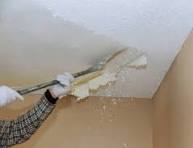
9. Inspect Attic and Basement

Check for any signs of leaks, mold, or pests in your attic and basement. Address any issues promptly to prevent them from becoming bigger problems during the winter months.

10. Review Your Emergency Plan

Winter storms can be unpredictable. Review your emergency plan, ensure you have a first aid kit, and keep a supply of non-perishable food and water on hand in case you’re snowed in or experience a power outage.

Taking the time to complete these essential maintenance tasks before winter arrives will help you stay warm, safe, and comfortable throughout the season. Not only will these efforts improve your home’s efficiency and longevity, but they will also provide peace of mind knowing that you’re well-prepared for the colder months.

Transform Your Space with a Dedicated Beverage Center

If you’re passionate about drinks—whether it’s crafting sophisticated cocktails, brewing the perfect coffee, or blending fresh smoothies—creating a dedicated beverage center in your home can elevate your drink preparation and hosting game to the next level. Imagine having a well-organized space that caters specifically to your beverage needs, turning your living area into the hottest spot for entertaining and enjoying your favorite drinks. Here’s how you can transform any corner of your home into a standout beverage center.

Why Create a Beverage Center?

A dedicated beverage center isn’t just about convenience; it’s about enhancing your experience and the enjoyment of your guests. Here are a few reasons why setting up a beverage center can be a game-changer:

  1. Efficiency and Organization: Having a designated area for your drinks means all your ingredients, tools, and glassware are in one place. No more scrambling for cocktail shakers or searching for that perfect glass. Everything you need is right at your fingertips.
  2. Enhanced Entertainment: A beverage center is a focal point for gatherings. It encourages guests to mingle and interact, making your home the go-to spot for entertaining. Whether it’s a weekend brunch or an evening cocktail party, your beverage center will be a hit.
  3. Versatility: You don’t have to limit your beverage center to alcoholic drinks. Consider transforming the space into a coffee bar, smoothie station, or a combination of both. The possibilities are endless and can be tailored to your lifestyle and preferences.

How to Create Your Beverage Center

  1. Choose the Right Space: Your beverage center can be as elaborate or as simple as you like. You might carve out a corner of your living room, repurpose a pantry or closet, or even design a custom-built bar area. Consider how much space you have and how you want to use it.
  2. Equip the Space: Depending on your focus, equip your beverage center with the necessary tools and accessories. For cocktails, invest in quality barware such as shakers, jiggers, and strainers. For coffee, consider a high-quality espresso machine, grinders, and a selection of syrups and flavorings. For smoothies, a powerful blender and fresh fruits will be essential.
  3. Organize and Display: Use shelves, cabinets, and drawers to keep everything organized. Display your favorite spirits, coffee beans, or smoothie ingredients in a way that’s visually appealing. Consider adding a small refrigerator or wine cooler if space allows.
  4. Personalize Your Space: Add personal touches that reflect your style and interests. Whether it’s artwork, a chalkboard for cocktail recipes, or a selection of unique glassware, make your beverage center a reflection of your personality.
  5. Consider Seating: If you have the space, adding seating to your beverage center can enhance the experience. A couple of bar stools or a small table can make it a cozy spot for sipping and socializing.

Inspiration for Your Beverage Center

  1. The Classic Bar Cart: For a chic and mobile option, a stylish bar cart can serve as your beverage center. It’s perfect for small spaces and can be easily moved around.
  2. The Coffee Nook: Create a dedicated coffee corner with a high-quality coffee machine, a selection of beans, and stylish mugs. Add a few shelves for syrups and accessories for a complete setup.
  3. The Smoothie Station: If smoothies are more your style, set up a blender, a variety of fruits, and some nutritious add-ins like protein powders and seeds.
  4. The Integrated Bar Area: For a more permanent solution, design a built-in bar area with cabinetry and counter space. Include a mini fridge, a sink, and plenty of storage for glassware and ingredients.

Transforming a part of your home into a dedicated beverage center is more than just a practical upgrade; it’s an investment in your lifestyle and enjoyment. Whether you’re mixing cocktails, brewing coffee, or whipping up smoothies, having a well-designed beverage area can make a significant difference in your daily routine and hosting experiences.

The Importance of Keeping Vital Records Safe at Home

Identity theft and natural disasters are real concerns, safeguarding your vital records is more important than ever. Documents like birth certificates, Social Security cards, passports, and property deeds are essential for proving your identity and accessing important services. Keeping these vital records secure at home should be a priority, and one of the best ways to do so is by storing them in a safe.

Why You Need to Protect Your Vital Records

Vital records are more than just pieces of paper; they are key to your personal identity and legal standing. Losing or damaging these documents can result in significant hassles, from the time-consuming process of replacing them to potential security risks like identity theft.

For example, a birth certificate or Social Security card falling into the wrong hands can be used to open fraudulent accounts, leading to financial loss and long-term damage to your credit. Similarly, property deeds and titles are critical in establishing ownership, and losing them could complicate legal matters related to your home or assets.

The Benefits of Keeping Vital Records in a Safe

Storing your vital records in a home safe offers several key advantages:

  1. Protection from Fire and Water Damage
  • A high-quality safe provides protection against fire and water, ensuring that your documents remain intact even in the event of a disaster. Fires, floods, and other emergencies can strike unexpectedly, and having a safe place for your records can prevent them from being destroyed.
  1. Security from Theft
  • A safe offers a secure location that is difficult for intruders to access. Keeping your vital records in a locked safe ensures that they are protected from theft, reducing the risk of identity fraud and other security breaches.
  1. Organized and Accessible
  • A safe helps you keep all your important documents in one organized place. This not only makes them easier to find when you need them but also reduces the chance of them being misplaced or accidentally discarded.
  1. Peace of Mind
  • Knowing that your vital records are stored securely in a safe provides peace of mind. You can rest easy knowing that, even in the face of unexpected events, your most important documents are protected.

What to Store in Your Safe

When deciding what documents to store in your safe, consider the following vital records:

  • Birth Certificates and Social Security Cards
  • Passports
  • Marriage and Divorce Certificates
  • Property Deeds and Titles
  • Insurance Policies
  • Wills and Powers of Attorney
  • Medical Records and Immunization History
  • Bank Account Information and Financial Records

In addition to paper documents, you may also want to include digital backups of these records stored on an encrypted USB drive.

Choosing the Right Safe

When selecting a safe for your home, consider the following factors:

  • Fire and Water Resistance: Look for safes that are rated to withstand high temperatures and water exposure.
  • Size: Choose a safe large enough to store all your vital records comfortably, with room for any additional valuables you may want to secure.
  • Security Features: Opt for a safe with advanced locking mechanisms, such as biometric or keypad entry, for added security.
  • Portability: Depending on your needs, you may want a safe that is lightweight and easy to move, or one that is heavier and more difficult to remove from your home.

Your vital records are essential to your identity and legal standing. Keeping them safe from damage, theft, and loss should be a priority. By investing in a high-quality safe and storing your important documents securely at home, you can protect your future and ensure that you have access to these critical records when you need them most. Take the time to assess your current storage solutions and consider upgrading to a safe that will provide the protection and peace of mind you deserve.

https://amzn.to/3YPNLLz

Increasing Home Value: The Impact of Removing Popcorn Ceilings

Popcorn ceilings, once a popular design trend in the ’80s, have lost their appeal in modern times. Beyond aesthetics, there are valid reasons for homeowners to consider removing them. Not only do they date a property, but they can also pose safety concerns related to asbestos, a common material used in older popcorn ceilings.

By choosing to remove popcorn ceilings, homeowners can significantly increase their property’s value and attract potential buyers. A smooth, updated ceiling creates a modern and fresh look, instantly elevating the home’s overall appeal. Moreover, in today’s competitive real estate market, buyers seek move-in ready properties that require minimal renovation.

While removing popcorn ceilings may be a quick fix, it’s essential to entrust this task to professionals to avoid any risks associated with asbestos exposure. Making this investment ensures not only a higher selling price but also the peace of mind that comes with knowing the home is safe and updated for its new occupants. 🏡✨ #HomeImprovement #PopcornCeilingRemoval #IncreaseHomeValue

Getting Ready for Football Season: Choosing the Best TV and Viewing Distance

Football season is right around the corner, and for many fans, it’s the perfect excuse to upgrade their home entertainment setup. Walking into a store like Costco, you’ll notice that TVs are prominently displayed, enticing you with their vibrant colors and sharp images. But once you decide on a new TV, one important question remains: what is the optimal distance from your couch to your TV for the best viewing experience?

Understanding TV Size and Viewing Distance

The size of your TV and the distance between the screen and your seating area can significantly impact your viewing experience. Sitting too close can lead to eye strain and discomfort, while sitting too far away can diminish the details and clarity of the picture.

The recommended viewing distance depends on the size of your TV and its resolution (HD, Full HD, or 4K Ultra HD). Here’s a general guideline to help you determine the best distance for your new TV:

Viewing Distance Guidelines

HDTV (720p/1080p)

  • 32-inch TV: Sit about 4.5 to 6.5 feet away.
  • 40-inch TV: Sit about 5 to 8.5 feet away.
  • 50-inch TV: Sit about 6.5 to 10.5 feet away.
  • 60-inch TV: Sit about 7.5 to 12.5 feet away.

4K Ultra HD TV

  • 40-inch TV: Sit about 3 to 5 feet away.
  • 50-inch TV: Sit about 4 to 6.5 feet away.
  • 60-inch TV: Sit about 5 to 8 feet away.
  • 70-inch TV: Sit about 6 to 10 feet away.

Factors to Consider

  1. Room Size and Layout Consider the size of your room and the placement of furniture when determining the best viewing distance. Ensure that the TV is positioned at eye level and free from glare or reflections.
  2. Personal Preference While guidelines provide a good starting point, personal preference plays a significant role. Some people prefer a more immersive experience and might choose to sit closer, while others may opt for a more relaxed view from a greater distance.
  3. Resolution and Content Type Higher resolution TVs (like 4K) allow you to sit closer without noticing pixelation, providing a sharper image. If you enjoy watching sports or high-action content, you might prefer sitting closer for a more detailed view.
  4. Eye Comfort Maintain a comfortable distance that prevents eye strain. Ensure the room is adequately lit to reduce glare and reflections on the screen.

Tips for Setting Up Your TV

  • Mounting Height: Position the TV so that the center of the screen is at eye level when seated.
  • Angle: Ensure the TV is directly in front of the seating area to avoid neck strain.
  • Sound: Consider investing in a soundbar or surround sound system for an enhanced audio experience.

As football season kicks off, choosing the right TV and setting up your viewing area can make all the difference in your game-day experience. Use these guidelines to find the best distance from your couch to your TV, ensuring a comfortable and immersive viewing experience. Whether you’re watching the big game or your favorite show, a well-placed TV can elevate your home entertainment setup.

Comfort: Creating a Living Space That Is Comfortable and Enjoyable

A comfortable living space is more than just a luxury—it’s essential for your well-being and enjoyment. Whether you’re relaxing after a long day, hosting friends, or simply spending time with family, creating a cozy and inviting environment can make all the difference. Here’s how to make your home a place where comfort and enjoyment are top priorities.

Why Comfort Matters

1. Enhances Relaxation

A well-designed, comfortable space helps you unwind and relax:

  • Stress Reduction: A cozy environment can help lower stress levels and promote relaxation.
  • Restful Sleep: Comfortable bedding and a peaceful bedroom environment improve sleep quality.

2. Boosts Enjoyment

An inviting home enhances your overall enjoyment:

  • Entertaining Guests: A comfortable setting makes entertaining more enjoyable for both you and your guests.
  • Daily Happiness: Being in a space you love can lift your mood and contribute to daily happiness.

3. Supports Well-Being

A comfortable home supports your physical and mental well-being:

  • Health Benefits: Ergonomic furniture and good airflow contribute to physical health.
  • Mental Calm: A well-organized and aesthetically pleasing space promotes mental clarity and peace.

Tips for Creating a Comfortable Living Space

1. Invest in Quality Furniture

Quality furniture enhances comfort and durability:

  • Choose Ergonomic Pieces: Opt for chairs and sofas that support good posture and offer comfort.
  • Consider Fabric and Cushions: Soft, durable fabrics and comfortable cushions add to the coziness of your furniture.

2. Layer Your Textiles

Textiles add warmth and comfort to your space:

  • Use Throw Blankets: Drape soft throw blankets over sofas and chairs for added comfort.
  • Add Plush Rugs: Area rugs can add warmth and softness underfoot.

3. Optimize Lighting

Proper lighting sets the mood and enhances comfort:

  • Incorporate Multiple Light Sources: Use a mix of overhead, task, and ambient lighting to create a warm and inviting atmosphere.
  • Choose Soft Bulbs: Opt for soft, warm light bulbs for a cozy and relaxing environment.

4. Create a Cozy Atmosphere

Design elements that promote coziness:

  • Incorporate Warm Colors: Use warm tones like beige, soft brown, or muted greens to create a soothing environment.
  • Add Personal Touches: Display personal items like photos, artwork, or souvenirs to make the space uniquely yours.

5. Ensure Proper Temperature Control

Temperature plays a significant role in comfort:

  • Use Fans and Heaters: Invest in fans and heaters to maintain a comfortable temperature throughout the year.
  • Consider Window Treatments: Use curtains or blinds to regulate indoor temperature and light.

6. Maintain Cleanliness and Organization

A clean, organized space contributes to comfort:

  • Declutter Regularly: Keep your space tidy to reduce stress and create a more enjoyable environment.
  • Create Storage Solutions: Use shelves, cabinets, and baskets to keep items organized and out of sight.

7. Incorporate Nature

Bringing nature indoors can enhance comfort:

  • Add Houseplants: Plants improve air quality and bring a touch of nature indoors.
  • Use Natural Materials: Incorporate materials like wood, stone, or woven fibers to create a warm, natural feel.

8. Personalize Your Space

Customize your space to reflect your preferences:

  • Choose Comfortable Fabrics: Select fabrics and materials that you find pleasing and comfortable.
  • Create Relaxation Zones: Designate areas for relaxation, such as reading nooks or meditation spaces.

9. Include Functional Elements

Functional features add to overall comfort:

  • Invest in Multi-Functional Furniture: Choose furniture that serves multiple purposes, like storage ottomans or sleeper sofas.
  • Include Practical Accessories: Items like cozy throws, soft pillows, and a well-stocked coffee station can enhance comfort.

Creating a comfortable living space is all about designing an environment that supports relaxation, enjoyment, and well-being. By investing in quality furniture, optimizing lighting, and adding personal touches, you can transform your home into a cozy haven that enhances your daily life. Embrace these tips and make your space a place where you truly feel at ease.

Why You Might Want to Rearrange Your Furniture: Benefits and Tips

Rearranging your furniture might seem like a simple task, but it can have a profound impact on your living space. Whether you’re looking to refresh your home’s look or improve functionality, a new furniture arrangement can breathe new life into your environment. Here’s why you might want to consider rearranging your furniture and how to do it effectively.

Benefits of Rearranging Furniture

1. Enhance Functionality

A new layout can significantly improve the functionality of your space. For example:

  • Optimizing Traffic Flow: Rearranging furniture can create a smoother flow through the room, making it easier to navigate.
  • Improving Usability: You can make better use of space by placing furniture where it’s most needed, such as creating distinct zones for different activities.

2. Update Your Home’s Aesthetic

A fresh arrangement can give your home a new look without the need for a complete renovation. This can be especially beneficial if:

  • Changing Seasons: You want to update the look of your home to reflect seasonal changes or trends.
  • Boredom with Current Setup: You’re simply looking for a change to refresh your living environment.

3. Maximize Space

Rearranging can help you make the most of your available space, particularly in smaller rooms. Consider:

  • Creating More Space: Rearranging can open up areas that felt cramped or cluttered.
  • Functional Zones: Designating specific areas for different functions (e.g., work, relaxation, dining) can make your space more versatile.

4. Improve Comfort and Well-Being

A thoughtful furniture arrangement can enhance your comfort and well-being by:

  • Reducing Clutter: Arranging furniture efficiently can help keep your space organized and clutter-free.
  • Creating Cozy Areas: Positioning furniture to create inviting, comfortable areas can improve relaxation and enjoyment of your home.

5. Boost Home Organization

Effective furniture placement can assist with better organization by:

  • Incorporating Storage Solutions: Positioning furniture to include or optimize storage can help manage household items.
  • Streamlining Access: Rearranging can make frequently used items more accessible.

Tips for Rearranging Your Furniture

1. Assess Your Space

Before moving anything, take a close look at your space. Consider:

  • Room Dimensions: Measure the room and your furniture to ensure everything fits comfortably.
  • Natural Light: Think about how the placement will affect natural light and ventilation.

2. Define Your Goals

Identify what you hope to achieve with the rearrangement. This might include:

  • Creating a Focal Point: Designating a focal point such as a fireplace or TV.
  • Improving Functionality: Addressing specific needs like creating a reading nook or enhancing social areas.

3. Experiment with Layouts

Try out different arrangements before committing. You can:

  • Use Software: Furniture layout apps or online tools can help you visualize different configurations.
  • Make Templates: Create scaled drawings or use masking tape on the floor to outline potential layouts.

4. Consider Traffic Flow

Ensure there’s enough space for easy movement. Avoid:

  • Blocking Pathways: Keep walkways clear to avoid creating obstacles.
  • Overcrowding: Avoid placing too much furniture in a small space, which can make it feel cramped.

5. Incorporate Key Design Principles

Keep these design principles in mind:

  • Balance: Arrange furniture to achieve visual balance in the room.
  • Proportion: Ensure furniture sizes are proportionate to the room and each other.
  • Harmony: Coordinate colors, textures, and styles to create a cohesive look.

6. Accessorize Thoughtfully

Once you’ve rearranged the furniture, consider:

  • Adding Accessories: Introduce new decor items like rugs, lamps, and cushions to complement the new layout.
  • Testing Comfort: Sit in different spots to ensure the arrangement is comfortable and functional.

Rearranging your furniture can transform your living space, enhancing both its functionality and aesthetic appeal. By carefully considering your goals and experimenting with different layouts, you can create a fresh, inviting environment that better suits your needs and preferences. Whether you’re aiming to optimize space, update your home’s look, or improve comfort, a little rearrangement can make a big difference.

Preparing Your Home for Vacation: Essential Steps to Secure Your House

Before you pack your bags and head off to your dream vacation destination, it’s important to ensure that your home is secure. An unoccupied house can be an easy target for burglars, but with some careful planning and simple precautions, you can protect your home and enjoy a worry-free vacation. Here’s a comprehensive guide to preparing your house before you leave.

1. Manage Your Lawn and Exterior

An overgrown lawn is a clear sign that no one is home. To avoid this, arrange for someone to take care of your yard while you’re away. Hiring a neighborhood kid or a professional lawn service to mow the lawn and tend to any garden needs can keep your house looking occupied.

2. Handle Your Mail and Deliveries

An overflowing mailbox and a pile of packages on the doorstep are red flags for intruders. Contact the post office to temporarily stop your mail delivery, or ask a trusted neighbor to collect it for you. Additionally, pause any newspaper deliveries and arrange for a friend or neighbor to pick up any packages that may arrive.

3. Use Light Timers and Smart Lighting

Darkened windows and a lack of evening lights make it obvious that a house is empty. To create the illusion that someone is home, use light timers to turn lights on and off at various times. For more advanced control, consider investing in an app-controlled smart lighting system. These systems allow you to remotely control your home’s lights from your smartphone, making it easy to simulate occupancy.

4. Secure Doors and Windows

Before leaving, double-check that all doors and windows are securely locked. Reinforce sliding doors with a metal rod or a wooden dowel in the track. Ensure that your garage door is also locked and that any interior doors leading from the garage to the house are secured.

5. Set Up a Security System

If you don’t already have one, consider installing a security system. Many modern systems offer features such as motion detectors, door and window sensors, and security cameras that you can monitor remotely. Displaying security system signs can also act as a deterrent to potential burglars.

6. Inform Trusted Neighbors

Let a trusted neighbor know about your travel plans. They can keep an eye on your property, collect any unexpected deliveries, and even park their car in your driveway to give the appearance that someone is home. Provide them with your contact information and a spare key in case of emergencies.

7. Unplug Electronics and Appliances

Unplugging non-essential electronics and appliances not only saves energy but also reduces the risk of electrical fires. This includes items like coffee makers, toasters, and televisions. Additionally, consider turning off your water supply to prevent potential leaks or flooding.

8. Adjust Your Thermostat

Set your thermostat to an energy-saving temperature. If you’re traveling during the winter, ensure it’s set high enough to prevent pipes from freezing. In the summer, set it to a level that keeps your house comfortable for any pets that may be staying behind or for the sake of your plants.

9. Hide Valuables

Store any valuable items, such as jewelry, important documents, and expensive electronics, in a safe or a hidden, secure location. Avoid leaving them in plain sight where they could tempt intruders.

10. Check Your Home Insurance

Review your home insurance policy to ensure you have adequate coverage while you’re away. Make sure you know what’s covered and have a clear understanding of the procedure to follow in case of an incident.

Taking these precautions before you leave for vacation can help ensure that your home remains safe and secure while you’re away. By managing your lawn, handling your mail, using light timers, securing entry points, and enlisting the help of trusted neighbors, you can deter potential intruders and enjoy your vacation with peace of mind. So, before you head out for your adventure, take the time to prepare your home—

Smart Lighting:

https://amzn.to/45UOWe6

The Art of Thoughtful Hosting and Guest Etiquette

Hosting and attending gatherings is more than just an event—it’s an opportunity to foster connections and show appreciation. Whether you’re the host or the guest, here are some tips to enhance your experience and make every gathering memorable.

For Guests: Show Appreciation with Thoughtful Gestures

When attending a gathering, never arrive empty-handed, even if the host insists. A small token of appreciation like homemade jam or a scented candle shows thoughtfulness and gratitude. If time is short, handpicked flowers in a vase make for a charming gift that can brighten up the host’s home.

If the host suggests bringing something specific to lighten their load, embrace the opportunity. Whether it’s dessert, a salad, or a favorite drink, contributing to the meal adds to the communal spirit of the occasion.

For Hosts: Set the Stage for a Welcoming Atmosphere

As a host, make your guests feel welcomed from the moment they arrive. Have a drinks station ready with a variety of options, including non-alcoholic beverages, so everyone can find something to enjoy immediately. Consider a setup like a bar cart or a cooler stocked with ice, glasses, and garnishes to elevate the experience.

Communicate clearly with your guests about what they can bring to help, whether it’s preparing a dish, clearing plates, or entertaining children. Guests often appreciate having a specific task assigned as it makes them feel valued and involved in the event.

Mutual Courtesy: Offer Assistance and Relaxation

Guests should offer their help throughout the gathering, whether it’s in the kitchen preparing food or assisting with cleanup. These small gestures not only ease the host’s responsibilities but also strengthen bonds and ensure a smoother event.

For hosts, prioritize your own enjoyment by preparing in advance. Consider prepping meals ahead of time, curating a relaxing ambiance with music, and allowing yourself moments to unwind before guests arrive. Remember, the essence of hosting lies in enjoying time spent together, not in striving for perfection.

Conclusion: Creating Lasting Memories Through Thoughtful Gatherings

Whether you’re hosting a dinner party or attending a backyard barbecue, embracing these tips can transform any gathering into a memorable occasion. By showing appreciation, offering assistance, and focusing on relaxed enjoyment, both hosts and guests contribute to the warmth and camaraderie that define meaningful social interactions.

Let each gathering be an opportunity to connect, share, and celebrate the joy of spending time together in a welcoming environment.

Simplify Your Home: A Donation Box

Living in a clutter-free, organized home not only enhances your living space but also brings a sense of calm and order to your daily life. One of the simplest yet most effective ways to maintain a tidy home is by keeping a donation box handy. This small change can have a big impact on reducing clutter and helping you stay organized. Here’s how you can use a donation box to simplify your home.

The Concept of the Donation Box

The idea is simple: place a box in a convenient location, such as your closet or laundry room, and use it to collect items you no longer need or use. This box serves as a designated spot for anything you decide to part with, making the decluttering process more manageable and continuous.

Benefits of Keeping a Donation Box Handy

  1. Continuous Decluttering:
    By having a donation box readily available, you can declutter your home on an ongoing basis. Instead of waiting for a big spring cleaning session, you can gradually remove items you no longer need, keeping your space consistently tidy.
  2. Ease of Use:
    The donation box simplifies the process of deciding what to keep and what to donate. Whenever you come across an item that you no longer use, you can quickly place it in the box without having to overthink or delay the decision.
  3. Encourages Minimalism:
    Keeping a donation box encourages a minimalist mindset. It prompts you to regularly evaluate your belongings and focus on what truly adds value to your life, rather than holding onto unnecessary items.
  4. Helps Others:
    Donating items you no longer need is a great way to give back to your community. Your gently used clothes, toys, and household items can benefit those in need, making your decluttering efforts even more rewarding.

How to Set Up and Use Your Donation Box

Choose a Location:
Select a spot in your home that is easily accessible. The closet or laundry room are ideal locations because they are places you visit frequently and are often associated with sorting through belongings.

Use a Suitable Container:
Find a sturdy box or bin that can hold a variety of items. It doesn’t have to be fancy—a cardboard box, plastic bin, or reusable shopping bag will do the trick.

Label the Box:
Label the box clearly with “Donations” so everyone in your household knows its purpose. This can also serve as a gentle reminder to regularly add items to the box.

Set a Donation Routine:
Once your donation box is full, make it a habit to take it to your local donation center. Establish a routine, such as donating once a month or whenever the box fills up, to ensure items are regularly leaving your home.

Involve the Whole Family:
Encourage everyone in your household to participate in using the donation box. Teach children the value of giving and involve them in the process of selecting items to donate. This not only helps maintain a clutter-free home but also instills good habits and values in your children.

Incorporating a donation box into your home is a small yet impactful way to simplify your living space. By continuously decluttering, making quick decisions about what to keep, and regularly donating items, you can create a more organized, peaceful, and minimalist environment. Plus, you’ll be contributing to your community by providing others with items they might need. Embrace the power of the donation box and enjoy the benefits of a simplified home.