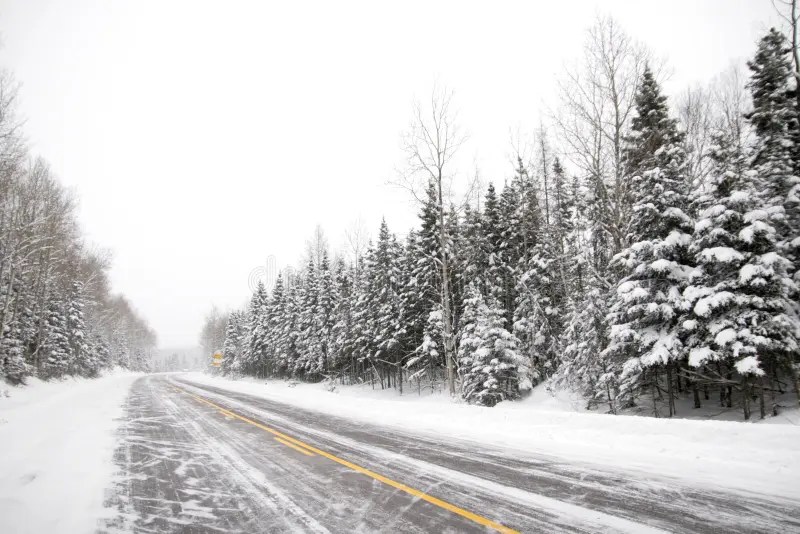
4 Home Modifications for Our Aging Generation

As we age, maintaining comfort, accessibility, and safety in our homes becomes increasingly important. Simple modifications can make daily tasks easier and create a space that supports independence. Here are four key home updates designed with aging individuals in mind.

1. Replace Cabinet and Door Handles

Traditional knobs can be challenging for individuals with arthritis or limited dexterity. Consider replacing them with D-shaped handles, which are easier to grasp and don’t require twisting motions. This small change can significantly enhance functionality while maintaining style. These handles are available in a wide range of designs, ensuring your home stays both practical and aesthetically pleasing.

2. Install Grab Bars and Railings

Grab bars are essential safety features, particularly in areas prone to slips and falls, like the bathroom. They provide stability for movements and can double as a resting handhold. Proper installation is key to ensuring they support weight effectively. Railings along stairs or outdoor steps can also be lifesavers, offering additional balance and confidence for homeowners.

3. Widen Doorways to 36 Inches, at Minimum

Mobility aids like wheelchairs and walkers require sufficient space to navigate. Standard doorways are often too narrow, creating obstacles. By widening doorways to at least 36 inches, you ensure easier movement throughout the home. This modification promotes long-term accessibility, making it possible to age in place comfortably.

4. Update Flooring for Safety

Slippery or uneven flooring poses a significant risk for falls. Consider replacing slick surfaces with non-slip materials like textured vinyl, rubber, or carpet tiles. Additionally, ensure any area rugs have non-slip backing or are secured to the floor to prevent tripping.

Aging Gracefully at Home

These thoughtful modifications enhance safety, accessibility, and overall quality of life. Whether you’re planning for yourself or helping a loved one, taking proactive steps ensures that home remains a haven for years to come.

By making these updates, you can create a space that adapts to your needs and allows you to age comfortably and independently.

Prep Your Home for Winter: Wrap Your Water Heater in Warmth

As temperatures drop and energy bills rise, it’s the perfect time to ensure your home is winter-ready. One often-overlooked energy saver? Insulating your hot water heater. If your unit is older or has an R-value below 24 (check the label or manual), it could be losing heat unnecessarily. Here’s how to keep it cozy and efficient.

Why Wrap Your Water Heater?

Think of a water heater insulation blanket as a jacket for your tank. Made from materials like foil or fiberglass, these wraps reduce heat loss by 25-45%. This means your water heater doesn’t have to work as hard, saving energy and lowering utility costs by 7-16%. Over the course of a year, the savings often pay for the cost of the blanket.

How to Tell If Your Water Heater Needs Wrapping

  • Touch Test: If your water heater feels warm, it’s losing heat.
  • Check the R-Value: If it’s less than 24, it’s a good candidate for insulation.

Choosing the Right Blanket

Water heater blankets come in various sizes, so make sure to pick one that fits your tank. Options range from budget-friendly foil wraps to thicker fiberglass models. Look for kits that include adhesive or straps for easy installation.

Quick Installation Tips

  1. Turn off the water heater: Safety first!
  2. Cut around controls: Ensure vents, knobs, and access panels are unobstructed.
  3. Secure tightly: Use the straps provided to snugly wrap the blanket around the tank.

Bonus: Eco-Friendly and Budget-Friendly

By insulating your water heater, you’re not just saving money—you’re reducing your home’s energy consumption, which is great for the environment.

Wrapping It Up (Pun Intended)

Prepping for winter doesn’t have to be complicated. Small upgrades, like wrapping your hot water heater, can lead to big savings and a cozier home. So, grab that insulation blanket and give your water heater the winter jacket it deserves!

https://amzn.to/3YVxeE7

How to Start Tackling Small Projects Around the House

Taking on home improvement projects can be both exciting and overwhelming. Starting small and building your skills gradually is the key to successfully completing tasks and gaining confidence. Here’s a guide to help you get started with those small projects around the house:

1. Start Small: Build Your Confidence

When you’re new to DIY projects, it’s wise to begin with simple tasks. Starting small allows you to build your confidence and get a feel for handling tools and materials. Consider starting with projects like fixing a leaky faucet, painting a room, or changing a light fixture. These tasks are manageable and provide immediate results, which can be incredibly motivating.

2. Gather Tools: Invest in Basics

Having the right tools is essential for any home project. Invest in a basic toolkit that includes items such as a hammer, screwdriver set, pliers, a tape measure, and a utility knife. These tools will serve you well for a variety of tasks. As you progress and take on more complex projects, you can expand your toolkit with specialized tools as needed.

3. Watch Tutorials: Learn from the Experts

Online tutorials can be a fantastic resource for learning how to tackle different home improvement tasks. Websites like YouTube have countless videos demonstrating step-by-step instructions for everything from basic repairs to more intricate projects. Watching these tutorials can provide you with visual guidance and help you understand the techniques involved in completing your tasks.

4. Read Instructions: Follow Closely

For tasks like assembling furniture or installing fixtures, following instructions closely is crucial. Carefully read and follow the manufacturer’s guidelines to ensure that you complete the task correctly. Paying attention to details in the instructions can help you avoid mistakes and achieve better results.

5. Ask for Help: Seek Advice and Assistance

Don’t hesitate to reach out to friends, family, or neighbors who have experience with DIY projects. Asking for advice or help can be incredibly valuable, especially when you’re tackling a task for the first time. More experienced individuals can offer tips, answer questions, and provide hands-on assistance if needed.

Starting small and tackling simple projects around the house can be a rewarding way to build your DIY skills. By gathering the right tools, learning from tutorials, following instructions, and seeking advice, you’ll be well-equipped to handle a variety of tasks. As you gain confidence and experience, you can gradually take on more complex projects and continue to improve your home.

Seasonal Maintenance Checklist: Essential Home Tasks to Complete Before Winter

It might still be 100 where you live, but Costco has Winter decorations out!

Proper seasonal maintenance not only ensures your home stays warm and energy-efficient but also prevents costly repairs down the road. Here’s your essential checklist to tackle before winter sets in.

1. Inspect and Clean Your HVAC System

Your HVAC system works hard to keep you comfortable through the winter. Before the temperature drops, schedule a professional inspection and cleaning. A technician can check for any issues, clean the system, and ensure everything is running efficiently. Additionally, replace or clean filters to maintain good air quality and system performance.

2. Seal Drafts and Insulate

Cold drafts can make your home uncomfortable and lead to higher energy bills. Inspect windows and doors for any gaps or leaks and seal them with weatherstripping or caulk. Don’t forget to check areas like electrical outlets and pipes that might need additional insulation. Adding or replacing insulation in attics and basements can also help keep your home warm and reduce heating costs.

3. Clean and Inspect Gutters

Fallen leaves and debris can clog your gutters and downspouts, leading to water damage and ice dams. Clean out gutters and downspouts thoroughly and ensure they’re properly attached and draining away from your home’s foundation. Installing gutter guards can also help reduce future clogs.

4. Check Roof and Chimney

Inspect your roof for any missing or damaged shingles that could lead to leaks. If you have a chimney, schedule a professional inspection and cleaning to prevent dangerous chimney fires and ensure proper ventilation.

5. Test Smoke and Carbon Monoxide Detectors

Cold weather can lead to increased use of heating systems and potentially dangerous indoor air quality issues. Test smoke and carbon monoxide detectors to ensure they’re working correctly and replace batteries as needed. Consider installing additional detectors if you don’t have them in key areas.

6. Prepare Outdoor Plumbing

To prevent pipes from freezing, insulate exposed outdoor pipes and disconnect garden hoses. Drain and store hoses, and if you have a sprinkler system, follow the manufacturer’s instructions for winterizing it.

7. Check Driveways and Walkways

Inspect your driveways and walkways for cracks or damage that could worsen with freezing temperatures. Repair any cracks and consider applying a sealant to protect the surfaces from ice and snow.

8. Stock Up on Winter Supplies

Ensure you have necessary winter supplies such as salt or sand for de-icing driveways and walkways, a snow shovel or snow blower for clearing snow, and emergency supplies like flashlights and batteries in case of power outages.

9. Inspect Attic and Basement

Check for any signs of leaks, mold, or pests in your attic and basement. Address any issues promptly to prevent them from becoming bigger problems during the winter months.

10. Review Your Emergency Plan

Winter storms can be unpredictable. Review your emergency plan, ensure you have a first aid kit, and keep a supply of non-perishable food and water on hand in case you’re snowed in or experience a power outage.

Taking the time to complete these essential maintenance tasks before winter arrives will help you stay warm, safe, and comfortable throughout the season. Not only will these efforts improve your home’s efficiency and longevity, but they will also provide peace of mind knowing that you’re well-prepared for the colder months.

The Importance of Keeping Vital Records Safe at Home

Identity theft and natural disasters are real concerns, safeguarding your vital records is more important than ever. Documents like birth certificates, Social Security cards, passports, and property deeds are essential for proving your identity and accessing important services. Keeping these vital records secure at home should be a priority, and one of the best ways to do so is by storing them in a safe.

Why You Need to Protect Your Vital Records

Vital records are more than just pieces of paper; they are key to your personal identity and legal standing. Losing or damaging these documents can result in significant hassles, from the time-consuming process of replacing them to potential security risks like identity theft.

For example, a birth certificate or Social Security card falling into the wrong hands can be used to open fraudulent accounts, leading to financial loss and long-term damage to your credit. Similarly, property deeds and titles are critical in establishing ownership, and losing them could complicate legal matters related to your home or assets.

The Benefits of Keeping Vital Records in a Safe

Storing your vital records in a home safe offers several key advantages:

  1. Protection from Fire and Water Damage
  • A high-quality safe provides protection against fire and water, ensuring that your documents remain intact even in the event of a disaster. Fires, floods, and other emergencies can strike unexpectedly, and having a safe place for your records can prevent them from being destroyed.
  1. Security from Theft
  • A safe offers a secure location that is difficult for intruders to access. Keeping your vital records in a locked safe ensures that they are protected from theft, reducing the risk of identity fraud and other security breaches.
  1. Organized and Accessible
  • A safe helps you keep all your important documents in one organized place. This not only makes them easier to find when you need them but also reduces the chance of them being misplaced or accidentally discarded.
  1. Peace of Mind
  • Knowing that your vital records are stored securely in a safe provides peace of mind. You can rest easy knowing that, even in the face of unexpected events, your most important documents are protected.

What to Store in Your Safe

When deciding what documents to store in your safe, consider the following vital records:

  • Birth Certificates and Social Security Cards
  • Passports
  • Marriage and Divorce Certificates
  • Property Deeds and Titles
  • Insurance Policies
  • Wills and Powers of Attorney
  • Medical Records and Immunization History
  • Bank Account Information and Financial Records

In addition to paper documents, you may also want to include digital backups of these records stored on an encrypted USB drive.

Choosing the Right Safe

When selecting a safe for your home, consider the following factors:

  • Fire and Water Resistance: Look for safes that are rated to withstand high temperatures and water exposure.
  • Size: Choose a safe large enough to store all your vital records comfortably, with room for any additional valuables you may want to secure.
  • Security Features: Opt for a safe with advanced locking mechanisms, such as biometric or keypad entry, for added security.
  • Portability: Depending on your needs, you may want a safe that is lightweight and easy to move, or one that is heavier and more difficult to remove from your home.

Your vital records are essential to your identity and legal standing. Keeping them safe from damage, theft, and loss should be a priority. By investing in a high-quality safe and storing your important documents securely at home, you can protect your future and ensure that you have access to these critical records when you need them most. Take the time to assess your current storage solutions and consider upgrading to a safe that will provide the protection and peace of mind you deserve.

https://amzn.to/3YPNLLz

Increasing Home Value: The Impact of Removing Popcorn Ceilings

Popcorn ceilings, once a popular design trend in the ’80s, have lost their appeal in modern times. Beyond aesthetics, there are valid reasons for homeowners to consider removing them. Not only do they date a property, but they can also pose safety concerns related to asbestos, a common material used in older popcorn ceilings.

By choosing to remove popcorn ceilings, homeowners can significantly increase their property’s value and attract potential buyers. A smooth, updated ceiling creates a modern and fresh look, instantly elevating the home’s overall appeal. Moreover, in today’s competitive real estate market, buyers seek move-in ready properties that require minimal renovation.

While removing popcorn ceilings may be a quick fix, it’s essential to entrust this task to professionals to avoid any risks associated with asbestos exposure. Making this investment ensures not only a higher selling price but also the peace of mind that comes with knowing the home is safe and updated for its new occupants. 🏡✨ #HomeImprovement #PopcornCeilingRemoval #IncreaseHomeValue

End of Summer and Your Hose is Leaking? Repair It Instead of Buying a New One

As summer winds down, you might notice that your trusty garden hose has developed a leak. Instead of rushing out to buy a new one, consider repairing it. Fixing a leaky hose is a simple, cost-effective solution that can extend the life of your hose and save you money. Here’s how you can repair your hose and keep it in good shape for seasons to come.

Why Repairing Your Hose Makes Sense

  1. Cost-Effective: Repairing a hose is much cheaper than buying a new one. Most repair kits are inexpensive and can be found at any hardware store.
  2. Environmental Benefits: By repairing your hose, you reduce waste and contribute to a more sustainable environment. Less plastic and rubber waste means a smaller carbon footprint.
  3. Convenience: Repairing a hose can be done quickly and easily, often with items you already have at home. There’s no need for a trip to the store or waiting for a new hose to be delivered.
  4. Learn a Useful Skill: Learning how to repair common household items like hoses is a valuable skill that can save you money and give you a sense of accomplishment.

Common Hose Problems and How to Fix Them

  1. Pinhole Leaks: These are small leaks that can occur anywhere along the length of the hose. Solution:
  • Turn off the water and locate the leak.
  • Dry the area around the leak and wrap it with waterproof tape, ensuring it’s tightly sealed.
  • Alternatively, use a hose mender kit, which includes a small piece of tubing and clamps to cover the hole.
  1. Leaking Hose Ends: The connectors at the ends of the hose can wear out or become damaged, causing leaks. Solution:
  • Cut off the damaged end of the hose using a sharp knife or hose cutter.
  • Insert a new hose coupling into the cut end. Make sure to choose the correct size (male or female) for your hose.
  • Secure the coupling with the provided clamp, tightening it until the coupling is firmly attached.
  1. Cracks or Splits in the Hose: These can happen due to wear and tear or exposure to the elements. Solution:
  • Identify the section of the hose that is cracked or split.
  • Cut out the damaged section using a sharp knife or hose cutter.
  • Use a hose mender to join the two cut ends. Slide each end of the hose onto the mender and secure with the provided clamps.

Tools and Materials Needed

  • Utility knife or hose cutter: For cutting the hose cleanly.
  • Hose repair kit: These kits include hose menders, couplings, and clamps.
  • Screwdriver: For tightening the clamps on the hose mender or coupling.
  • Waterproof tape: For quick fixes on small leaks.

Steps to Repair a Leaky Hose

  1. Identify the Problem: Determine the location and type of leak in your hose.
  2. Gather Your Supplies: Have all necessary tools and materials on hand before starting the repair.
  3. Prepare the Hose: Turn off the water and drain the hose completely. Dry the area around the leak.
  4. Make the Repair:
  • For pinhole leaks, wrap the area with waterproof tape or use a hose mender kit.
  • For leaking hose ends, cut off the damaged end and attach a new coupling.
  • For cracks or splits, cut out the damaged section and use a hose mender to join the ends.
  1. Test the Repair: Turn the water back on and check for any leaks. Ensure the repair is holding and no water is escaping.

Preventative Measures

To avoid future leaks and extend the life of your hose, consider these preventative measures:

  1. Store Properly: Keep your hose out of direct sunlight and extreme temperatures. Store it coiled and off the ground to prevent damage.
  2. Use Hose Guides: Use guides to prevent the hose from kinking or being dragged over sharp edges.
  3. Regular Inspections: Periodically check your hose for signs of wear and tear, and address any issues promptly.

As summer draws to a close, don’t let a leaky hose dampen your gardening spirits. Repairing your hose is an easy, affordable, and environmentally friendly solution that can save you money and extend the life of your hose. With a few simple tools and materials, you can tackle common hose problems and keep your garden thriving.

https://amzn.to/4cZA94w

Preparing Your Home for Vacation: Essential Steps to Secure Your House

Before you pack your bags and head off to your dream vacation destination, it’s important to ensure that your home is secure. An unoccupied house can be an easy target for burglars, but with some careful planning and simple precautions, you can protect your home and enjoy a worry-free vacation. Here’s a comprehensive guide to preparing your house before you leave.

1. Manage Your Lawn and Exterior

An overgrown lawn is a clear sign that no one is home. To avoid this, arrange for someone to take care of your yard while you’re away. Hiring a neighborhood kid or a professional lawn service to mow the lawn and tend to any garden needs can keep your house looking occupied.

2. Handle Your Mail and Deliveries

An overflowing mailbox and a pile of packages on the doorstep are red flags for intruders. Contact the post office to temporarily stop your mail delivery, or ask a trusted neighbor to collect it for you. Additionally, pause any newspaper deliveries and arrange for a friend or neighbor to pick up any packages that may arrive.

3. Use Light Timers and Smart Lighting

Darkened windows and a lack of evening lights make it obvious that a house is empty. To create the illusion that someone is home, use light timers to turn lights on and off at various times. For more advanced control, consider investing in an app-controlled smart lighting system. These systems allow you to remotely control your home’s lights from your smartphone, making it easy to simulate occupancy.

4. Secure Doors and Windows

Before leaving, double-check that all doors and windows are securely locked. Reinforce sliding doors with a metal rod or a wooden dowel in the track. Ensure that your garage door is also locked and that any interior doors leading from the garage to the house are secured.

5. Set Up a Security System

If you don’t already have one, consider installing a security system. Many modern systems offer features such as motion detectors, door and window sensors, and security cameras that you can monitor remotely. Displaying security system signs can also act as a deterrent to potential burglars.

6. Inform Trusted Neighbors

Let a trusted neighbor know about your travel plans. They can keep an eye on your property, collect any unexpected deliveries, and even park their car in your driveway to give the appearance that someone is home. Provide them with your contact information and a spare key in case of emergencies.

7. Unplug Electronics and Appliances

Unplugging non-essential electronics and appliances not only saves energy but also reduces the risk of electrical fires. This includes items like coffee makers, toasters, and televisions. Additionally, consider turning off your water supply to prevent potential leaks or flooding.

8. Adjust Your Thermostat

Set your thermostat to an energy-saving temperature. If you’re traveling during the winter, ensure it’s set high enough to prevent pipes from freezing. In the summer, set it to a level that keeps your house comfortable for any pets that may be staying behind or for the sake of your plants.

9. Hide Valuables

Store any valuable items, such as jewelry, important documents, and expensive electronics, in a safe or a hidden, secure location. Avoid leaving them in plain sight where they could tempt intruders.

10. Check Your Home Insurance

Review your home insurance policy to ensure you have adequate coverage while you’re away. Make sure you know what’s covered and have a clear understanding of the procedure to follow in case of an incident.

Taking these precautions before you leave for vacation can help ensure that your home remains safe and secure while you’re away. By managing your lawn, handling your mail, using light timers, securing entry points, and enlisting the help of trusted neighbors, you can deter potential intruders and enjoy your vacation with peace of mind. So, before you head out for your adventure, take the time to prepare your home—

Smart Lighting:

https://amzn.to/45UOWe6

The Importance of Routine Maintenance for Your Home Appliances

Keeping your home appliances in good working order is essential for both convenience and cost-efficiency. Proper routine maintenance can significantly extend the lifespan of your appliances, saving you money on repairs and replacements. Taking just a few minutes here and there to clean and maintain these common household items can add years to their service life. Here’s how you can keep your refrigerator, washing machine, and dryer running smoothly.

Freshen the Fridge

The refrigerator is one of the hardest working appliances in your home, running 24/7 to keep your food fresh. To ensure it continues to operate efficiently, regular maintenance is key.

  • Regular Cleaning: Spills and expired food can leave the refrigerator sticky and smelly. Make it a habit to wipe down the interior shelves and drawers regularly and discard old or expired items.
  • Door Seals: The door seals (gaskets) are crucial for maintaining the fridge’s cooling efficiency. Wash them with warm soapy water and consider applying a small amount of petroleum jelly to keep them supple and effective.
  • Ice/Water Dispensers and Filters: Clean the ice/water dispensers, drip trays, and ice buckets periodically to prevent buildup and bacteria growth. Additionally, replace the water filter at least twice a year to ensure clean and fresh water.

Maintain the Washer

Your washing machine needs regular care to prevent issues like mold, mildew, and mechanical problems.

  • Air Circulation: After doing a load of laundry, leave the washing machine door open to promote air circulation and help prevent mold and mildew from accumulating inside the drum.
  • Avoid Overloading: Be mindful not to overload the washer with too many clothes or bulky items in one load, as this can strain and potentially break essential components.
  • Check the Bellow: The rubber gasket on the door, known as the bellow, should be checked periodically. Make sure it is clean and free from debris to ensure a tight seal and proper functioning.

Don’t Forget the Dryer

A well-maintained dryer not only dries clothes more efficiently but also reduces the risk of fire.

  • Exhaust Vent: Clean the dryer exhaust vent at least once a year to prevent lint buildup, which can reduce efficiency and pose a fire hazard.
  • Lint Filter: Clean the lint filter after each load. This simple step optimizes your dryer’s power and efficiency and is crucial for safety.
  • Reminders: Consider setting a reminder on your phone or calendar to ensure you stay on top of these maintenance tasks. Regular attention can prevent costly repairs and dangerous situations.

Routine maintenance of your home appliances is a small investment of time that pays off significantly in the long run. By taking the time to regularly clean and check your refrigerator, washing machine, and dryer, you can extend their lifespans, ensure they operate efficiently, and reduce the risk of costly repairs or replacements.

https://amzn.to/4bIdpW1

Stainless Steel Cleaner

https://amzn.to/3VcT1p9

Compact Vacuum, Hand Held

https://amzn.to/3yNuK1i

Washing Machine Cleaner, Cleans Front Load and Top Load Washers

Effortless Furniture Moving: The Benefits of Furniture Movers

Moving heavy furniture can be a daunting task, often leading to scratches, scuffs, and strained muscles. However, with the help of furniture movers, you can slide your furniture effortlessly across various surfaces without causing damage or exerting excessive effort. In this blog post, we’ll explore the benefits of using furniture movers and how they can make your life easier.

What Are Furniture Movers?

Furniture movers, also known as sliders or gliders, are small, often disk-shaped tools that are placed underneath the legs or corners of heavy furniture. These sliders are typically made of durable materials like plastic or rubber and have smooth surfaces that allow furniture to glide easily across floors without scratching or damaging them.

Benefits of Using Furniture Movers

  1. Protect Your Floors: One of the primary benefits of furniture movers is their ability to protect your floors from scratches, dents, and scuffs. By reducing friction between the furniture and the floor, sliders prevent damage caused by dragging or sliding heavy items.
  2. Effortless Moving: Furniture movers make moving heavy furniture much easier and less strenuous. Instead of lifting and carrying heavy items, you can simply slide them across the floor with minimal effort, reducing the risk of strain or injury.
  3. Versatility: Furniture movers can be used on various surfaces, including hardwood, tile, laminate, carpet, and vinyl. Whether you’re rearranging furniture in your living room or moving appliances in the kitchen, sliders provide a versatile solution for easy mobility.
  4. Preserve Your Furniture: In addition to protecting your floors, furniture movers also help preserve the integrity of your furniture. By eliminating the need to lift and drag heavy items, sliders reduce the risk of damage to the furniture itself, such as scratches, dents, or loose joints.

How to Use Furniture Movers

Using furniture movers is simple:

  1. Place a slider under each leg or corner of the furniture you want to move.
  2. Once in position, gently push or pull the furniture in the desired direction. The sliders will allow it to glide smoothly across the floor.
  3. When you’ve reached the desired location, remove the sliders and enjoy your newly arranged space.

Furniture movers are a simple yet effective solution for moving heavy furniture with ease and preventing damage to your floors and furniture. Whether you’re rearranging your home or preparing for a move, sliders provide a convenient and versatile way to make furniture mobility effortless. Invest in a set of furniture movers and say goodbye to the hassle of heavy lifting and potential floor damage.