As summer winds down, you might notice that your trusty garden hose has developed a leak. Instead of rushing out to buy a new one, consider repairing it. Fixing a leaky hose is a simple, cost-effective solution that can extend the life of your hose and save you money. Here’s how you can repair your hose and keep it in good shape for seasons to come.
Why Repairing Your Hose Makes Sense
- Cost-Effective: Repairing a hose is much cheaper than buying a new one. Most repair kits are inexpensive and can be found at any hardware store.
- Environmental Benefits: By repairing your hose, you reduce waste and contribute to a more sustainable environment. Less plastic and rubber waste means a smaller carbon footprint.
- Convenience: Repairing a hose can be done quickly and easily, often with items you already have at home. There’s no need for a trip to the store or waiting for a new hose to be delivered.
- Learn a Useful Skill: Learning how to repair common household items like hoses is a valuable skill that can save you money and give you a sense of accomplishment.
Common Hose Problems and How to Fix Them
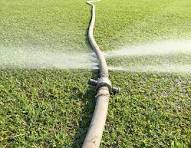
- Pinhole Leaks: These are small leaks that can occur anywhere along the length of the hose. Solution:
- Turn off the water and locate the leak.
- Dry the area around the leak and wrap it with waterproof tape, ensuring it’s tightly sealed.
- Alternatively, use a hose mender kit, which includes a small piece of tubing and clamps to cover the hole.
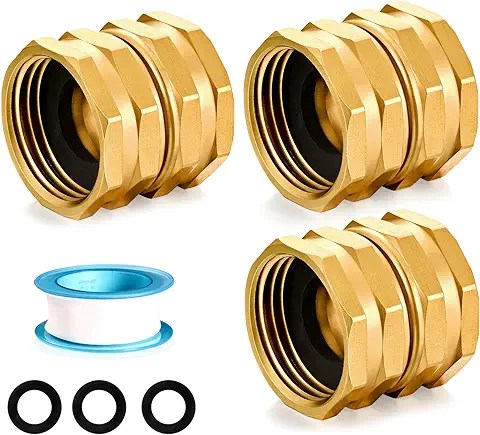
- Leaking Hose Ends: The connectors at the ends of the hose can wear out or become damaged, causing leaks. Solution:
- Cut off the damaged end of the hose using a sharp knife or hose cutter.
- Insert a new hose coupling into the cut end. Make sure to choose the correct size (male or female) for your hose.
- Secure the coupling with the provided clamp, tightening it until the coupling is firmly attached.
- Cracks or Splits in the Hose: These can happen due to wear and tear or exposure to the elements. Solution:
- Identify the section of the hose that is cracked or split.
- Cut out the damaged section using a sharp knife or hose cutter.
- Use a hose mender to join the two cut ends. Slide each end of the hose onto the mender and secure with the provided clamps.
Tools and Materials Needed
- Utility knife or hose cutter: For cutting the hose cleanly.
- Hose repair kit: These kits include hose menders, couplings, and clamps.
- Screwdriver: For tightening the clamps on the hose mender or coupling.
- Waterproof tape: For quick fixes on small leaks.
Steps to Repair a Leaky Hose
- Identify the Problem: Determine the location and type of leak in your hose.
- Gather Your Supplies: Have all necessary tools and materials on hand before starting the repair.
- Prepare the Hose: Turn off the water and drain the hose completely. Dry the area around the leak.
- Make the Repair:
- For pinhole leaks, wrap the area with waterproof tape or use a hose mender kit.
- For leaking hose ends, cut off the damaged end and attach a new coupling.
- For cracks or splits, cut out the damaged section and use a hose mender to join the ends.
- Test the Repair: Turn the water back on and check for any leaks. Ensure the repair is holding and no water is escaping.
Preventative Measures
To avoid future leaks and extend the life of your hose, consider these preventative measures:
- Store Properly: Keep your hose out of direct sunlight and extreme temperatures. Store it coiled and off the ground to prevent damage.
- Use Hose Guides: Use guides to prevent the hose from kinking or being dragged over sharp edges.
- Regular Inspections: Periodically check your hose for signs of wear and tear, and address any issues promptly.
As summer draws to a close, don’t let a leaky hose dampen your gardening spirits. Repairing your hose is an easy, affordable, and environmentally friendly solution that can save you money and extend the life of your hose. With a few simple tools and materials, you can tackle common hose problems and keep your garden thriving.